While I’d really like to get a legit roof on this thing first, it cannot be first. The roof laps over the sides, so the sides must be done first. I suppose I could just do the top parts of the sides first, then the roof, but that seems fraught since the siding is normally built from the bottom to top because of how the tongue-and-groove system works best, and doing things backwards, well, is backwards. So, okay, siding.
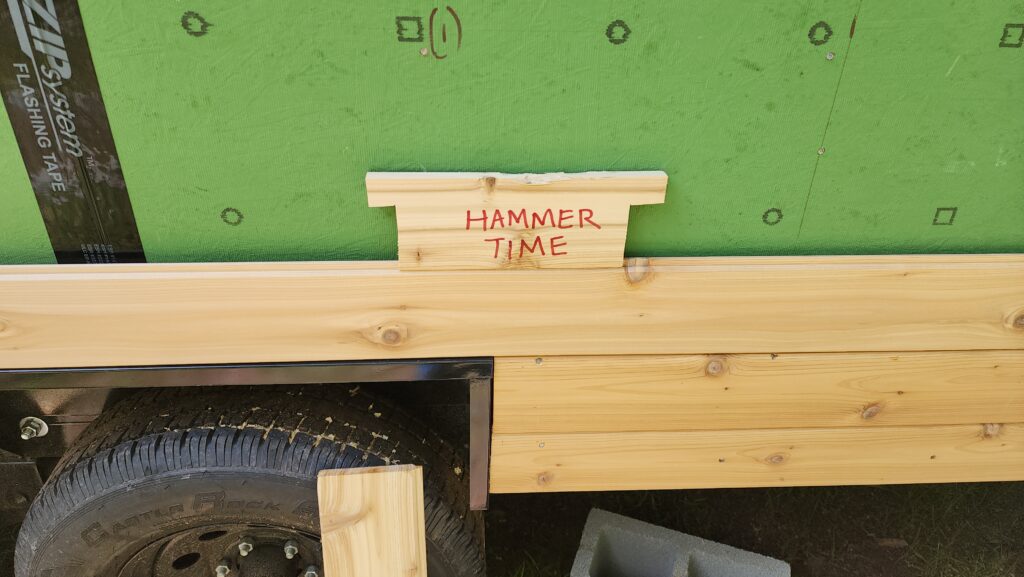
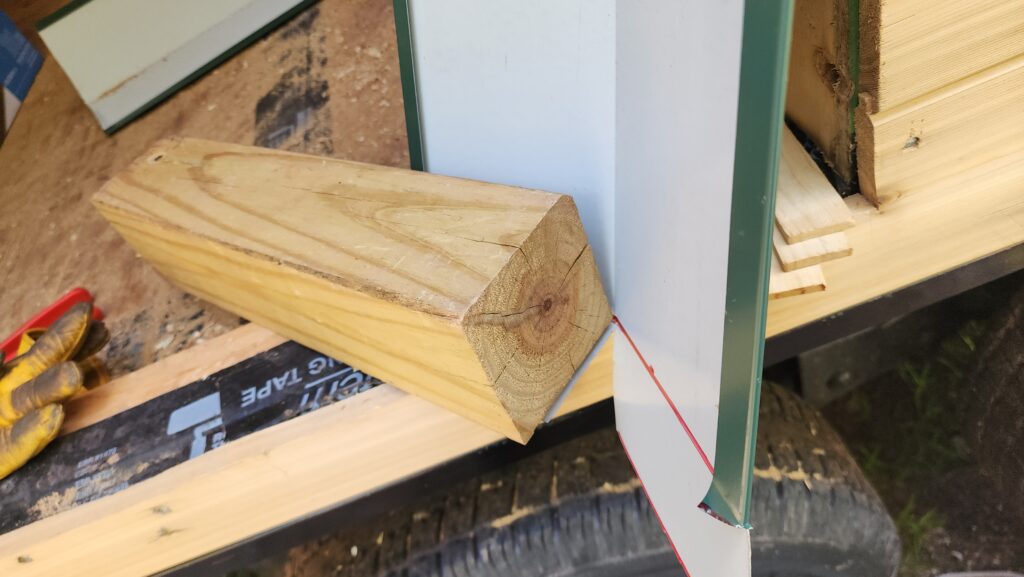
The T&G boards go on with the tongue facing up, but also need to be seated firmly against the boards below. Use of even a rubber mallet on the tongue part can damage the part, so something is needed to buffer the impact. Behold, a small T&G board that has had its tongue removed, for easy bashing with a hammer. The groove on the bottom interfaces perfectly with the tongue feature of the board below, protecting it. The side wings are to make the beater board easier to remove – I can just slip a finger under one or both of the wings and lift it right up, no matter how tightly jammed it might become. This beater board was the first of several. You might imagine they don’t particularly endure, given their role.
Corner trim goes up first, then I fill in the fields between them.
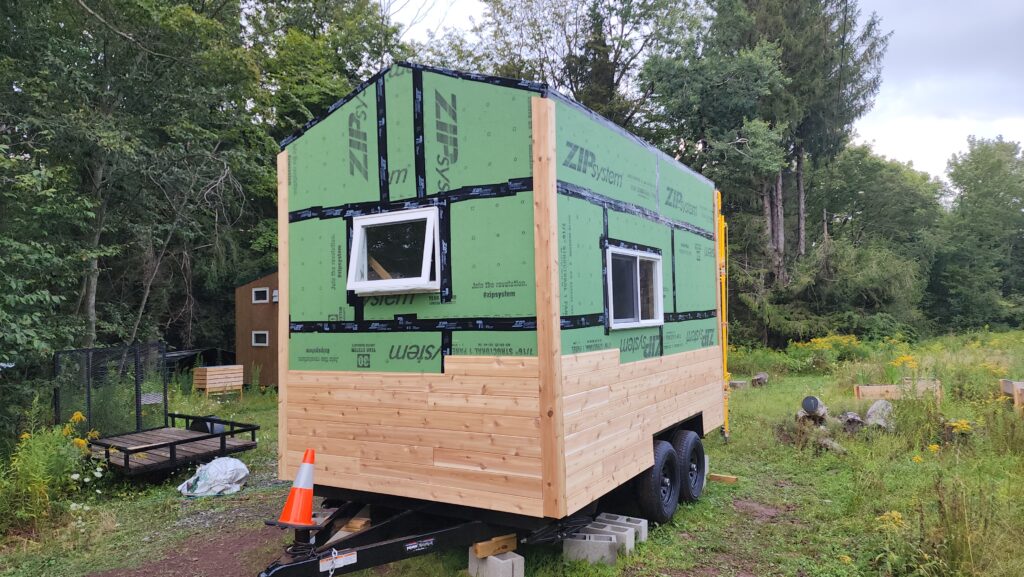
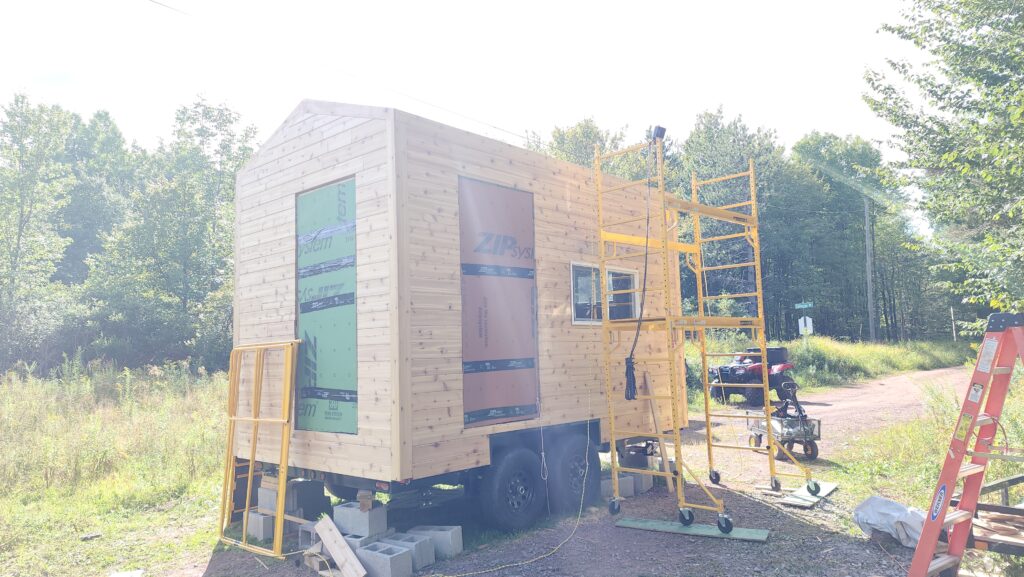
The boards do not have to be absolutely perfectly abutted, since the green board behind them is water resistant and all the seams are taped, making a decently tight barrier against what little bits of weather might make it through the siding layer. This saves me a lot of trouble, since getting the fit exact is hard, but getting it close enough is easy. Shown here, about what I could do from ground level. Now it’s time to bring back the scaffold to do another round.
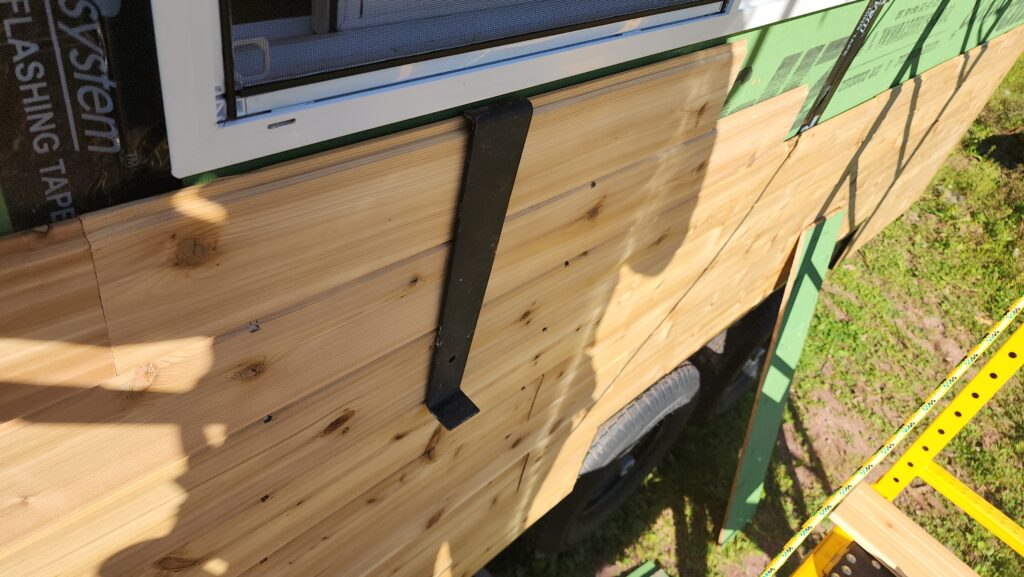
The second round included accommodation for the windows. The beater board wouldn’t fit under the windows at the last course or two, so I used this handy tool that is actually meant for installing the last few boards of a hardwood floor, but works perfectly well to seat siding boards under obstacles.
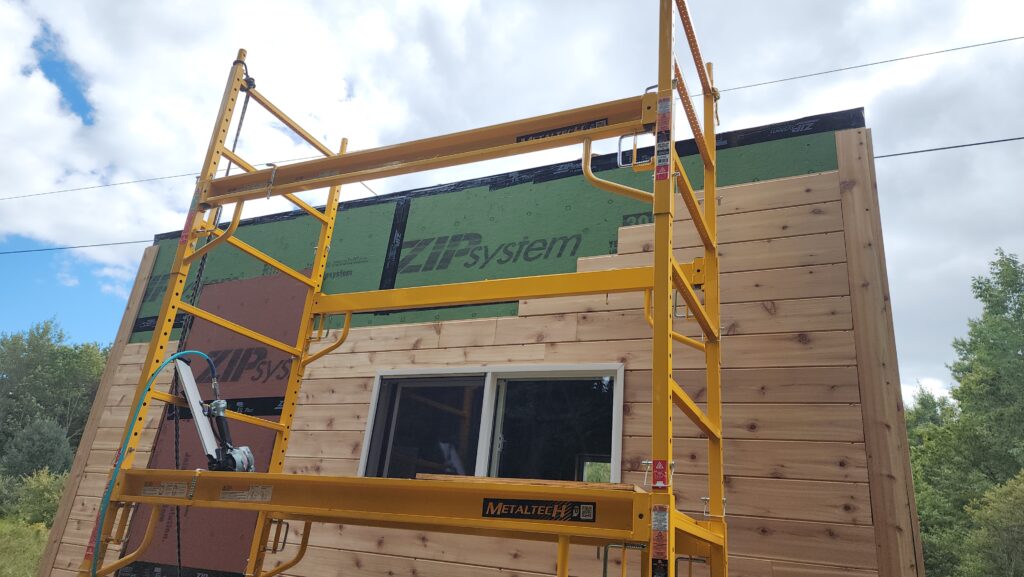
Then it’s on to the upper courses. Slower going, the higher I must climb to do the work. Again with staggering the courses, though, to maximize the amount of work I can do from one position — and, for that matter, the amount of work I can do in one climbing of the scaffold. A bundle of boards gets clamped together and goes up the rope elevator once I have myself climbed back up.
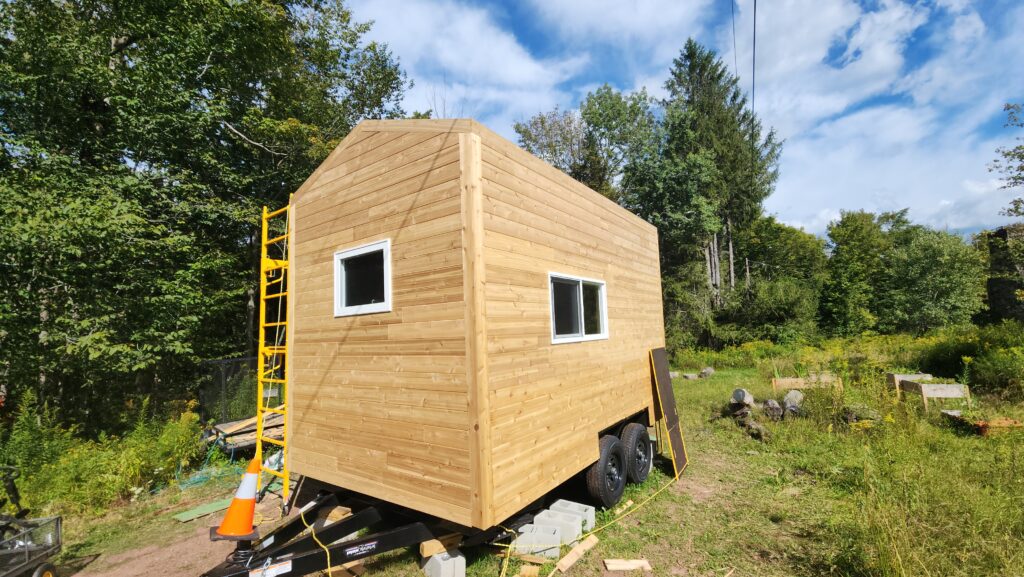
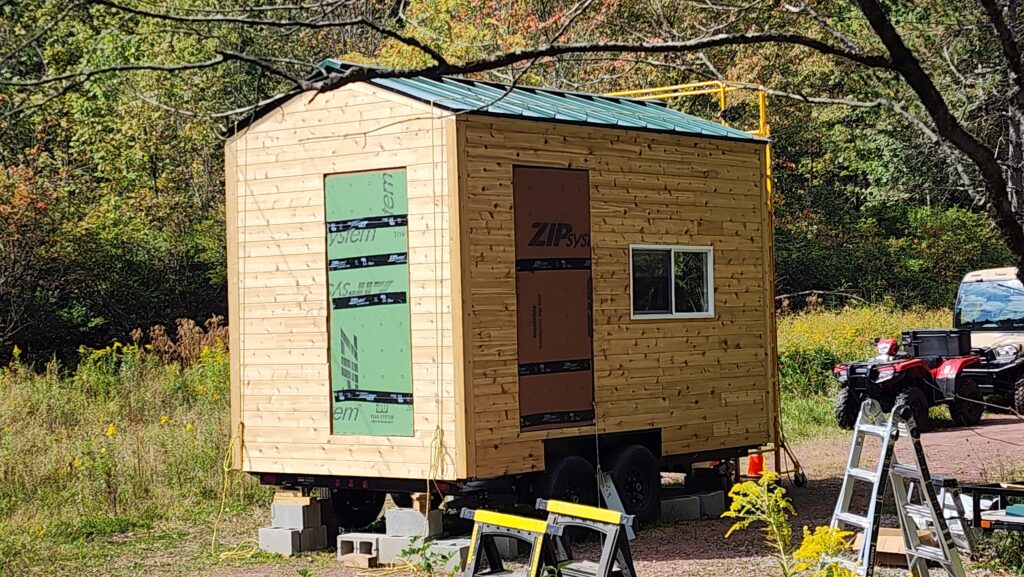
And finally, done with the siding. This is cedar and will last for quite some time even if I do not apply any protective finish to it. It will turn a soft silvery gray. And I will let it. Much as I love the warm tones of the new wood, it is a great deal of maintenance to keep it that way and frankly, I’m just not interested in all that additional work!
Before I get on to the roof (I am not looking forward to the roof work — it’s high up and metal rooves are unforgiving), one day I noticed this heavy log had moved.
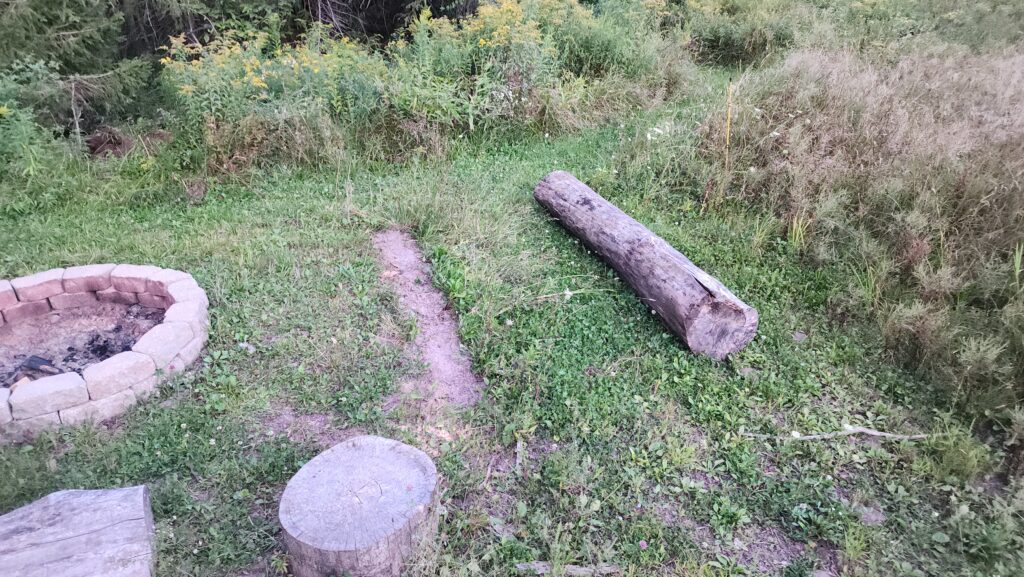
Normally, this log serves as bench seating for the fire pit, as you can see. And then one fine day it was 4ft to the right. WHY? I had no idea, but my friend suggested that a local bear may have been searching for grubs beneath it. That makes some sense. A very inconsiderate bear, though. I don’t mind that they were looking for food in the woods — I do live in the woods — but seriously, bear, the least you could do is put it back when you’re done! I mean, it’s pretty obvious this is a place, not just some randomly fallen section of tree.
Okay, roof time!
There are two kinds of melta rooves. The easy kind (you scan see the screws) and the hard kind (hidden fasteners). I have the hard kind on the main house. I like the look of the concealed fastener system, but they’re a lot more complicated to install. It turns out that not all concealed fastener systems are the same! There is almost nothing in common about how the new roof goes together with respect to how the old roof did.
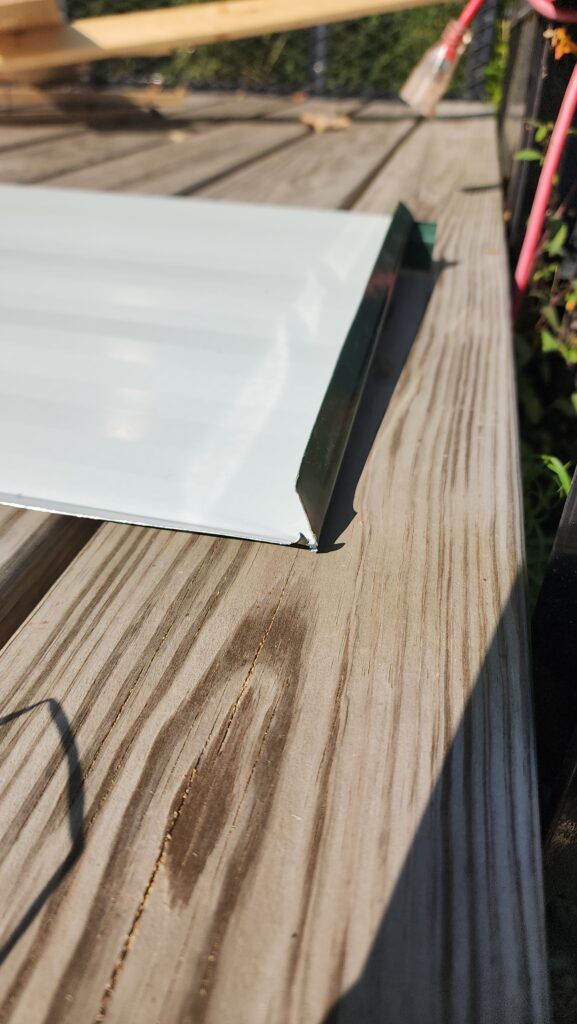
One thing they both needed, however, is for edges to get folded under. The very first (and last) panel on each side needs to wrap around the gable trim to secure the end. This is easy work with a big metal-forming tool called a “brake”. I do not have a brake. All I have is this hand tool, so I had to fold the edge in stages. It’s not elegant and it’s not easy, but it works.
The short ends also need to be folded under the eave trim to secure the bottom. The folding tool I have is well suited to this job and able to do it in one go.
Topside, the partial folds are then crimped closed around the edges with this woefully inadequate hand tool. I mean, okay, this tool is great for like ductwork and so forth, but it requires some powerful grip to close roofing metal around edges like this. I was using two hands and all my might, which is a considerable amount of might, to secure it.

Roofing panels also took the rope-elevator up to the scaffold work platform.
I could get two at a time per rope x 2 ropes = 4 panels. That was how many I could install from a single position of the scaffold, so that worked out well.
The starting end is hemmed around the eave trim. Subsequent edges are held down with these brackets (silver) that go over the rib and screw to the roof deck.
Then the next panel’s rib (they are different on each side – one fits inside the other) slips over the prior panel’s rib and clip and locks in place.
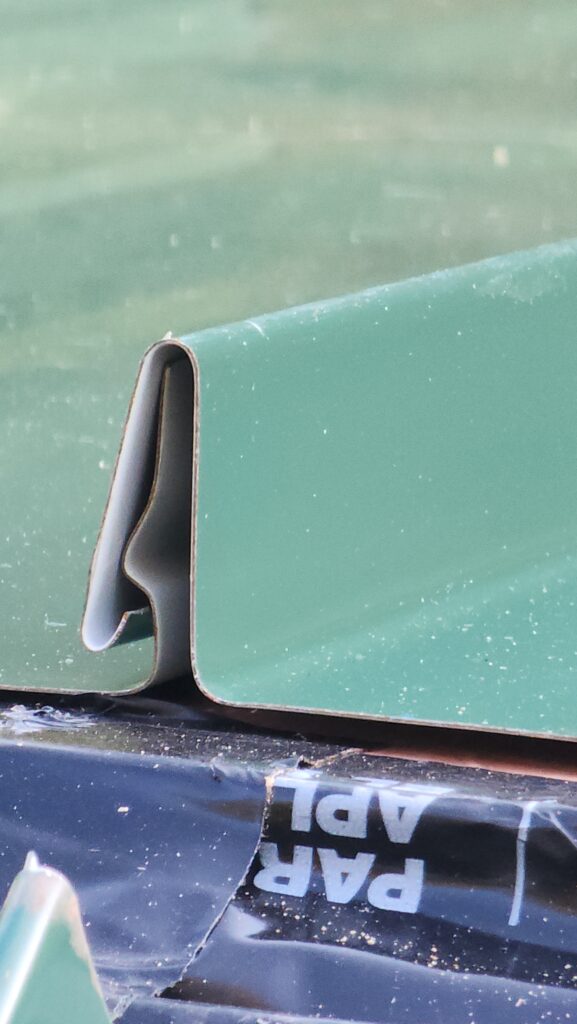
It may not look like much, but I assure you this is quite secure. I couldn’t undo it even by prying it up when I made an error and wanted to! I had to slide the whole panel down the length of the rib to free it.
The last bit is the ridge treatment. This is the hard part. Here’s a quick view of how it fits together, posed with a few stub cuts of the stock.
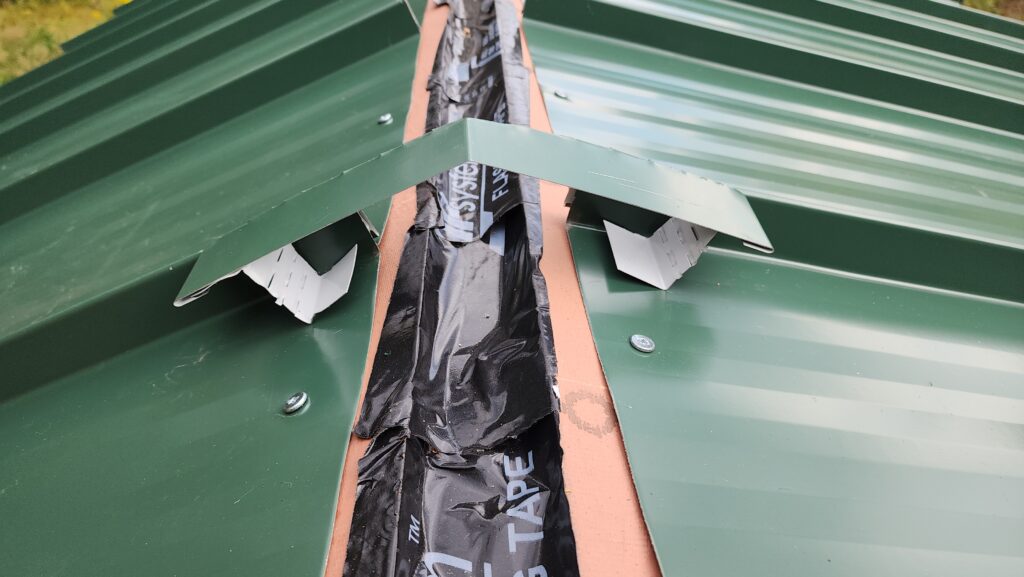
First, there are the Z-shaped parts which span the spaces between the ribs. these must be installed as close to parallel and perfectly spaced as possible. A sealant strip is place beneath them and they need to be screwed down to the deck. Then there is the cap itself, which hooks around the Z brackets and needs to be folded tight and riveted in place. That black tape currently closing the ridge vent needs to be removed. Note that the length of each face of the roof deck is about 4-1/2 feet long. That’s quite a reach. But the roof deck is also too short for a big person (such as myself) to safely climb on. So how am I going to get this stuff installed? A bucket truck would be an option, though the bucket would have to be at an unpleasant tilt to clear the roof and get me close enough. I don’t know if they can even do that.
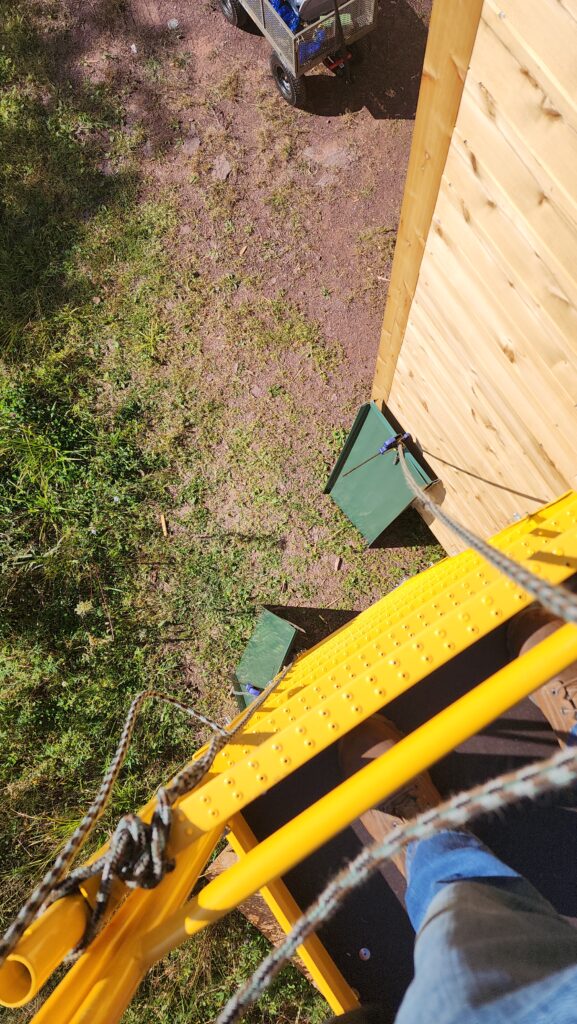
Well… it turns out that if I slip between the bars of the top cage on the scaffold and lean waaaaay out, I can just make it. I had one of my raven friends take this picture.

Not exactly ergonomic. This was very fatiguing to my arms and calves. Those anti-topple safety ropes were mandatory for this operation! And of course, as I got more of the roof installed, there were more exposed sharp metal edges to snag the rope as I was trying to wrangle it into each position.
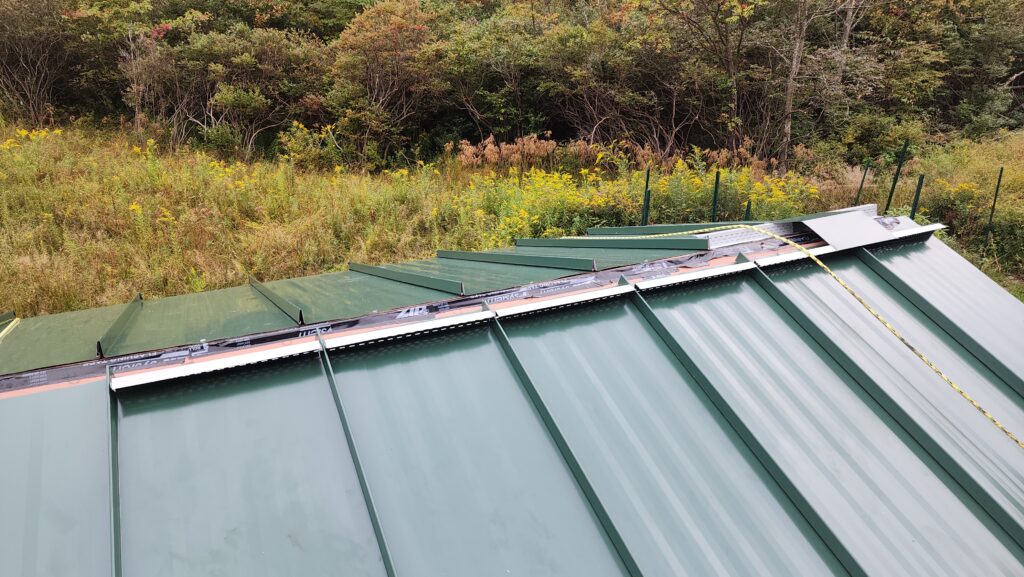
Progress on the first side of that Z bracket.
For the second side, I got smart and instead of trying to measure the spacing, I built a little fixture with to help me just place the opposing sides at the right spacing and perfectly parallel.
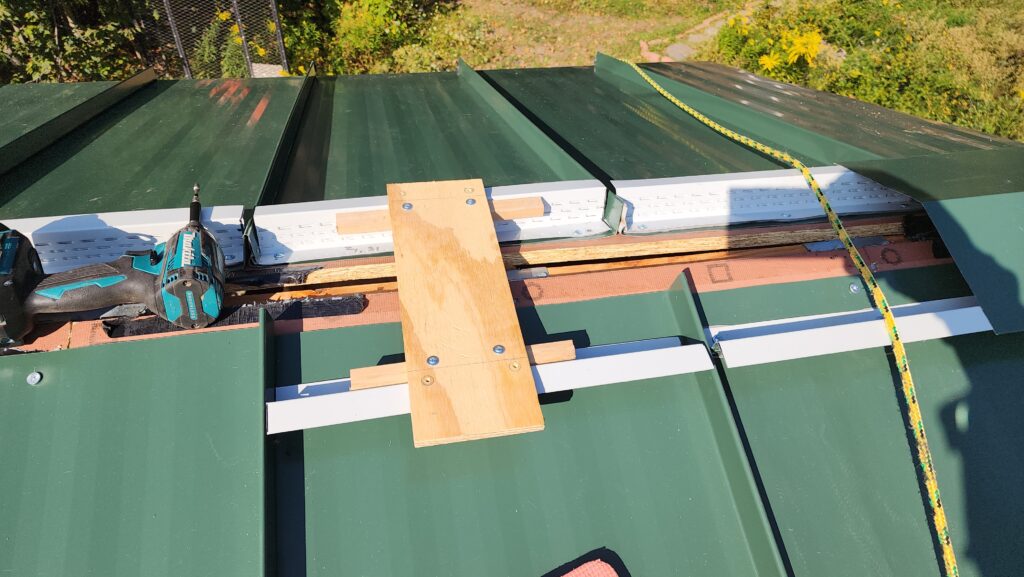
This was absolutely essential, as the tops of the roof panels weren’t always the same and the top of the roof deck was also a little jagged, making it impossible to get a consistent position reference. The fixture took care of all that. I put the sealant on the bottom of the new Z bracket, snugged it up against the fixture and the fixture against the back bracket, then just landed the front one. Presto, right where it should be, nicely aligned. Remove the fixture, and do a massive reach with the screw gun to get behind the fold of the Z bracket and affix it to the roof deck. Watch out for sharp edges!
The roofing system manual didn’t say anything about how to terminate the ridge system. Left as-is, it would just be open, admitting bugs and birds. That’s not what I want. I had to think about this a bit, but ultimately settled on folding the end of the ridge cap into an end form that would get the job done. The wings at the end will fold under the eave trim like the ends of the roof panels.
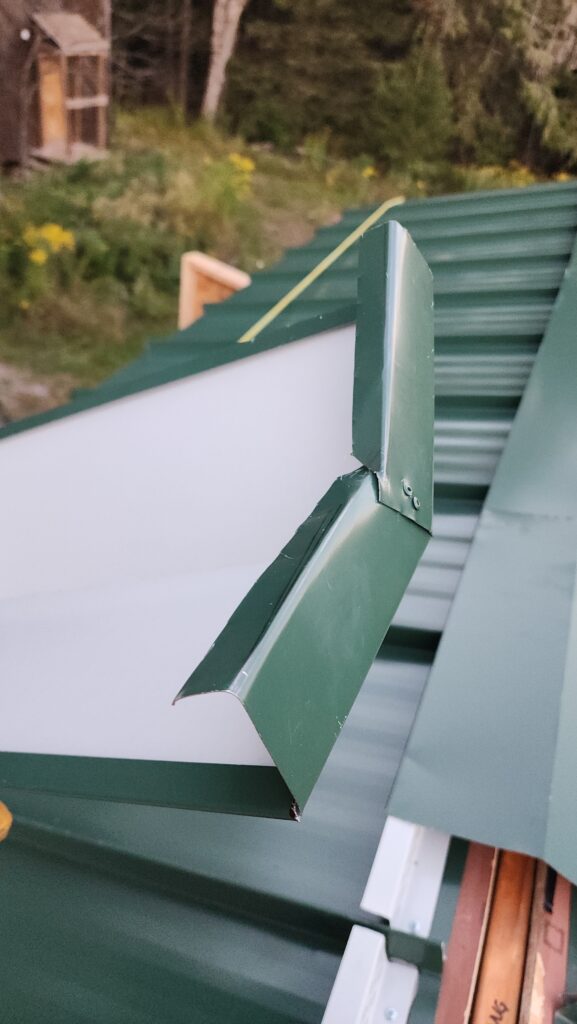
Without real sheet metal tools to make is complex fold (I needed a “box brake”), I resorted to using a piece of lumber as a bending form.
This worked decently, but required a great deal of finesse to get crisp, repeatable edges. I used the little hand folder tool for the second fold on each wing. Not exactly professional grade work, but it got the job done and who’s going to be inspecting the end of the ridge up close anyhow?
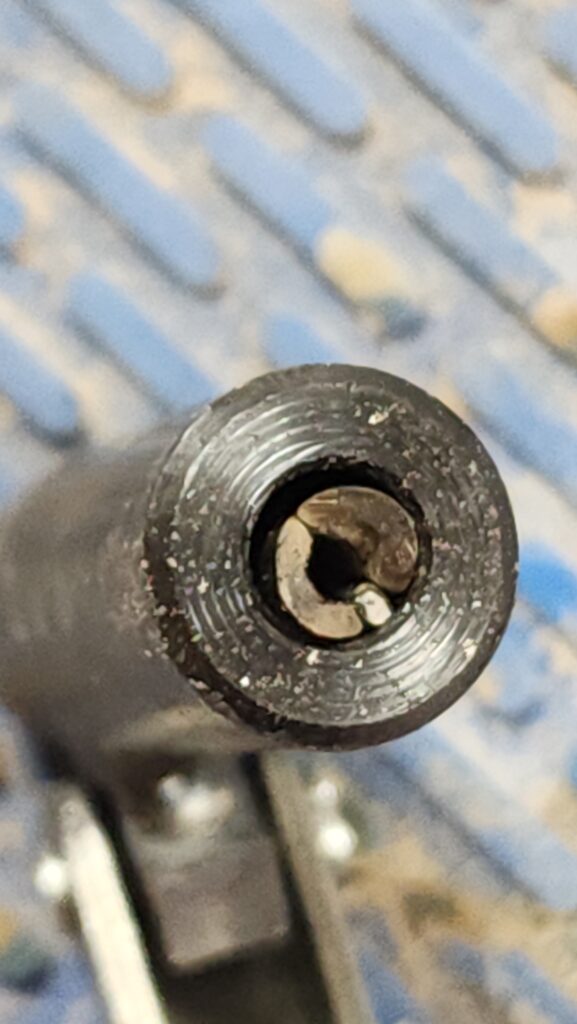
Along the way, my rivet tool stopped riveting! This was inconvenient.
It turned out to be relatively easy to fix. The problem was that the stem from one of the rivets got lodged in the tool’s jaw, preventing it from closing around new stems properly. I had to disassemble the tool to free it, but as soon as I had it apart, the jaws just dropped the errant stem and all I had to do was re-assemble the tool, which wasn’t too difficult.
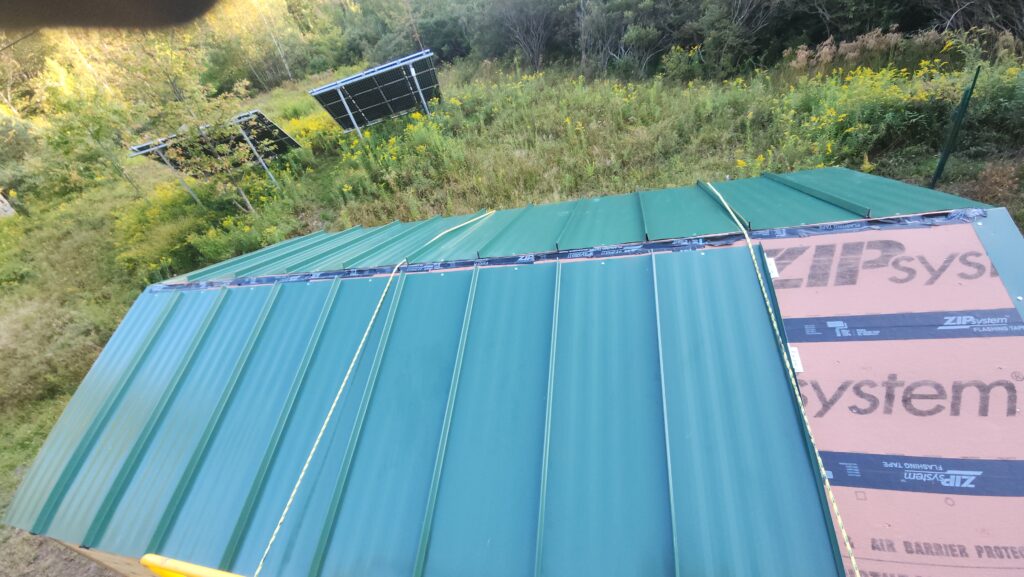
And completed roof!
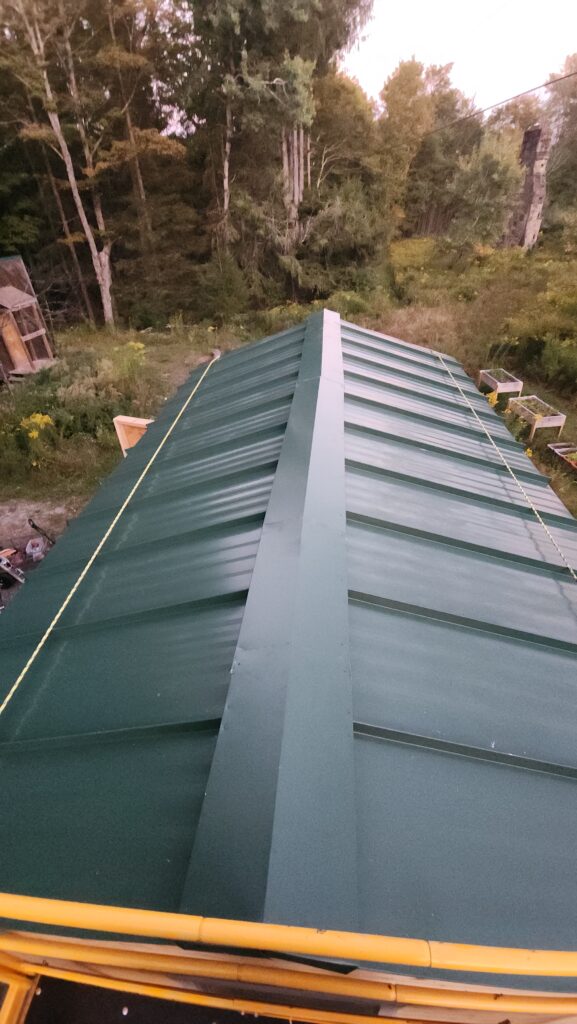
The astute observer might notice some nonlinearity, but hey, not bad considering the circumstances (including this being my first build of this system).
There remains one more task for the roof – the sun tubes. I will hold off on those for a little bit and focus on some other non-scaffold work for a little while, just to give my body a break from all that climbing. Remember, I’m a desk jockey by day. I’m not at all accustomed to all this monkey business. I don’t mind it, but I’m also not in shape for it!