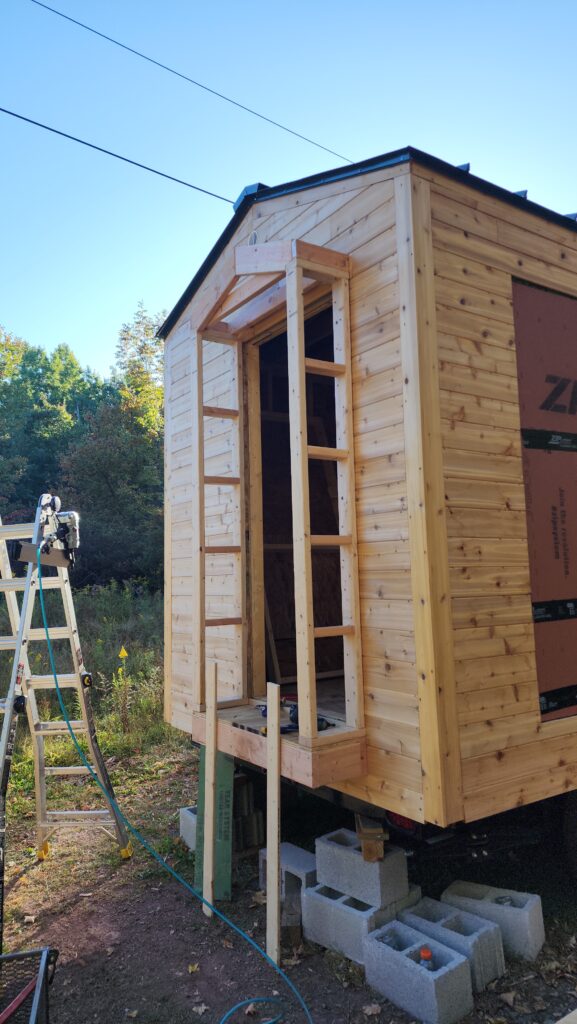
Now with siding and roof in place, lower-priority exterior work can proceed. In this case, that’s the snout — the short connecting corridor between the Club Car and the main house. There’s not much to it, but it greatly simplifies the interface since getting two large flat surfaces to meet is hard but getting a small outline and a large flat surface to meet is much easier. It starts with some basic framing.
The floor part is the same thickness as the interior under-floor and is likewise insulated.
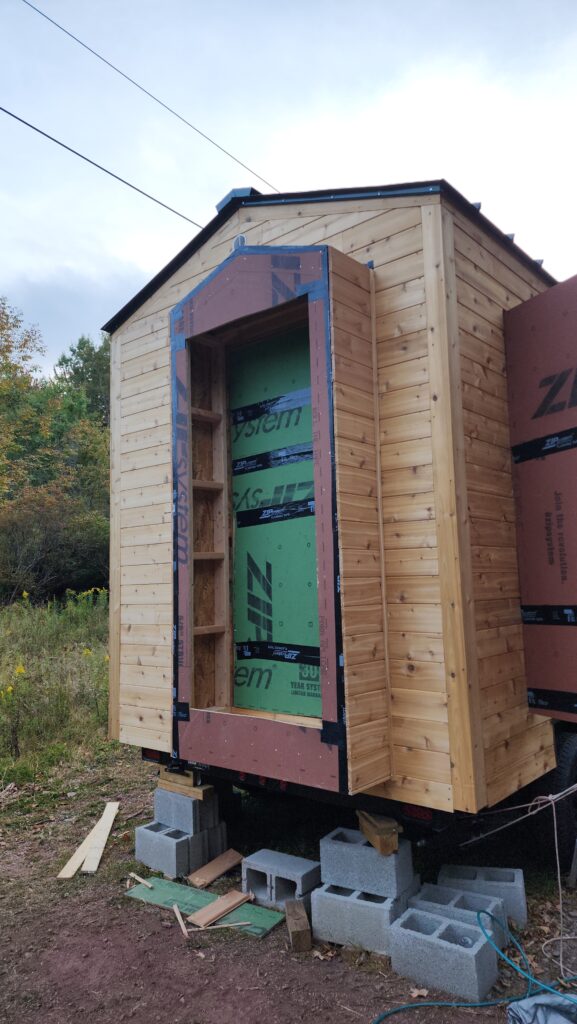
All dressed up, but before I installed some aluminum corners as edge trim and a simple corrugated roof.
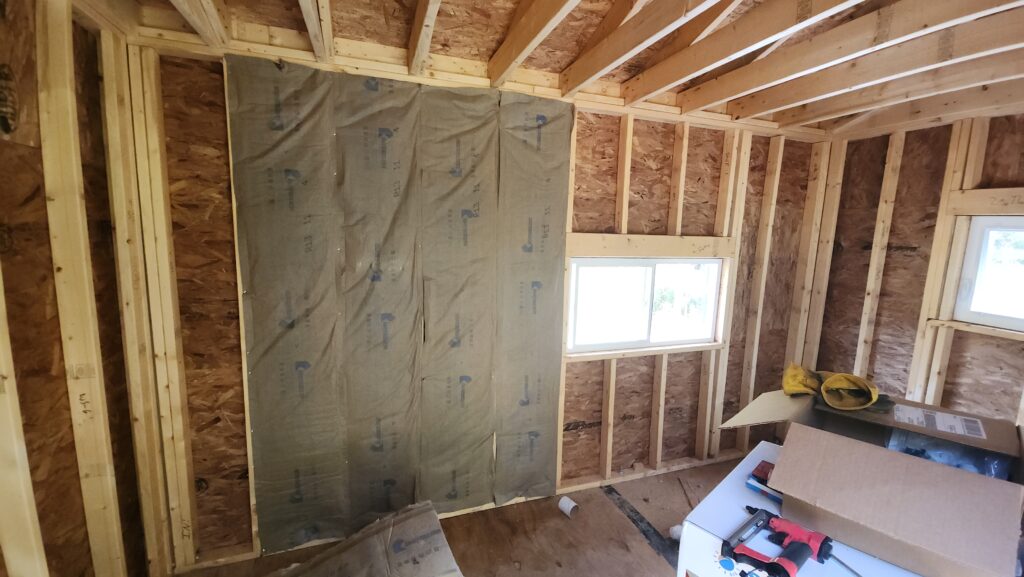
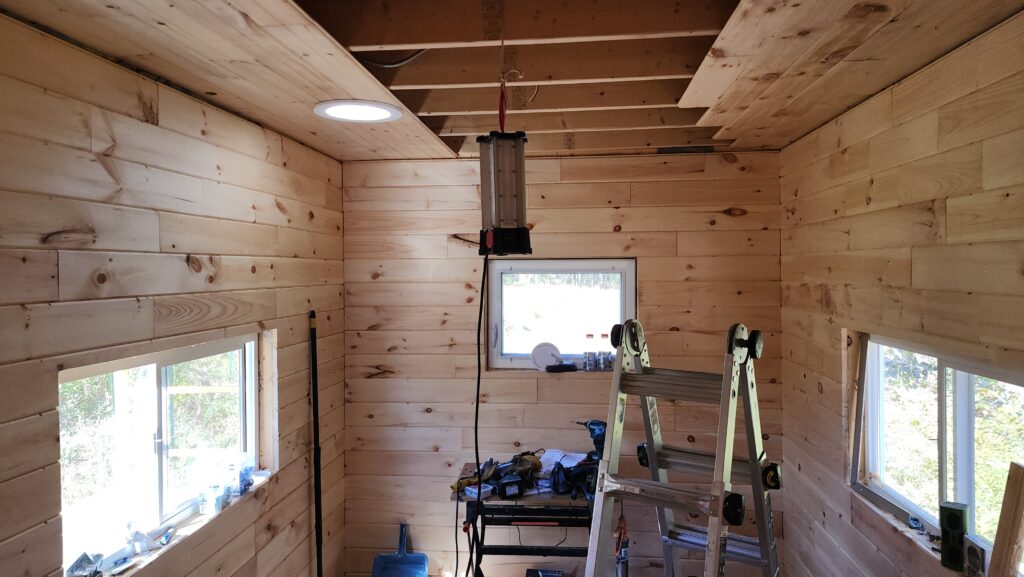
The next thing I really want to do is install the tubular skylights, but with the stud bays open inside, ladder work in there would be more tricky than if the walls were finished. With finished walls, I can put a ladder against any part of the wall and that seems like it could be useful, so interior walls are next. You know the drill, “before anything may be done, something else must first be done”. Still true.
And even here. Before the wall paneling goes up, the insulation must go in. That, at least, is actually ready to do. So that happens.
And then the paneling begins. I didn’t realize that the term “paneling” refers equally correctly to t&g boards like these as well as large sheet goods, which is what I normally think of as “paneling”. You know… panels.
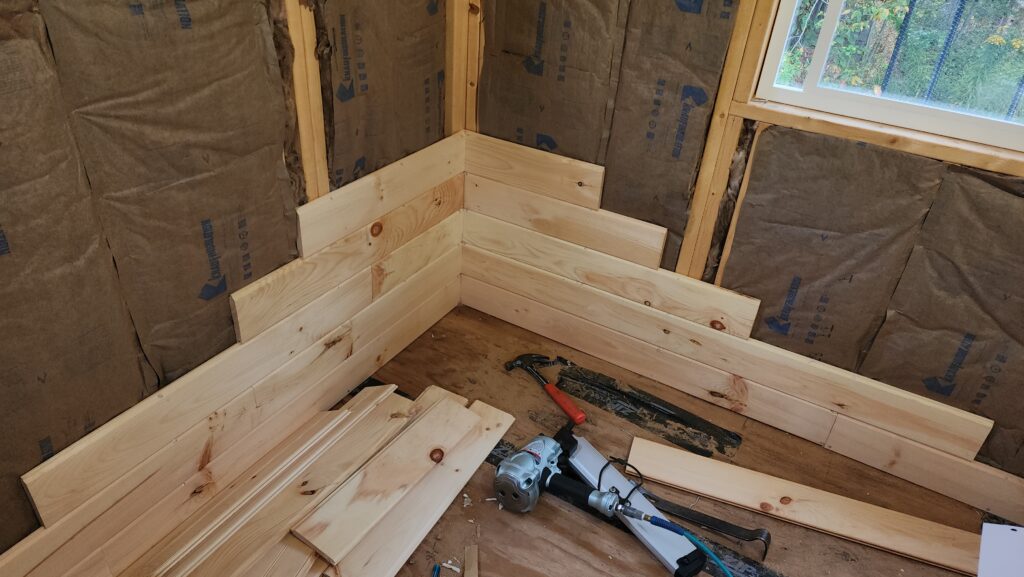
The corresponding boards in the main house are 1×8 trade size, which turns out to be hard to get. So after considerable effort trying to locate a single vendor that could supply the interior pine and the exterior cedar, I decided to settle with 1×6 for the interior, which was easy to get. Since the only place the two sizes get anywhere close to each other is the main house side of the passage between them, and there’s little actual exposed facing to be seen there, I didn’t think the clash would be too bad. And anyway, the 1×8 was hard to get.
Working my way around, trying to keep the lines consistent around corners. That turns out to be more difficult than one would reasonably expect. I do well at it in most cases, but there’s more daylight between here and my aspirations of perfection than I’d like. But so it goes. It’s not like I’m a professional builder…
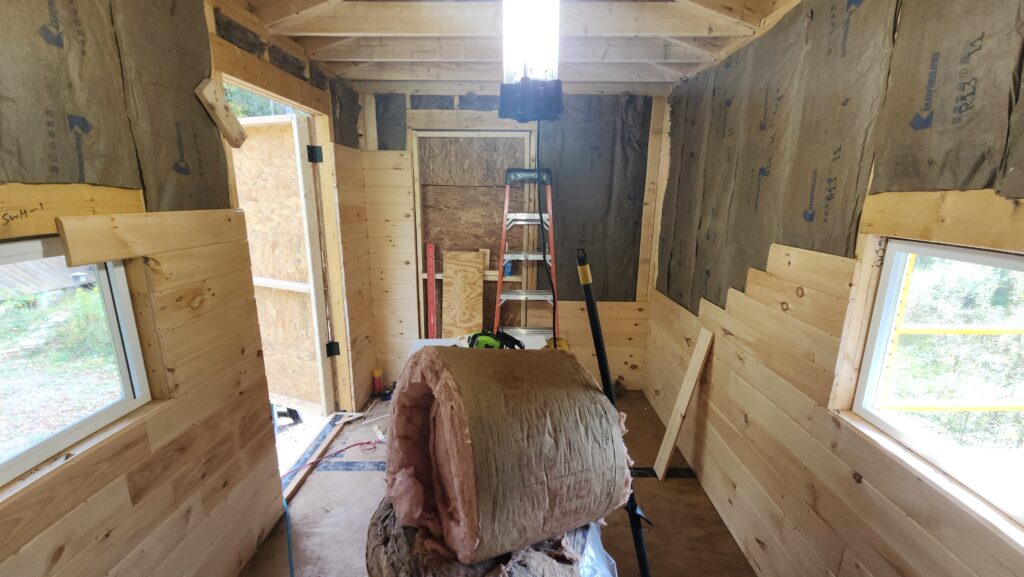
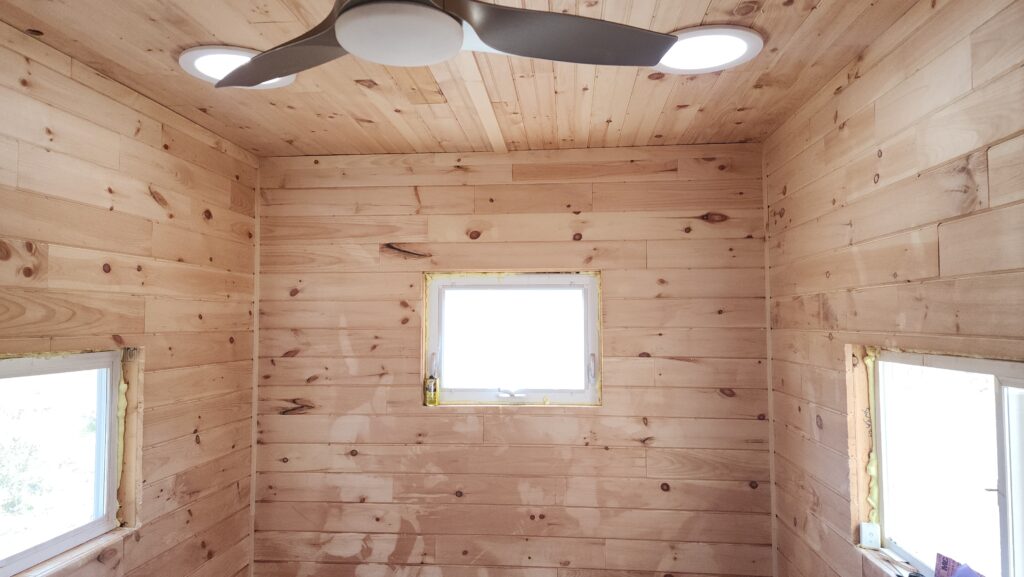
View toward the back of the room:

And toward the front:
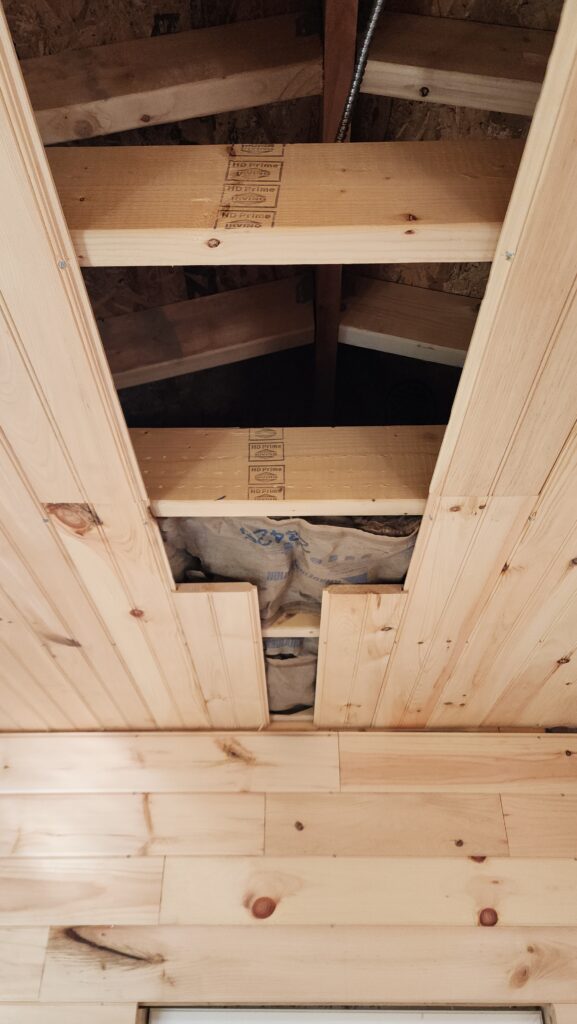
When the walls are done, it’s time to get those tubular skylights installed. But there’s a tricky bit. The skylights are meant to be installed from the rooftop and from inside the attic. But I don’t have an attic. I mean, okay, there’s a tiny bit of volume above the living space and below the roof, but there is no room for a full sized human in there and definitely no room to do work. So how am I going to do the below-the-roof but above-the-ceiling work for the skylights? Both the roof (exists now) and the ceiling (not yet in place) have to exist to install the tubular skylights.
The answer is to build the ceiling from the outside toward the center, stopping as soon as the area where the skylights go is built to do the above-ceiling work. This is access from just one side instead of all around the skylight, but it’s such close quarters that it should be ok. It turns out to be fairly difficult, but I get it done.
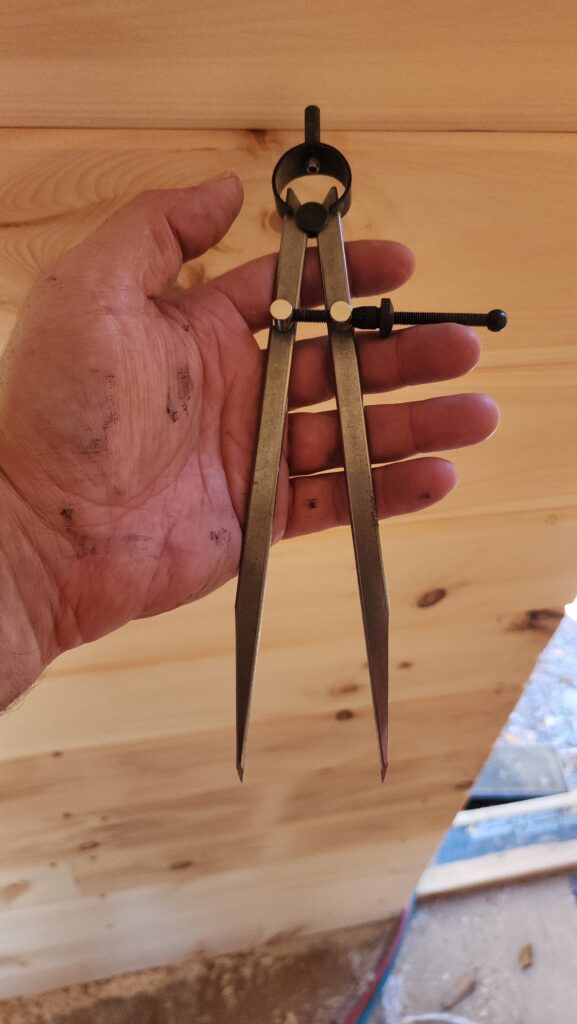
It starts by locating the skylight on the ceiling and cutting out the hole for the glass. I don’t actually have a large format compass with a pencil, but these calipers have sharp points and I can scratch a circle in the soft pine paneling of the ceiling and then just run an ordinary pencil in that gouge to get a high-contrast line to follow.
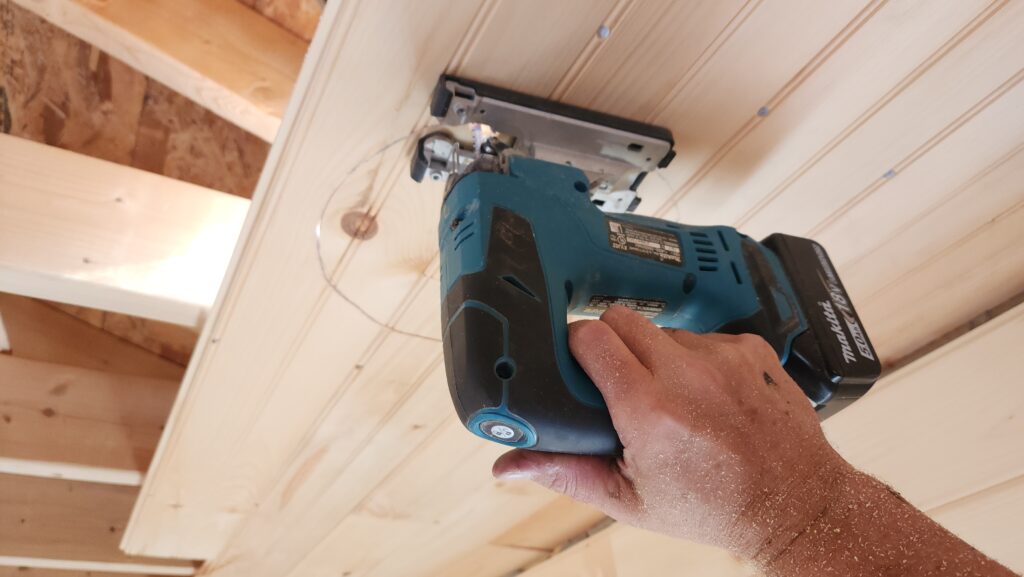
Then actually cut it…
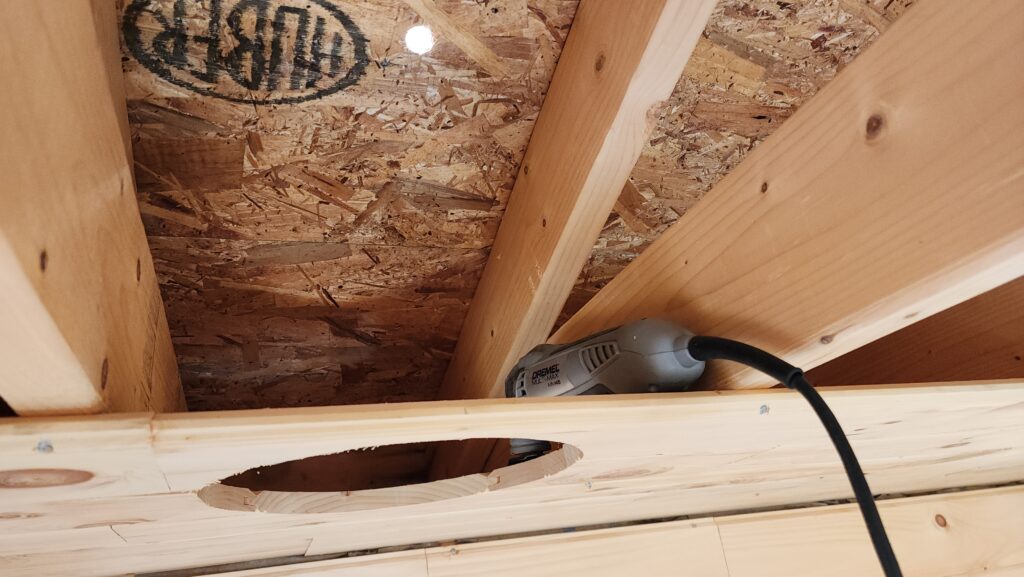
Next, I transfer the center of the cut-out to the roof and drill a hole in the roof so that center point can be located from the other side. I will need that Dremel tool on the roof, so I leave it here on top of the ceiling, where I’ll be able to grab it through the hole I’m about to cut in the roof.
Cutting circles on the roof isn’t easy because of the wood + sheet metal, but it gets really unpleasant if I happen to encounter the much heavier metal of the roof attachment brackets. It happened once. I did not enjoy it.
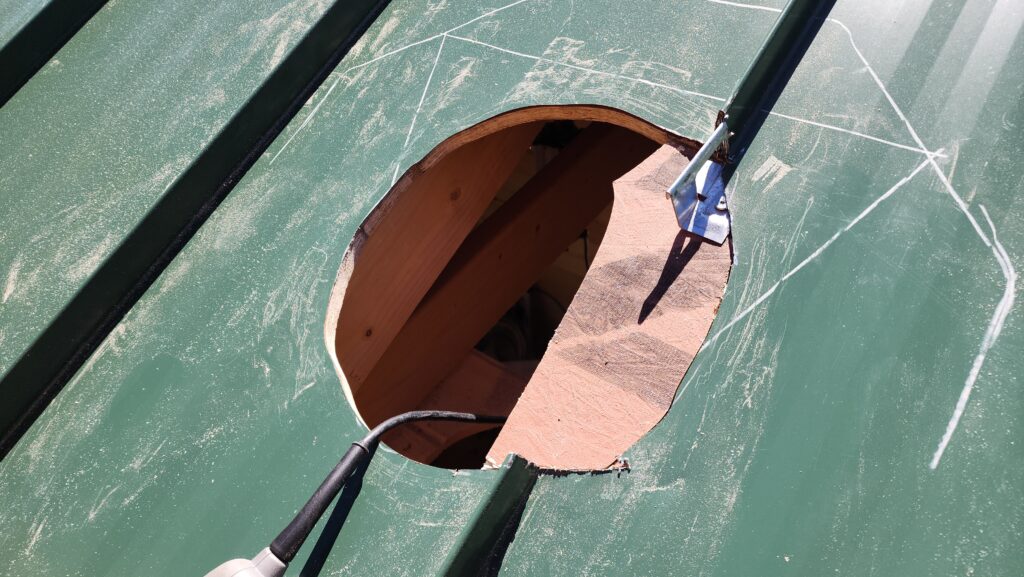
Those white lines are related to the roof flashing for the skylight. The octagonal pattern is the perimeter. The “cat ears” are where I will need to cut away the metal so the flashing slips under the roofing material.

But it goes from cat… to frog once the flashing is installed with the hold-down screws and huge fender washers.
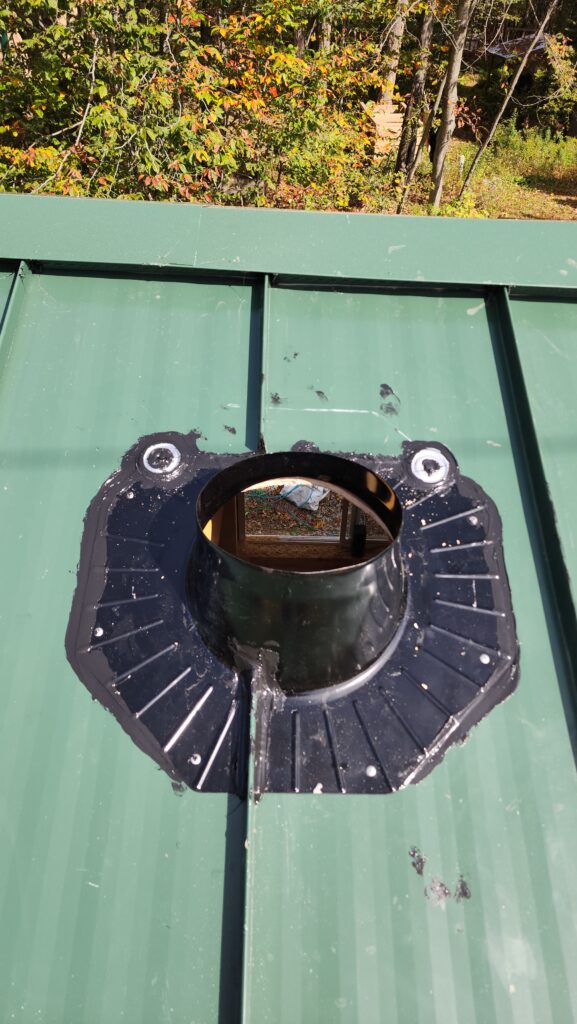
It was hard not to get sealant everywhere. I didn’t bother cleaning it off the roof deck because except for these photos taken from 15ft above ground level, who’s going to see?
When finished, there’s a cover with some clever lensing in it to direct light from any angle down into the highly reflective tube that will carry light down to the interior.

But right now, there’s still inside work to do. Here’s the end of the tube, showing lots of light pouring out above where the interior glass will go.
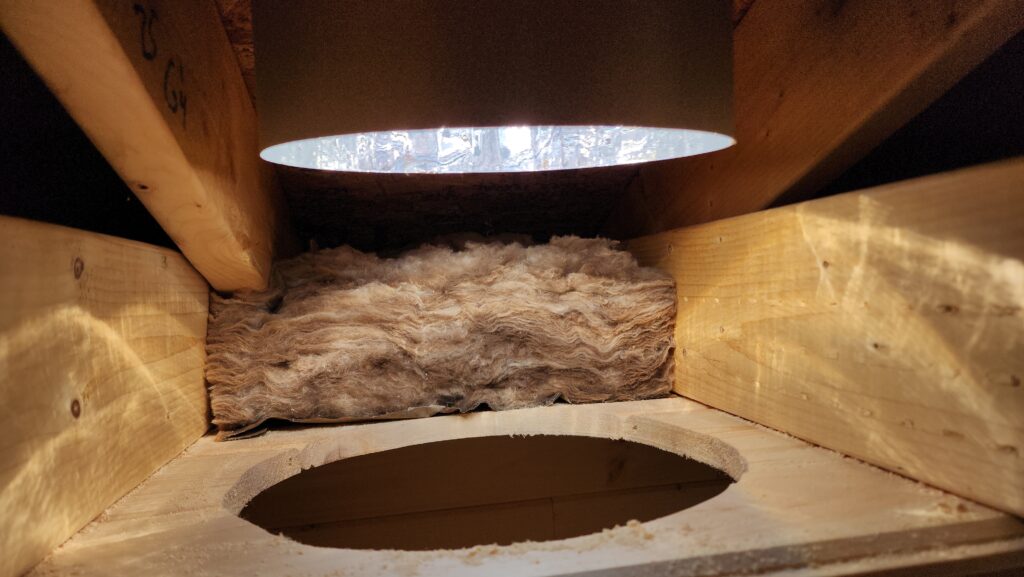
The hard part is that the bottom section and the top section of the skylight are meant to be nesting tubes with a few feet of distance between them. But my application has them super close together. This, it turns out, is a real challenge because they have to be aligned perfectly for it to go together — there’s no wiggle room along some length of travel. There’s no travel. Alignment proves to be immensely difficult due to the angle of the roof and how the flashing is built. I did not take a picture because what I did is between me and the house. I’m not proud of it, but it’s done and it works. That’s sunshine coming through that glass on the left, brightening up that whole corner considerably.
A consequence of building the ceiling from the sides toward the center is that it is not possible to properly close the center due to the t&g nature of the ceiling boards. Also, it’s a challenge to get ceiling insulation in place without attic access. I wind up putting 1/4 of the run into each side, then as I build toward the center, I put a 1/2 length in from the middle and push it out toward the 1/4s in the sides. This works, but is slow going because I have to fuss with it so much.
I will close that gap as best I can with a sawn-off t&g board but I will still need to cover it with trim at the end for it to look good. Ignore the redness of the color – my phone’s camera got confused and I didn’t notice in time to fix it.

Here’s the finished ceiling for a closer look at how it went. This picture also shows the corner trim in place for the interior paneling. The blotchiness on the walls is actually dust from sanding the floor – this photo was taken later in the actual progression of things (and has true color).
As an accent, though it wasn’t necessary to actually cover anything, I went across with the middle trim at the fan.
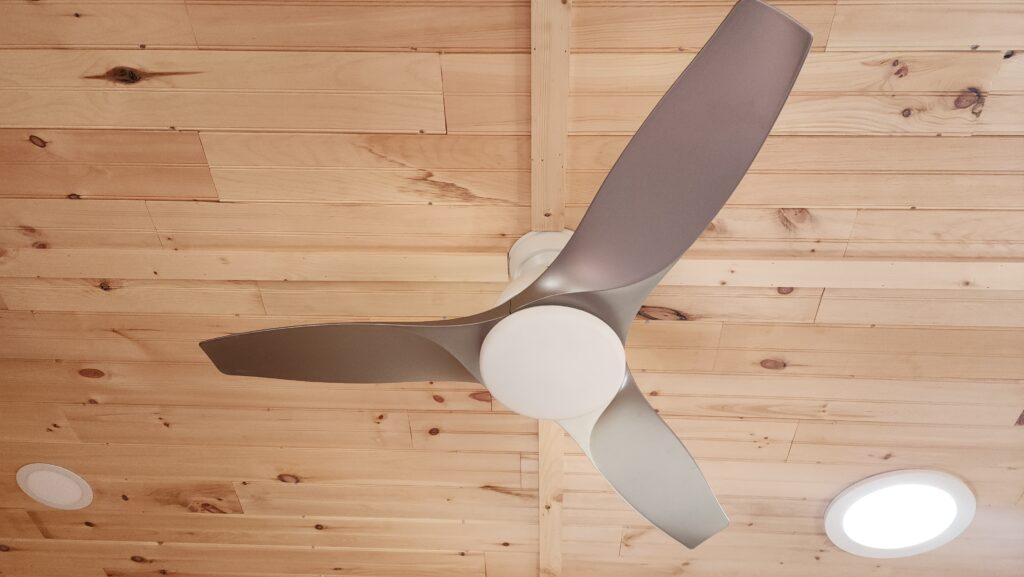
I thought about scribing the trim to match the curvature of the fan canopy, but the canopy was also domed as well as circular, making the profile quite complex. Not worth the trouble.
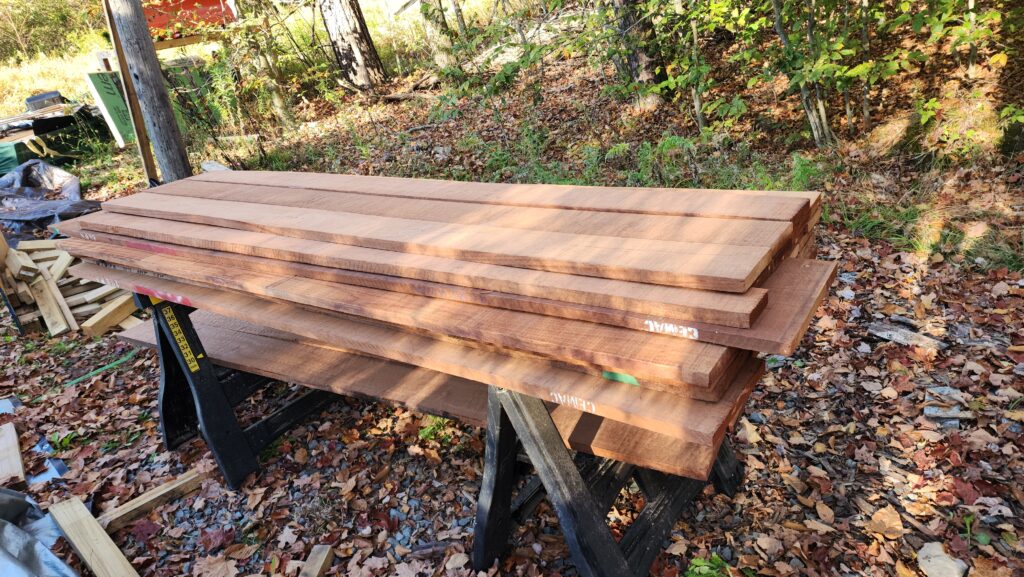
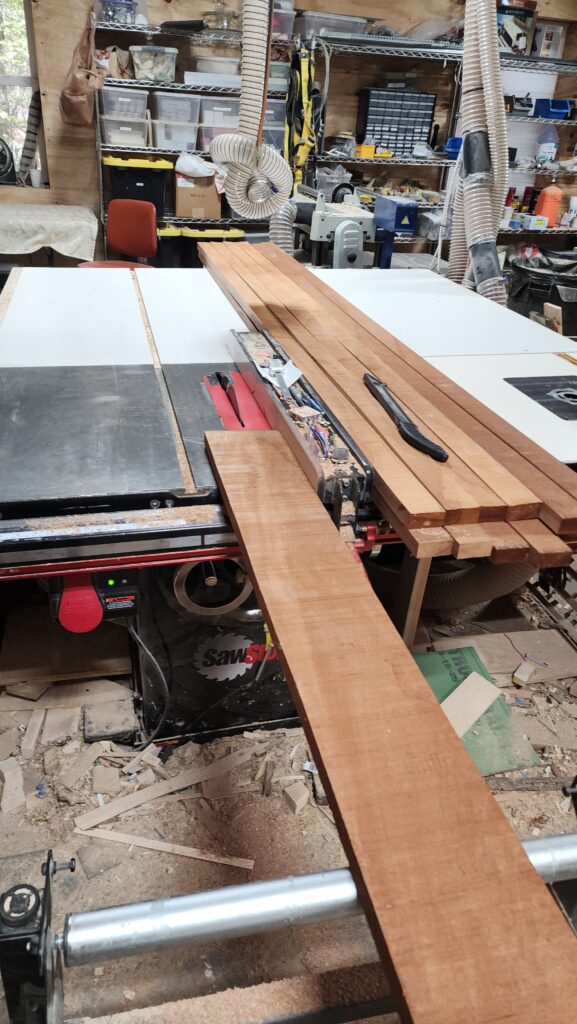
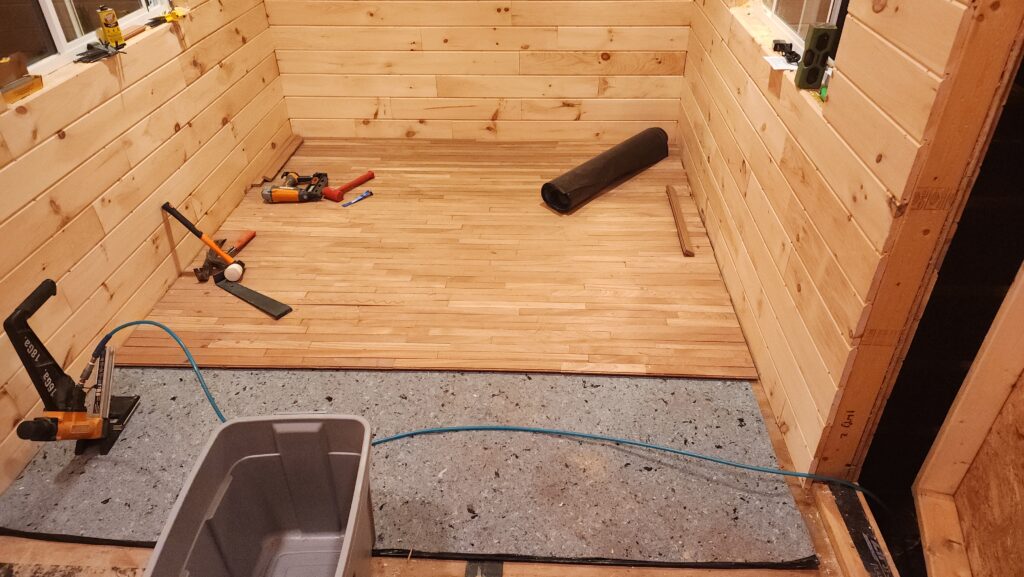
Next up, flooring! I wanted the Club Car floor to match the main house floor. That floor is made from an African hardwood called Sapele, which is reddish and is related to Mahogany. The main house floor was built when I lived much closer to civilization and it wasn’t too difficult to get to a distributor that stocked it. But out here in the hinterlands, I have to make a 3h (each way!) trip to the nearest big city to find a supplier that stocks it. I compute the amount I need carefully, add 40% for errors and the inevitable waste from off-cuts and such, and then I go get the wood.
It starts as just a pile of rough boards of random widths, as they came from the sawmill. Why random widths? Well, trees aren’t square. Outer slices are narrower than inner ones.
These do not look like floor boards, though. They need to be cut into strips…
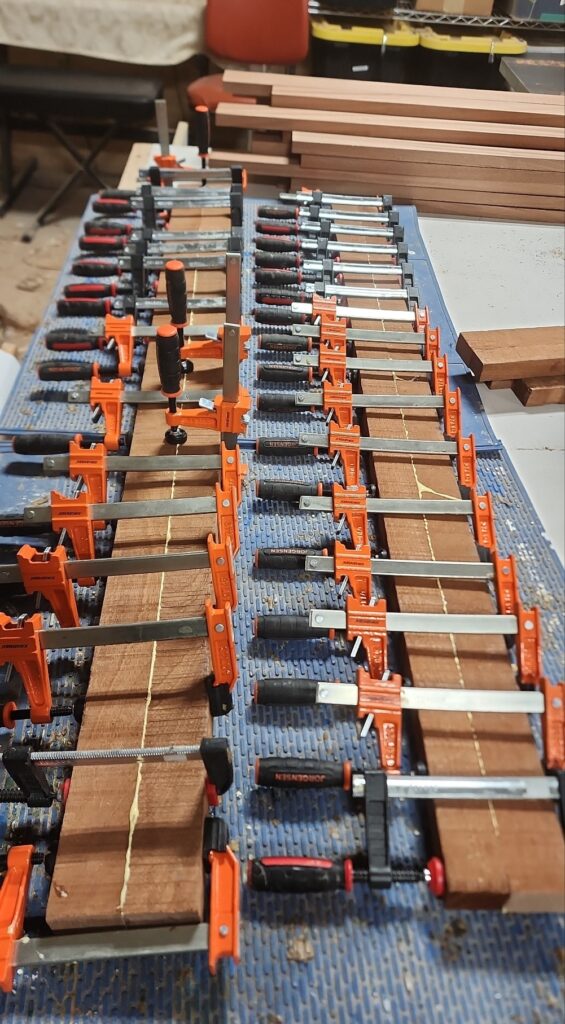
Which will generate a pile of random-width off-cuts as well. These are still perfectly good pieces of wood but they are not wide enough to continue in the milling process to become floor boards. Well, they’re not wide enough until I do this with them:
The strips take a ride through the thickness planer to smooth away the rough surface from the sawmill and to get them all to uniform thickness.
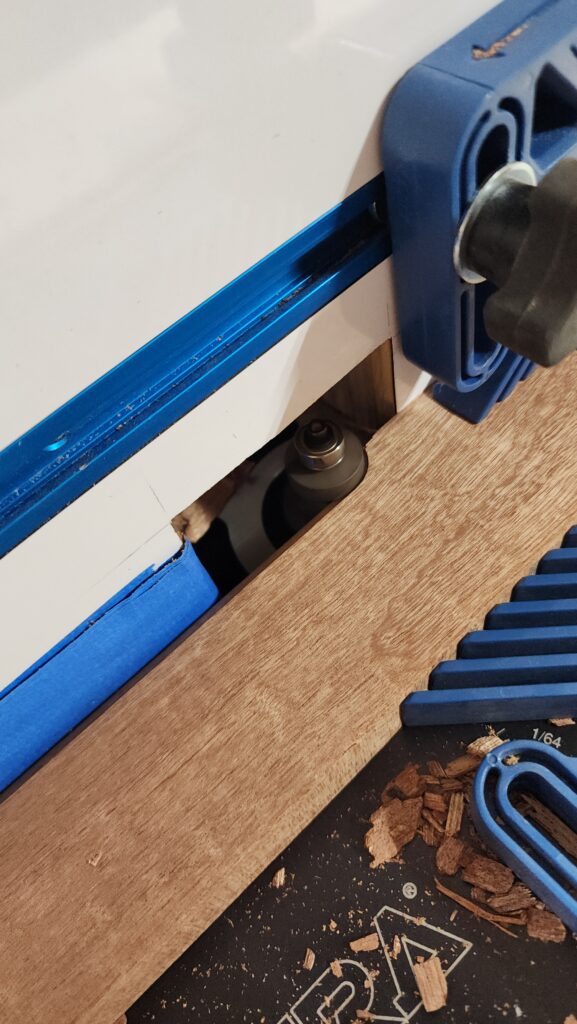
Then a couple of passes through the router table to cut mating profiles on each side:
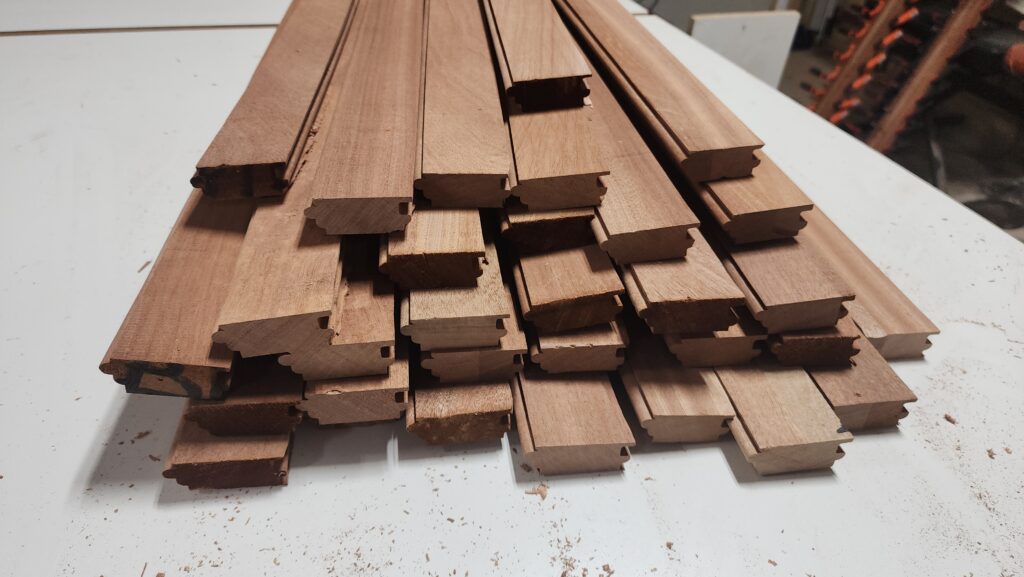
Which finally turns them into floor boards.
And only now can I begin to install them. This photo is by warm artificial light, which makes everything look yellow. The color in the prior photos of the wood is decently accurate.
As I’m installing the floor, I see my stock of rough boards get depleted faster than I think it should. I’m convinced I will run out of wood before I get to the end of the floor. But how is this possible? I bought 40% more wood (by area) than I thought I needed. Well, there were indeed a few errors and unusable pieces, but that’s not nearly 40% worth. I managed to reclaim most of the off-cuts, so that’s not it, either.
So what happened? Well, it turns out that the edge-forming process removes a significant amount of wood. The actual coverage of a 2.25″ blank after milling is more like 1.75″ or something like that. I forget the exact number. But that’s a loss of like 25% coverage right there. Go back and look at that router table picture. Notice how much surface coverage is reduced by the edge forming. Then there’s the fact that the table saw blade is 1/8″ wide. Every time I cut an 8 ft board, that’s 8ft x 1/8″ wide turned into sawdust. That’s 12 square inches lost. Now, that doesn’t seem like much, but remember that I have maybe 25 boards and each one gets 2-4 cuts. Let’s say 3 on average. 75 cuts -> 900 square inches -> 6.2 square feet lost to sawdust. It all adds up. And it all added up to more sawdust than I expected, so I knew I wouldn’t be able to finish the floor with what I had. Crap! I didn’t have time to take another day trip to the city (never mind that it would take them a week or more to get the order ready), so what to do?
Well, it turns out I have some nice Maple harvested from right here a couple of years ago. I can use that to make up the difference.

But how to blend this bright white wood with the dark red/brown Sapele in the same floor without it looking like a terrible mistake? I had an idea. As I got close to the end of the Sapele, I measured what I had left and compared it against the remaining open floor. Then I made a plan. I left the sector between the (new) front entrance and the passage into the snout open as I finished the rest of the space with the Sapele.
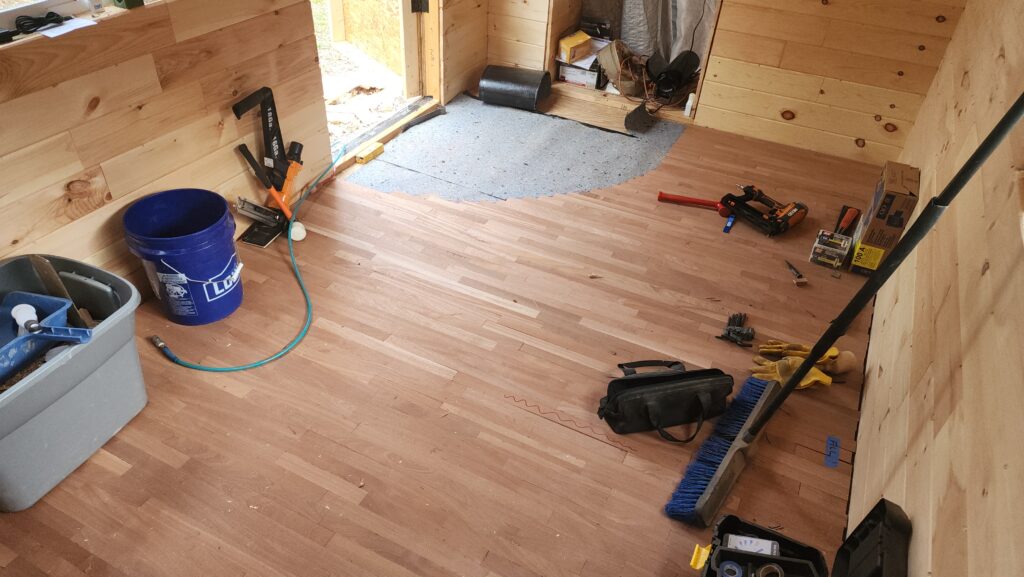
Then I milled that maple into the same-sized boards as the Sapele and filled in the sector with that as if it had been an intentional accent the whole time.
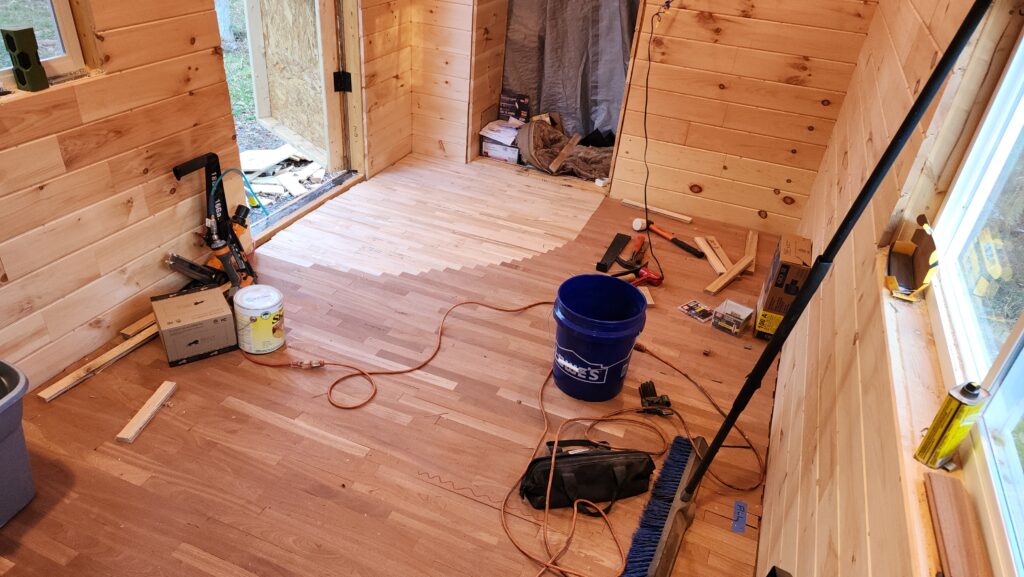
It doesn’t look too bad and follows the normal traffic flow so it has an intentionality to it.
You know what they say, “disguise the limit”. Indeed.
I did keep with my tradition of putting little blessings into the structure. Here, just a little love note left on the back of some flooring.

Because almost nothing is ever as easy as it should be, at some point during flooring installation, the air fitting for my flooring nailer just… broke. Fortunately, I keep spares of nearly all critical parts so if something breaks, I don’t have to take an hour’s trip into town to get a replacement (or wait a week for it to come by UPS).

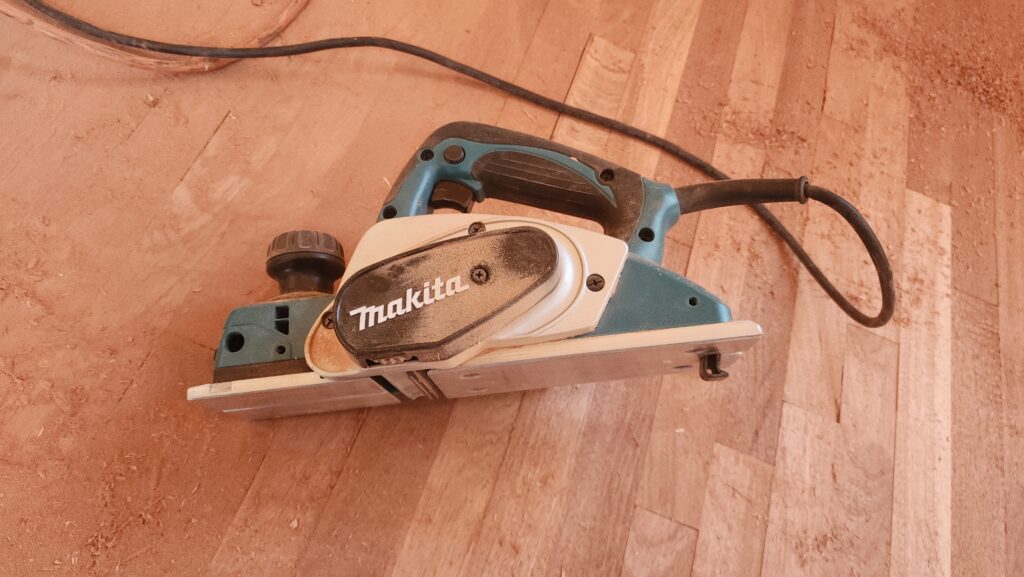
The last act for the flooring is to flatten any high spots and sand it down and apply the finish.
My friends Power Planer and Belt Sander had their work cut out for them.
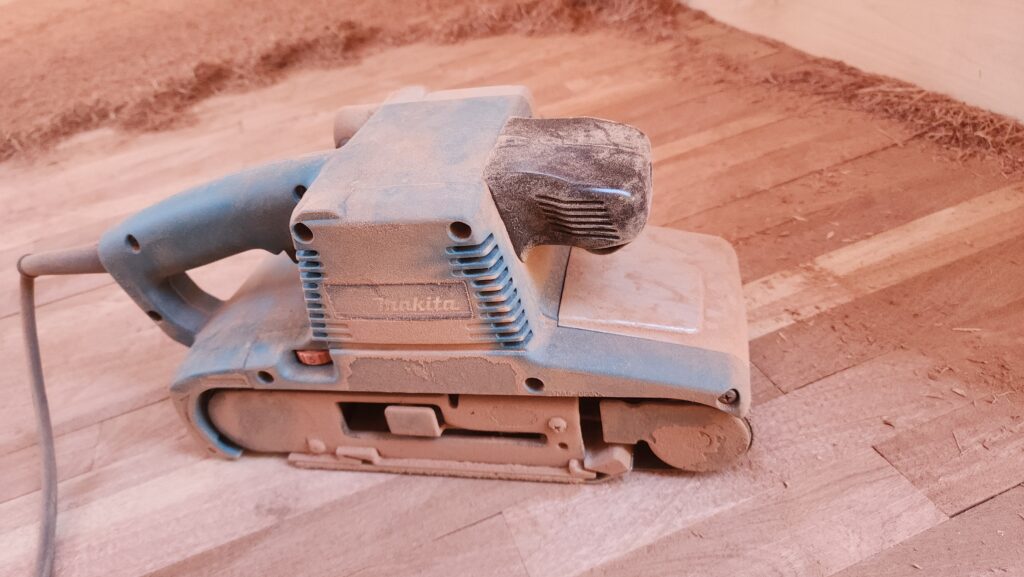
They made a lot of dust.
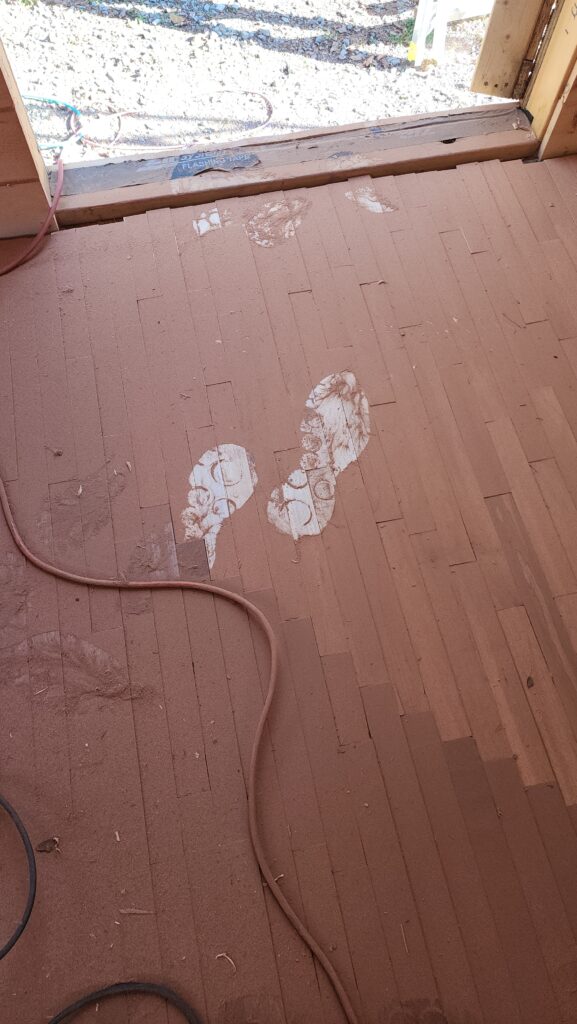
That’s the white maple section of the floor, covered in red dust from the rest of the floor.
There was much sweeping and vacuuming.
Finish was applied next, and then the interior was as done as it was going to be prior to Conjunction. The weather was starting to get cold and I wanted to bring the Club Car together with the main house ASAP after the floor was done. I knew this stage would be super dusty, so I didn’t want them connected before the floor was done, but as soon as it was, then. And that was now.