With cold weather approaching, getting the Club Car connected to the main house was now the priority.
But before anything can be done… something else must first be done. In this case, that was leveling the former spring garden (which months ago was transplanted to some standing planters) so there was clear ground to install the Club Car.
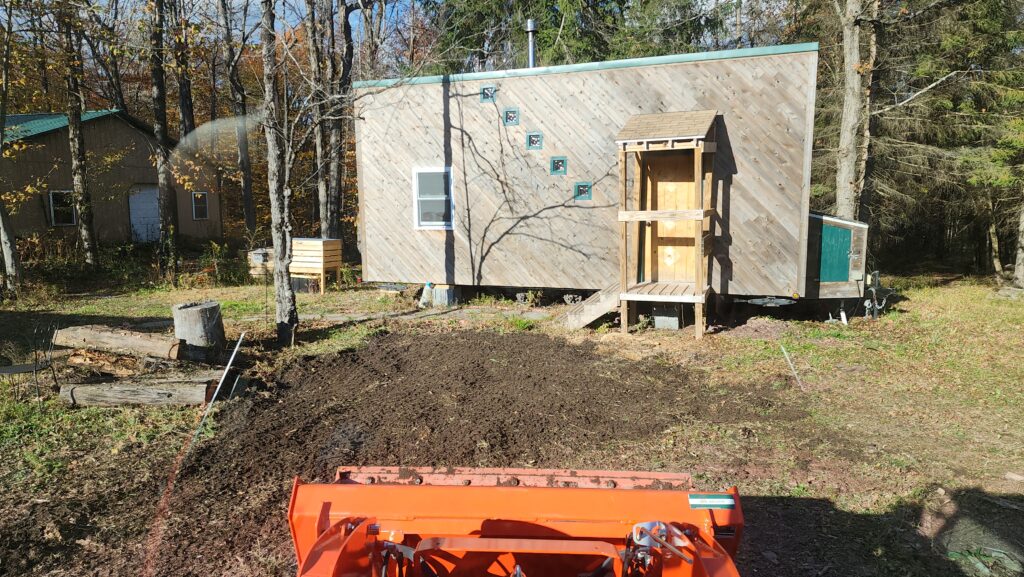
Bob’s grapple took care of the big border timbers and then the bucket did a decent job of smoothing it. I drove over the site many times in an effort to compact it. The porchlet was next and was a simple matter to topple it then Bob pushed it out of the way.
Now to actually position the CC.
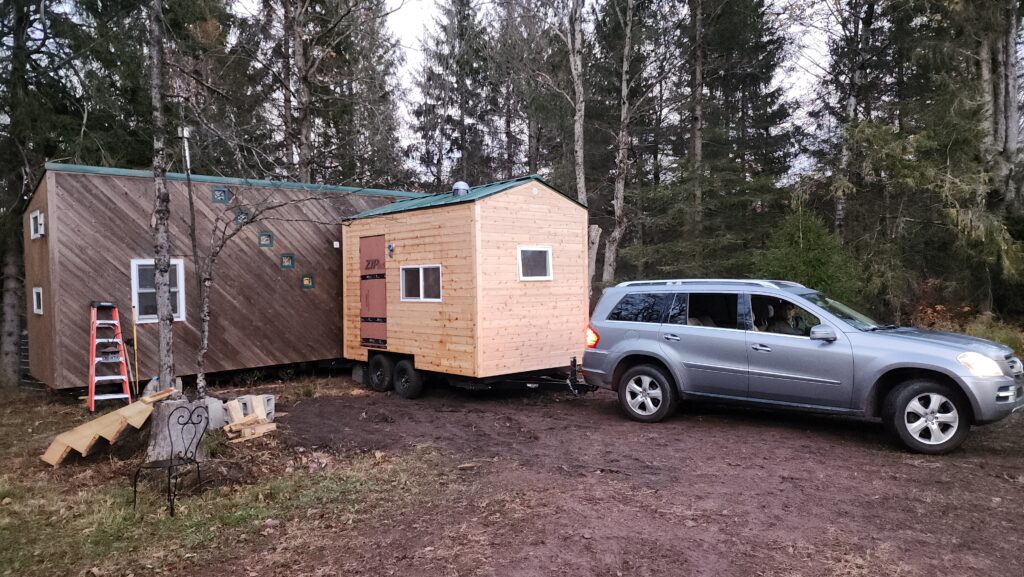
It didn’t take a large vehicle to do it, since the CC isn’t super heavy and it was over flat ground at slow speed – no need for a heavy truck to provide acceleration or braking. It turns out, however, that backing a 14 ft trailer nicely up to a specific spot, plus-or-minus just 2″ to get the doorway aligned with the snout was surprisingly difficult to accomplish. It took several hours to get it right.
Part of the problem was that there wasn’t a lot of running room ahead of the docking site, so it was difficult to execute trailer maneuvers that tend to require turns left and right and then some distance to resolve the position. There just wasn’t the space for that.
And those times we could get it decently on target, we couldn’t get it on target and perpendicular to the main house. It was always at some kind of angle. The mud didn’t help, either, contributing ruts that made control even harder.
At some point we realized that we didn’t have to actually get it perfect with the car. Just very close.
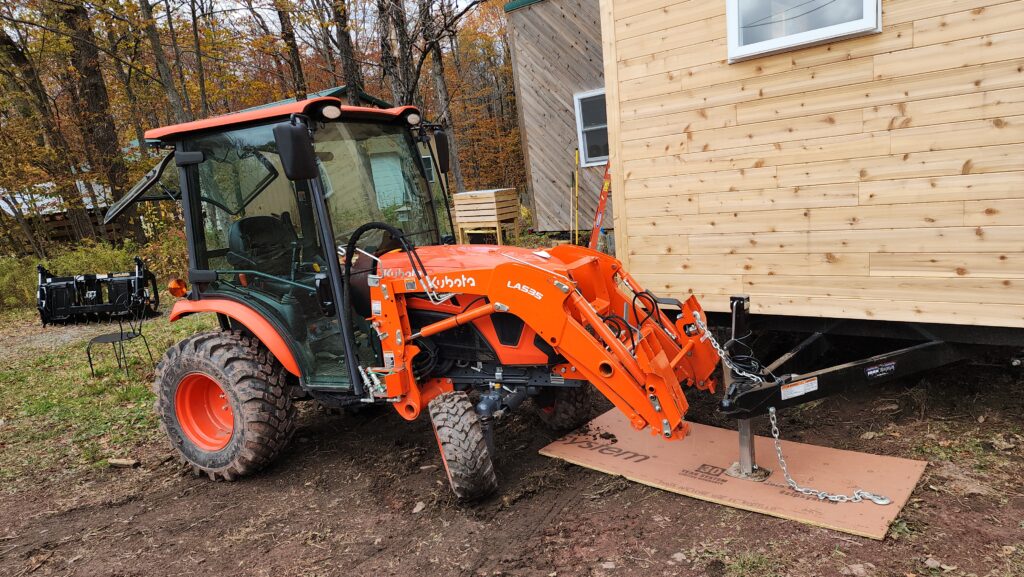
The tractor had better precision for the final adjustments, like backing it close to the house by just lifting up the hitch and driving forward a little.
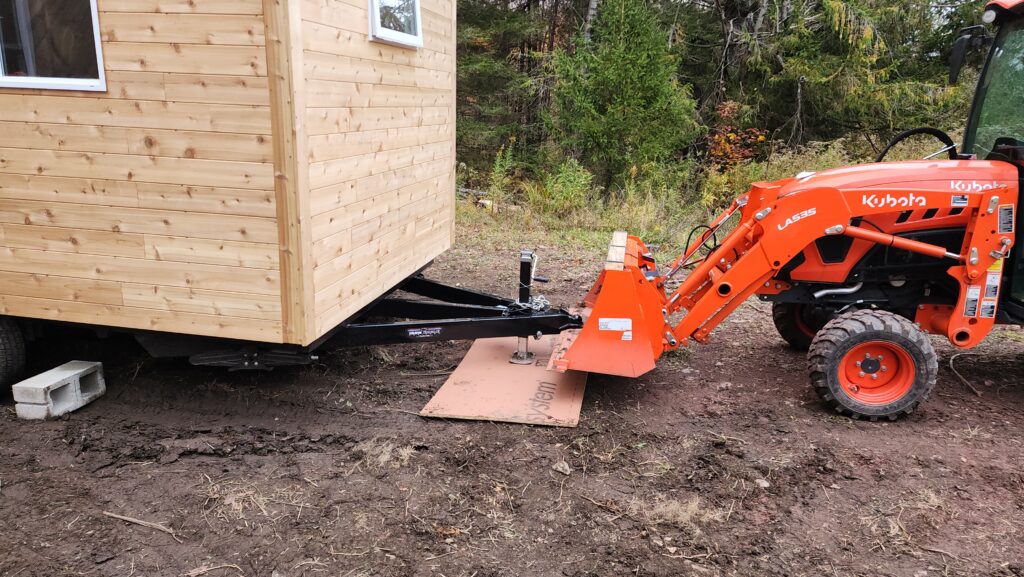
And as for being at a slight angle, well, if we put a board under the tongue jack so it could slide, Bob could just pull the nose a little this way or that to get the orientation just so, rather than having to land it perfectly in position with the car in reverse.
We could probably have saved hours of attempts with the car had we realized this earlier, but alas, it didn’t occur to me or my helper until a lot of other effort had already been spent. This trick worked quite well for final positioning.
And then it was in place.

That’s not the end of it, at all. The wheels need to come off, the trailer needs to be set on concrete piers, and the whole thing needs to be made level and sealed against the main house as well.
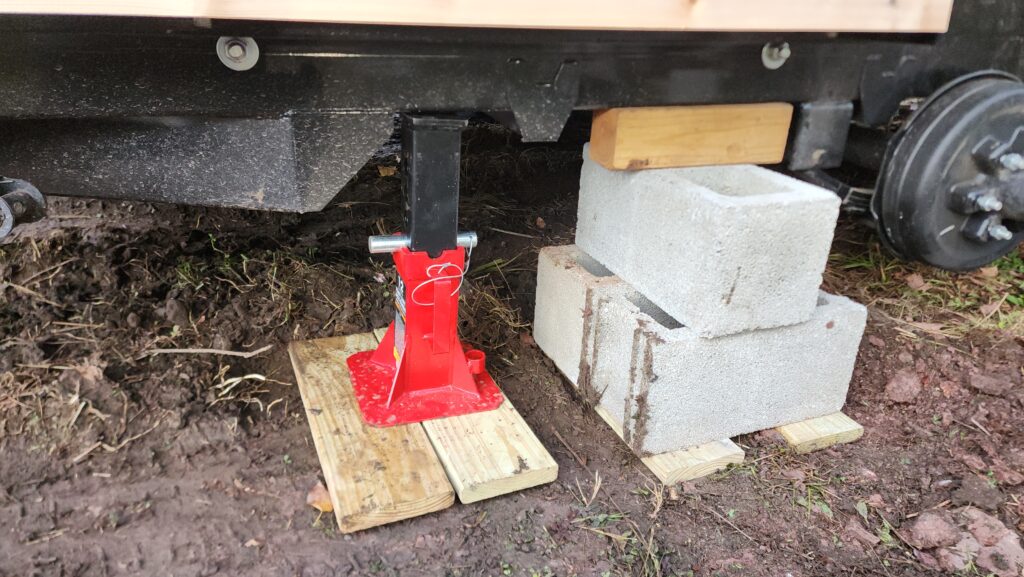
To get the wheels off, the whole thing has to come up a bunch. This is performed in increments with a heavy duty jack and some stands. Jack up a corner, land it on a stand. Jack up another corner, ditto. Go around and around, a couple of inches at a time, until the wheels are off the ground. Then remove the wheels.

Once the wheels were off, time to lower it down to get the inside floor of the Club Car as close to the main house floor as possible. And have the CC resting on concrete piers rather than jack stands, when it is all done. This was the same operation as removing the wheels, but in reverse. Jack up the corner off the stand. Remove wood or concrete and lower the stand to the next lower position for safety, then lower the corner onto the pier. Keep going around and around, changing out concrete blocks and wood shim blocks until the level was achieved. The jack stands in this case serve as safety backup so if the jack gave way while the pier was being adjusted, the corner had something to land on.
And finally, it was done and decently aligned. This is a view from the CC through the snout, to the existing entry door. There is a bit of a step. That was reduced somewhat since this picture was taken, but there is still a level change from one part to the other.
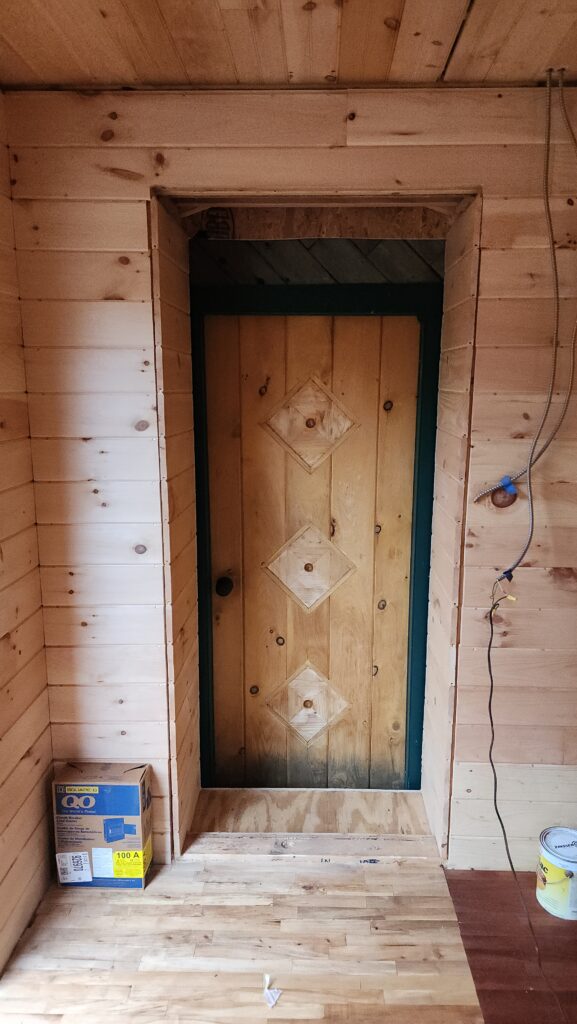
Next up – installing the real front door. Why did I wait so long? The door was delivered 2 weeks later than originally promised, so getting the finish applied was also well behind schedule. I wanted the finish to have a week to cure before exposure to the weather, so I left the construction door on until the last possible moment. That moment is now.
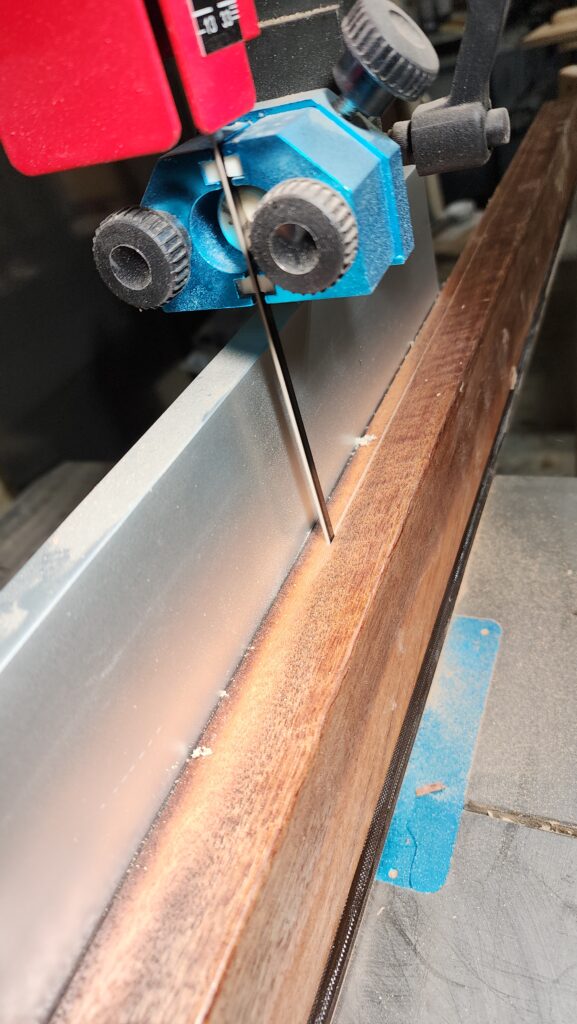
I measured the door jamb and compared it with the opening in the wall. The jamb was about 1/4″ too tall! I can’t cut that off the bottom, because it would affect the threshold. The top of the jamb was nice and thick, though, so I could disassemble it and slice it down carefully at the bandsaw. And so it was.
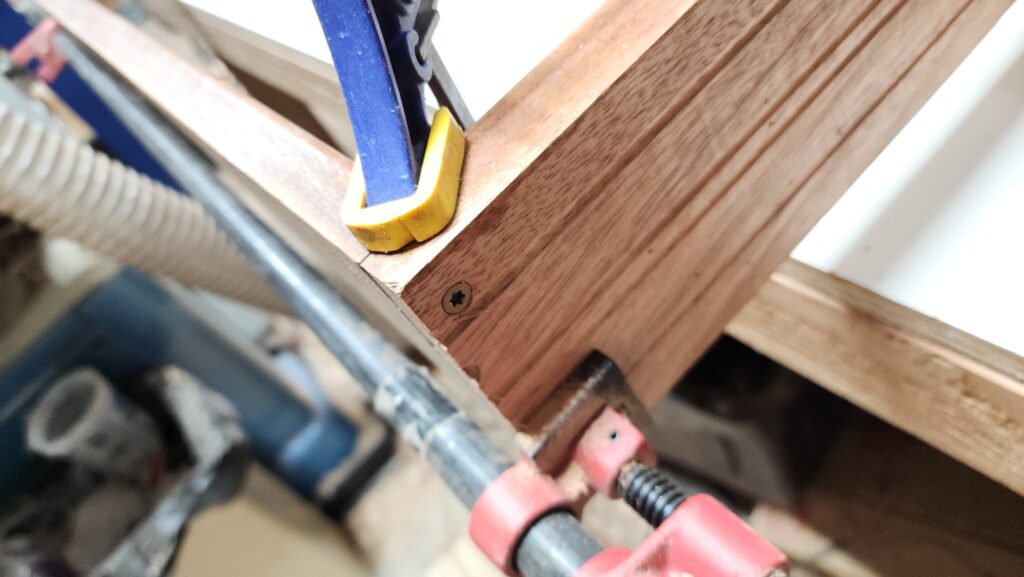
Then re-assemble the jamb, which required some significant clamping to keep everything tight and aligned. The wood wanted to spring open a bit, so I had to bring out the heavy pipe clamps to hold it in place while I very carefully drove some screws through the now-3/8″-thinner top member. I didn’t love it, but it was required to get it to fit. This jamb was extra thick, compared with other pre-hung doors I’ve met. I did not expect to have to accommodate so much bulk. There’s always something.
With the jamb cut down, the doro now fits in the opening.
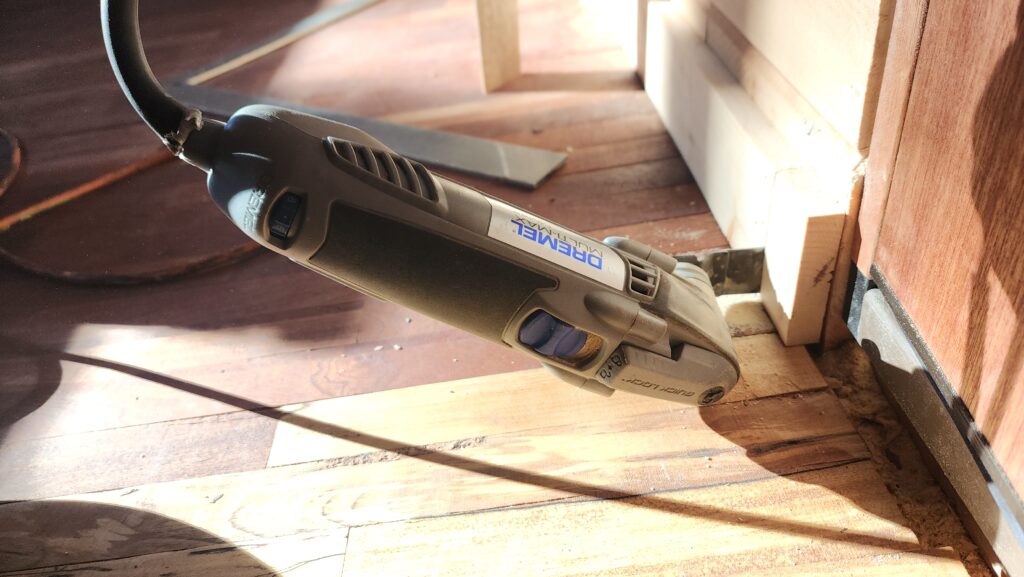
Now to add the exterior trim. I didn’t know how big that trim would be, so I dressed the siding close to the opening, with the intent of using the plunge cut feature of my favorite problem-solving tool, Dremel MultiMax to open it up as needed.
After tracing the outline of the trim on the siding, I went to work. In retrospect, MultiMax got it done, but a controlled circular saw with a shallow depth set would have gotten it done a lot faster and more neatly. The circular saw couldn’t get to the very ends, but it could have taken care of 95% of it in a minute instead of painstakingly long with Max, a few inches at a time that was really hard to keep nicely on the line. It wound up a bit more jagged than I’d hoped and was immensely fatiguing to use Max, who vibrates like mad, for an hour.

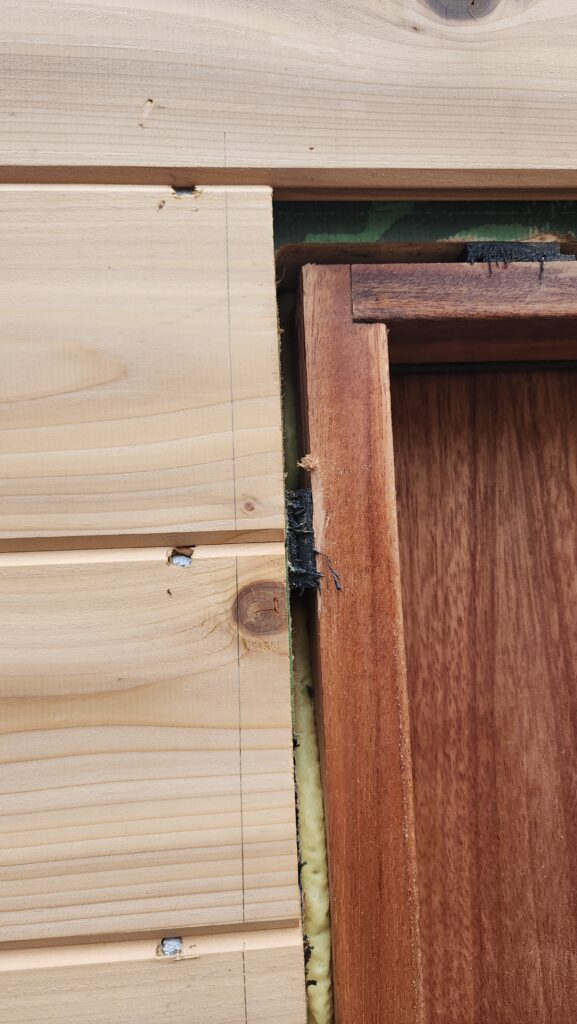
But it is what it is and there was no going back. Trim applied.
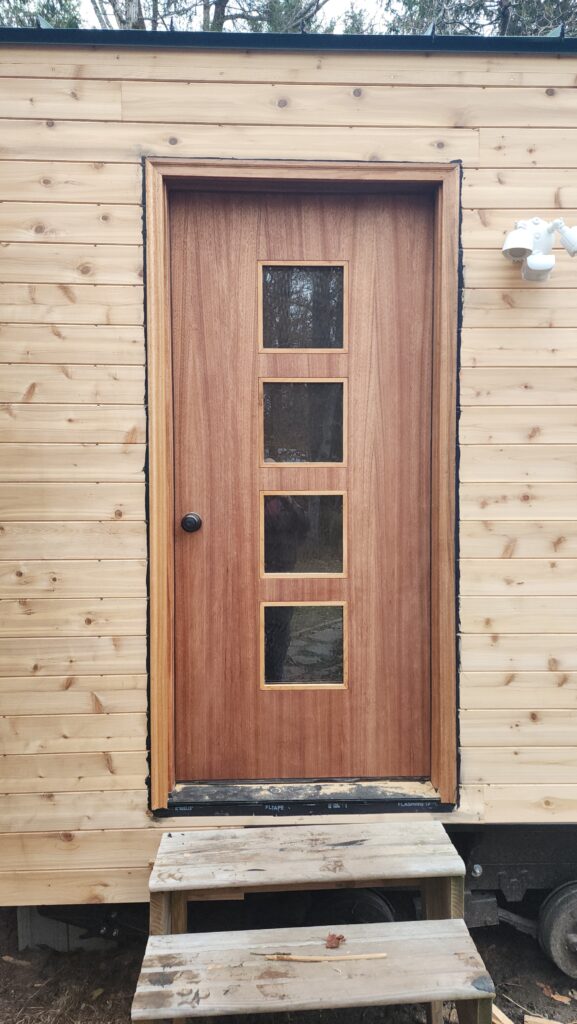
But there was significant gapping between the siding and the trim due to scribing and cutting errors. Those got black sealant, which ultimately just looked like a shadow line around the door, but I don’t love it. But also I couldn’t fix it. I suppose I could have put a second course of small trim, like 1/4-round or something, to cover the gaps, but that would probably look worse/weird. Anyway, it’s done and doesn’t look too bad if you don’t scrutinize the edges.
Hooray for my Gorilla ladder and its ability to have different-length spans to get me both high enough and close enough to perform installation of the top trim.
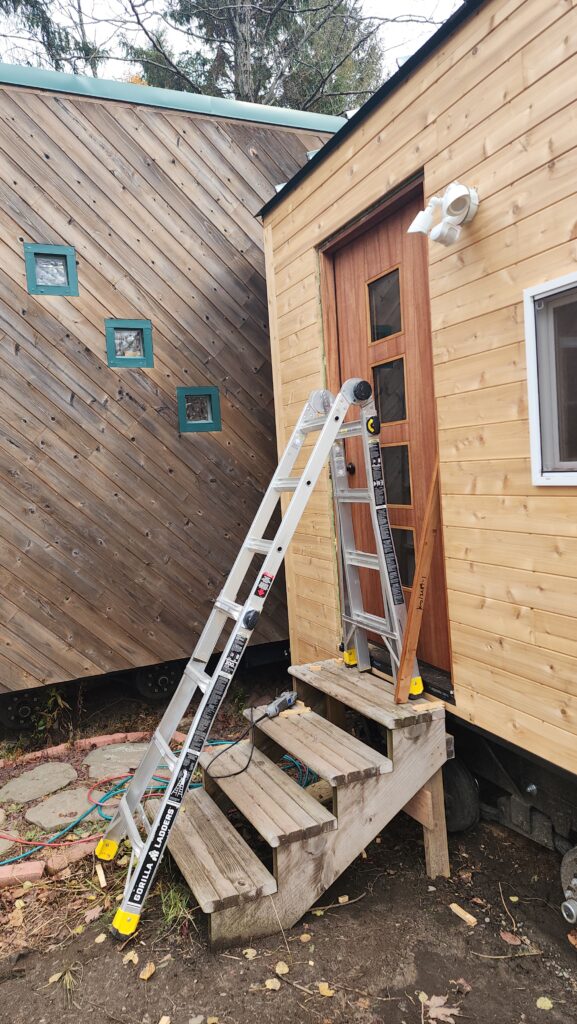
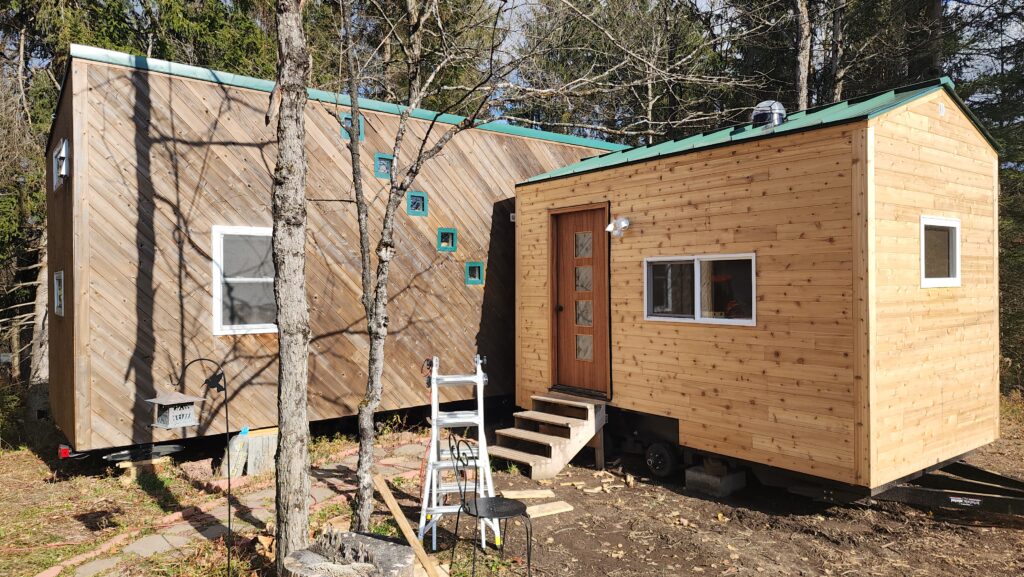
These are temporary stairs. They’ll probably be here through the winter at this point, to be replaced by something more elegant in the spring.
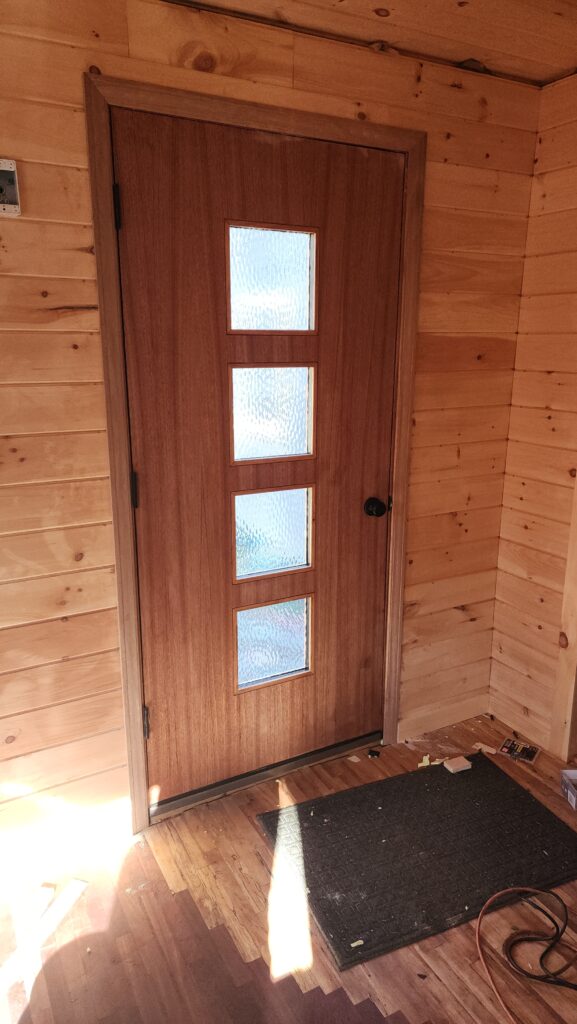
There’s trim on the inside face of the door as well. That went over the wall paneling, so it was a lot easier to make it look nice.
Max was part of this, too, removing a small amount of base trim to make way for the case molding for the door.
One thing a friend noticed, thankfully before I had wired in the fan and started to use it, was that the door met the fan in a most objectionable way.
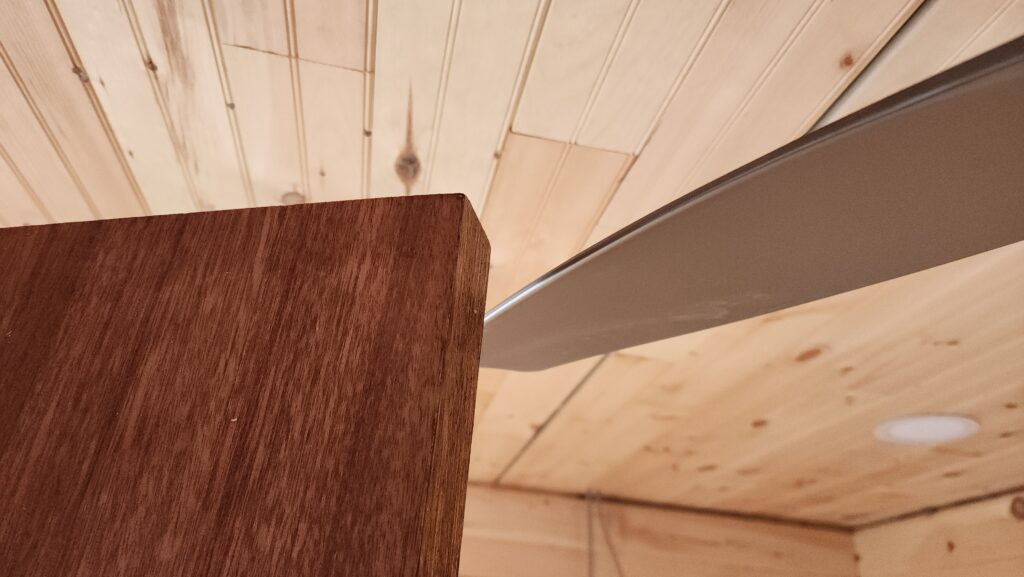
Fortunately, the fan came with a stubby downrod for use in just such circumstances. Had I known, I would have installed it that way in the first place. But no. So I had to disassemble the fan almost completely to get the shorter downrod in place.
Maybe all of 2 inches difference, but it was a critical difference. It also made the re-mounting of the fan much more difficult because of there being far less clearance, but I got it done.
Next up, some electrical. One interesting thing about doing surface-mount for all the wiring is that some fixtures really do not like that. I bought a motion-activated flood light for the outside but the way it was made required the light’s housing to sit flush against the siding of the building. But the junction box for it is not recessed, such that the fixture cannot be flush to the wall because the box is in the way. What to do? Answer – 3D print a section of “wall” for the fixture interface.
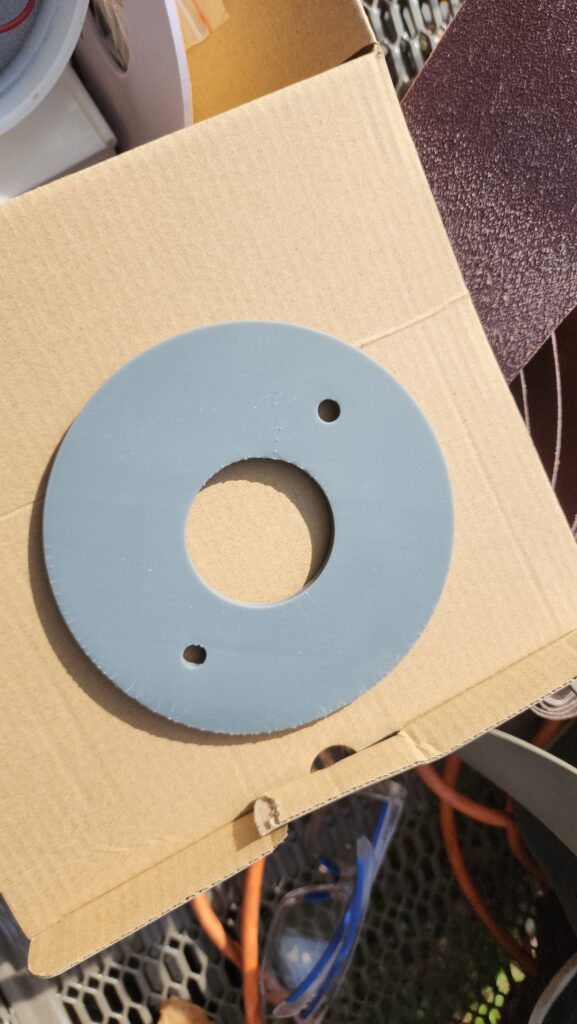
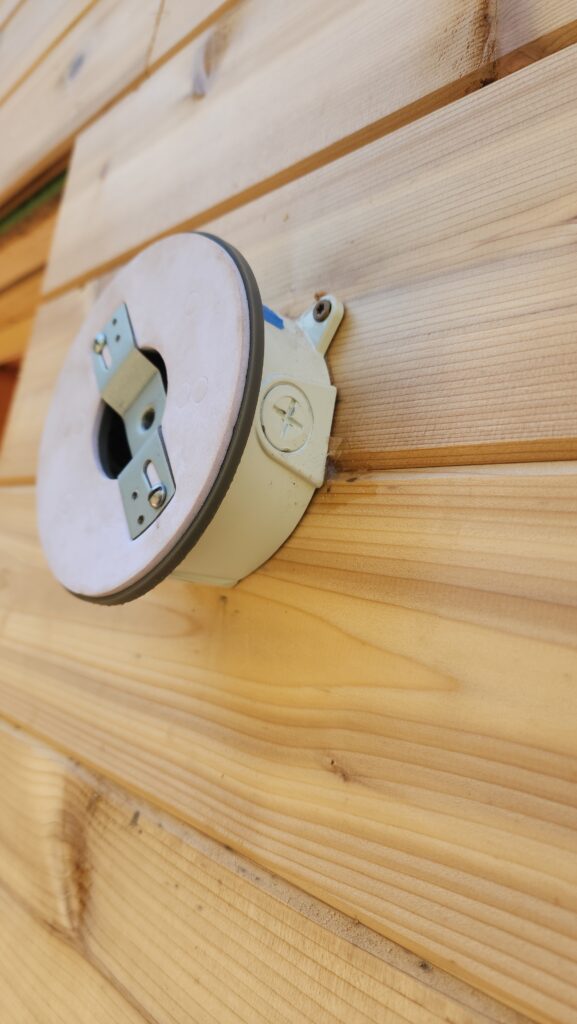
The gray disk fits over the junction box and is enough bigger than it that it serves as a surface against which the fixture itself may nicely sit.
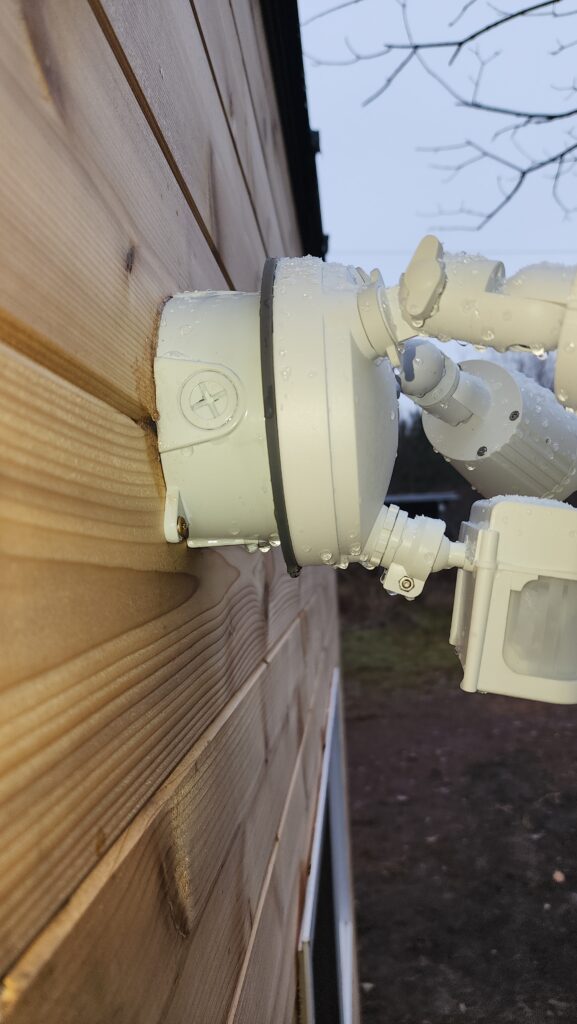
And now… now everything outside is in place.
Next up – interior electric.
I decided it would be easier to just do a sub-panel so I could have one cable back to the main house and do all the distribution in the Club Car separately.
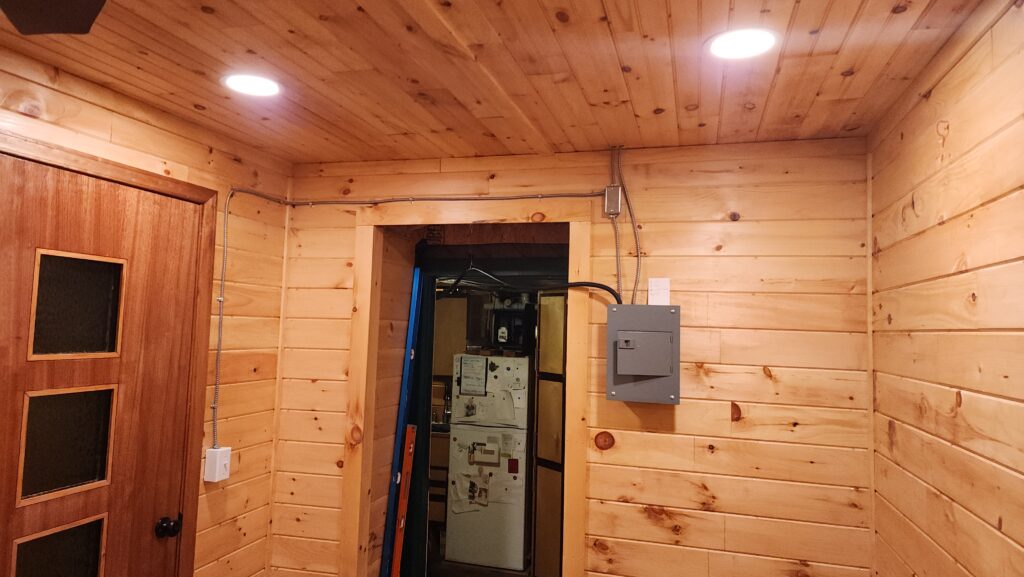
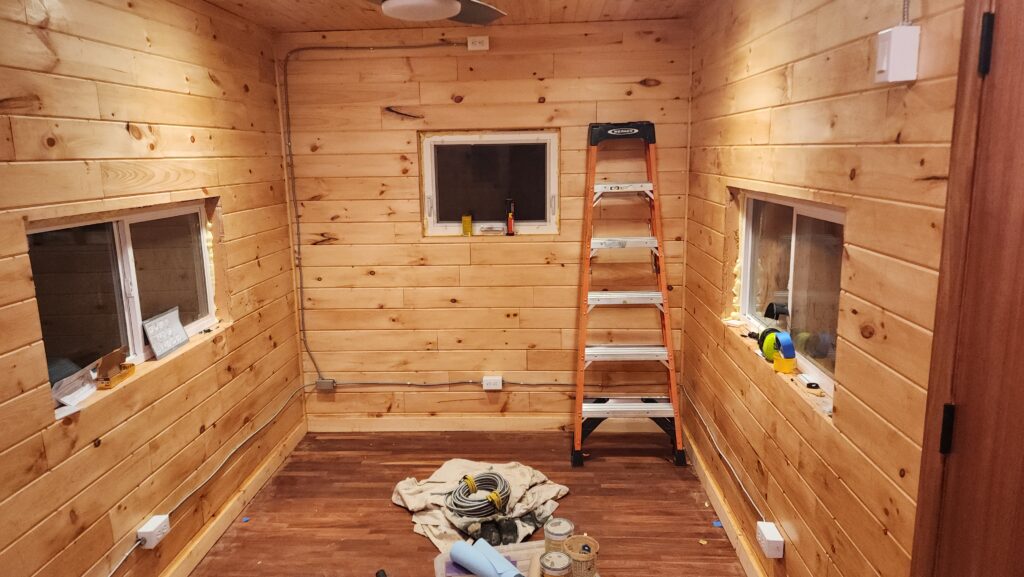
That outlet in the back by the ceiling is for the projector. The one at the floor is for the couch. Yes, the couch. It has power recliner features 🙂
The sub panel has a heavy cord that runs back to the main house and plugs in to a special heavy duty outlet I installed under the load center.
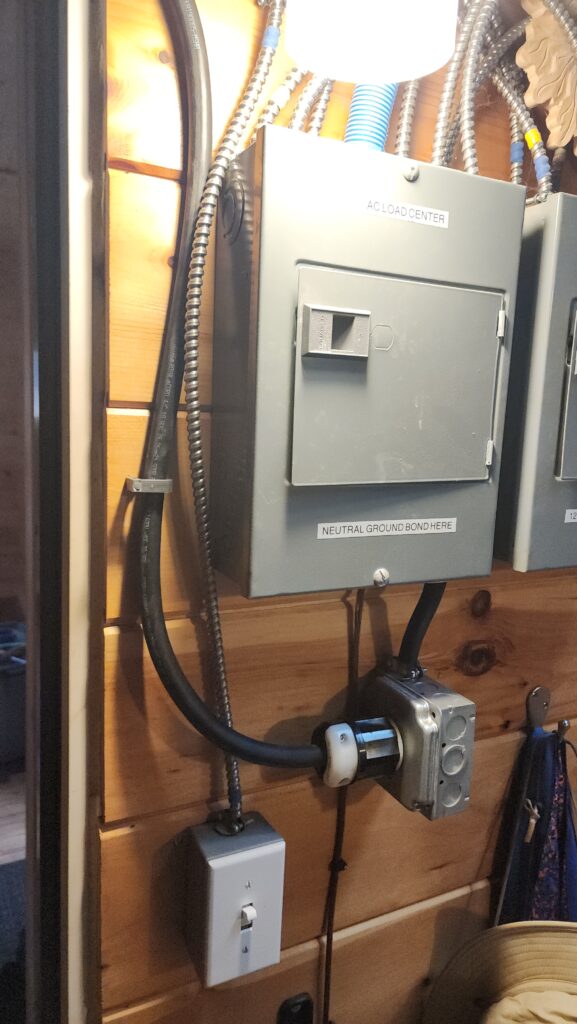
It’s semi-permanent in that I nailed in some cable clips to help keep the cord out of the way, but I can unplug it easily to de-energize the CC sub panel for service and if I ever move these trailers again, it’s easy to remove those clips and stow the cord in the CC.
The snout is sealed to the main house with… pool noodles! Yep. They’re just shoved right in there. I have one at the top in a bit of an arch – an eyebrow. Then below that, verticals that are lapped to shed water to the outside. And then one at the bottom in a U shape to seal up the floor. This actually works great and was an effective solution to sealing a slightly irregular gap good and tight.
But what I didn’t expect was that the diagonal grooves of the siding would track rain water right into my house. Not a lot, but some.


Rain will run down the side of the house exterior, find its way into a groove, then track diagonally down, sneak under the pool noodles, and when it reaches the top trim of the old front doorway, it spills over and onto the floor. This used to be outside the house, so that was fine. But it’s inside now. And that’s not fine.
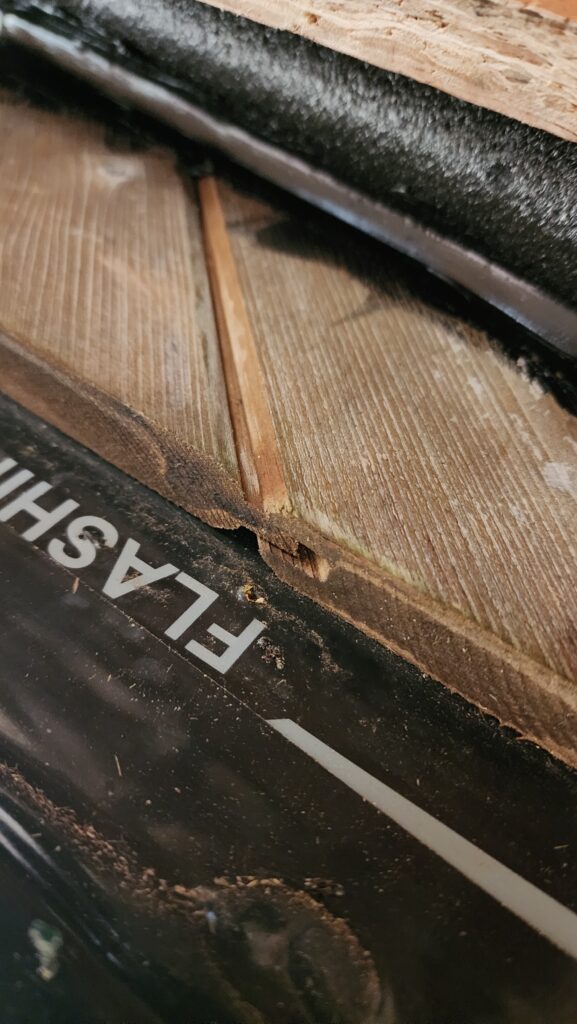
No way just gooping up those channels with sealant would be enough, because they are actually t&g joints and the water would just climb up over the tongue and track in back because all I could possibly seal would be the front exposed parts. The next photo is at an odd angle, but you can imagine water in the V-groove happily sneaking under the mating board to the right and traveling along the void where the tongue of the other board is inserted.
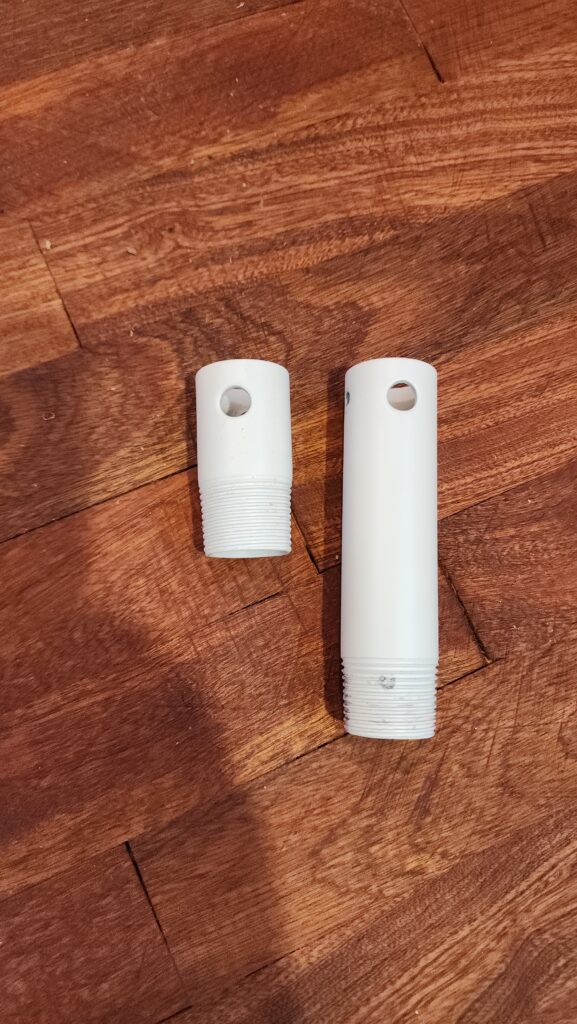
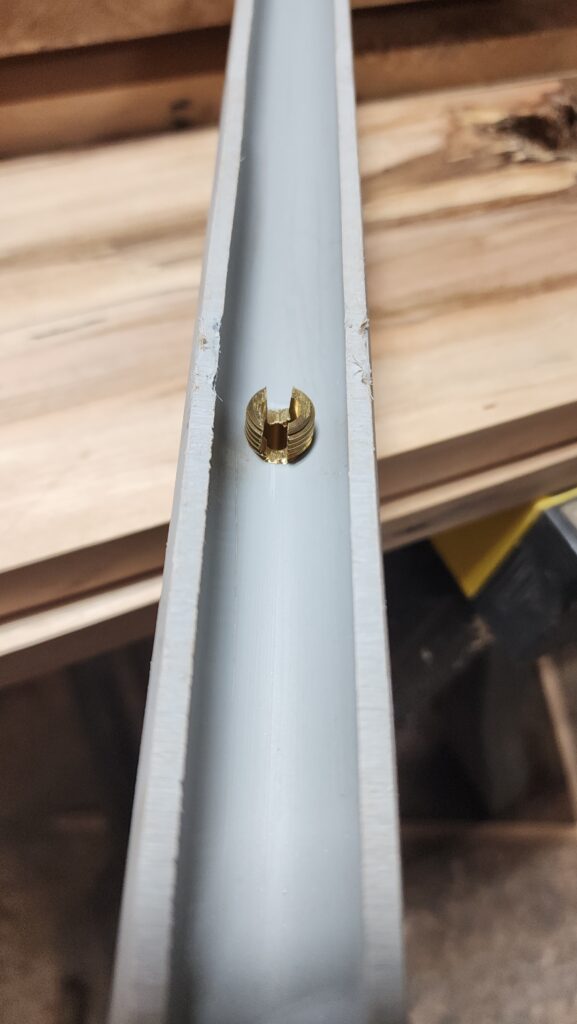
The right solution is… an interior gutter! I started with a length of 1″ plastic conduit pipe and ripped off the top to form a trough:
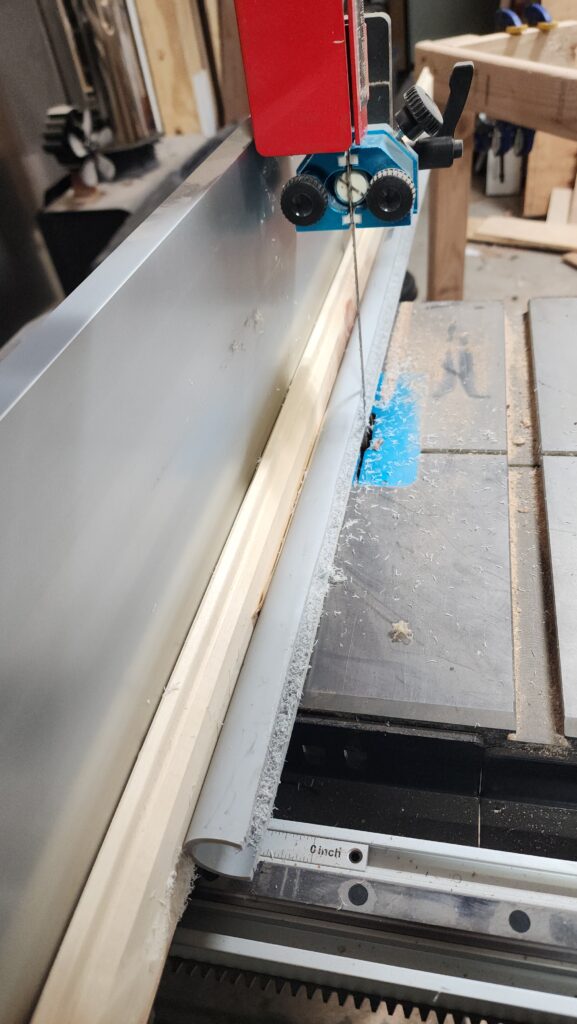
The pipe is stuck to the pine board behind it, for stability as I ran it through the bandsaw.
Then I screwed in a barb fitting, which, because the threaded part was so tall, I had to then cut a slot in it so water could actually reach the business end.
This I hung where the top trim used to be, and slipped some aluminum flashing under the siding to catch and deflect the water into the new gutter.
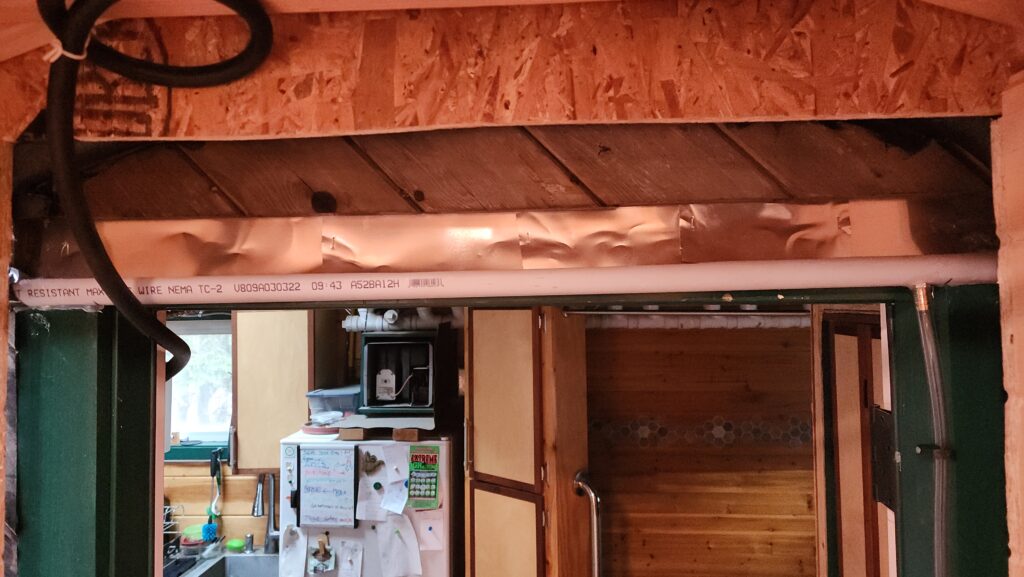
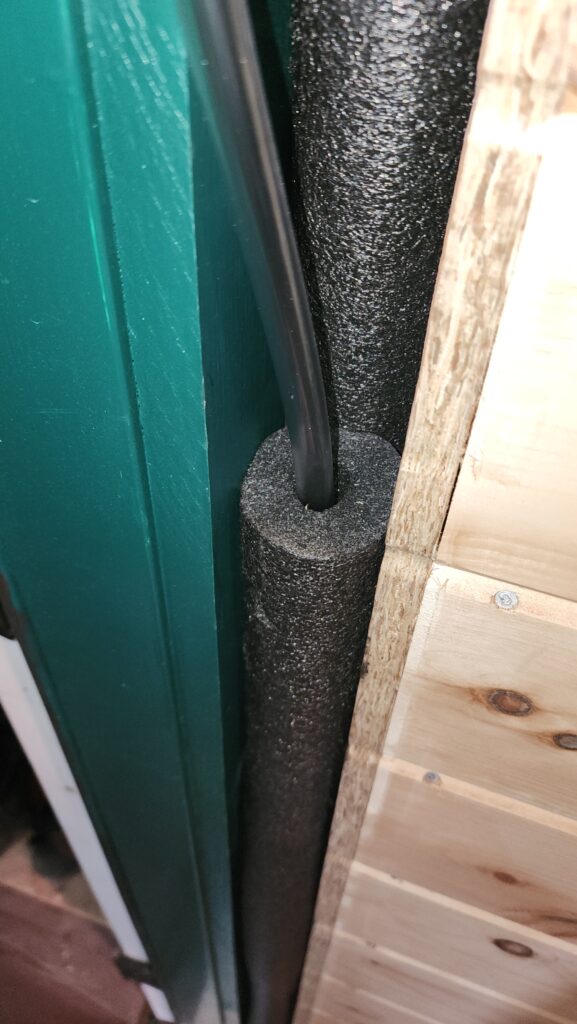
The drain hose makes its way to one of the pool noodles, which is already a passage to the outside!
It’s not necessarily beautiful, but it gets the job done! Sometimes (often!) I have to get creative out here to solve the unique problems that arise from my unconventional homestead.