In days gone by where trains were a primary mode of travel, some trains had a car where food/drinks were sold and that had lounge space. This car had various names, but “club car” was among them. Now, my tiny house is not a train, but now that it will comprise two “cars” and one of them is specifically for the purpose of lounging, I have officially designated the addition as the “club car” 🙂
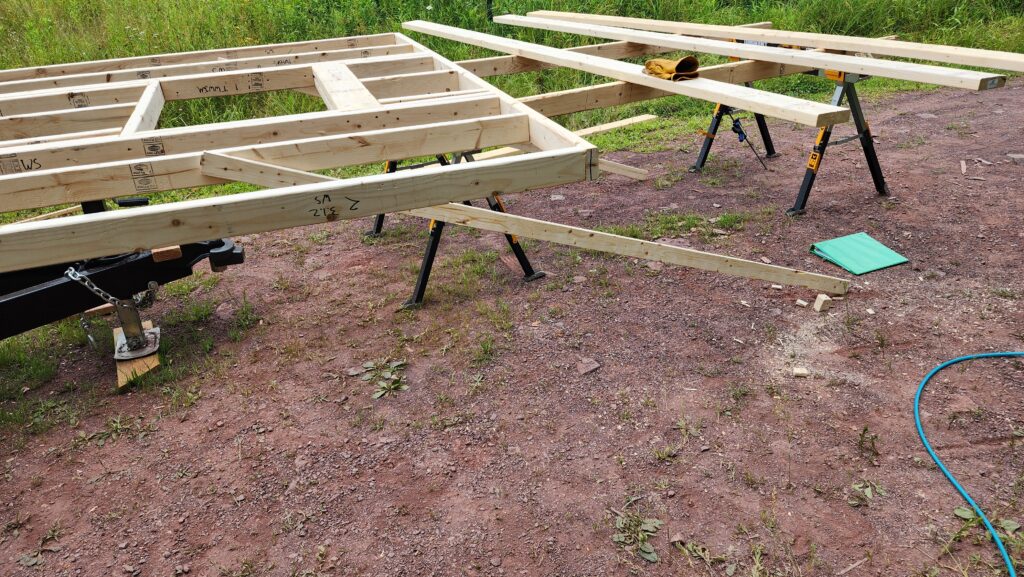
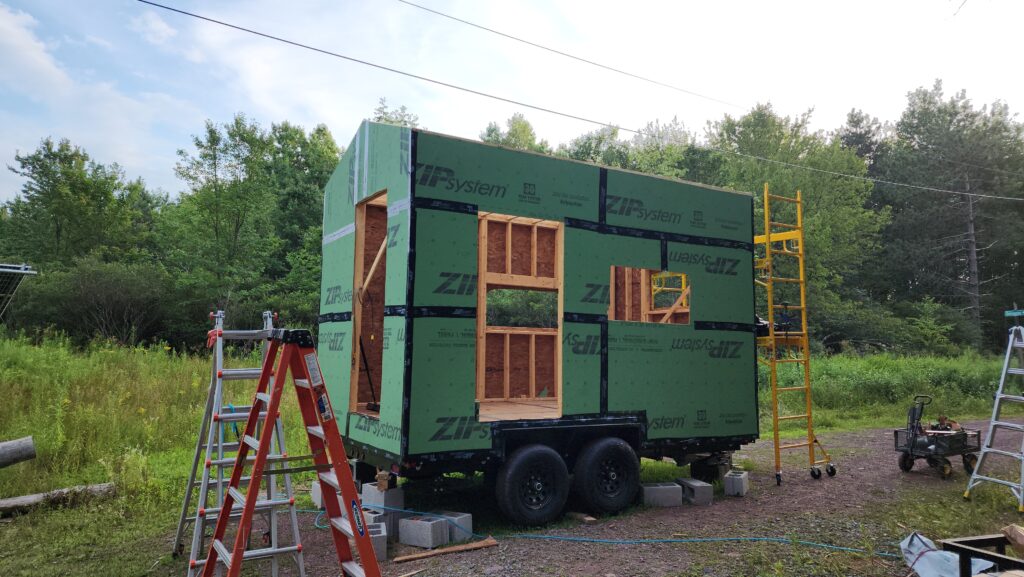
Progress continues! It’s more than just a fancy subfloor! Shortly after completing the subfloor, I was lucky enough to have a couple of helpers (1.2 of them visible in this photo) who were instrumental in getting the two long walls up on one shot.
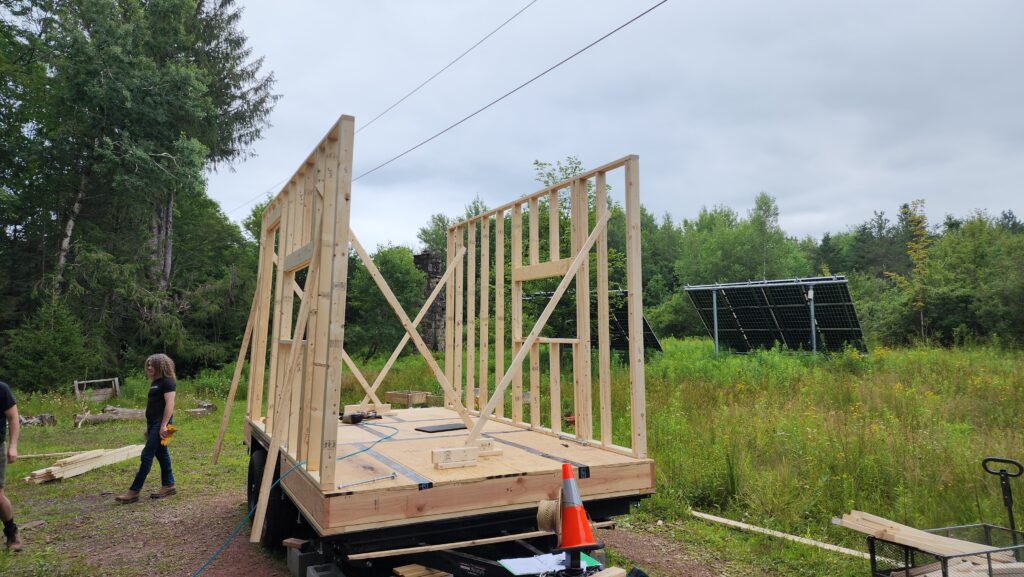
I did the layout and assembly, while the helpers measured and cut and helped me raise the walls once they were built. This was very efficient and in just a few hours, the two 14×8 wall sections were up (and all the lumber was cut for the end walls).
I was back to solo building for the end walls. This had its own challenges, as I could no longer use the subfloor deck as a build surface. The end walls were 7″ wider than the available space, because the extend to the edges of the long walls, rather than being strictly within them. Now, had I really thought the assembly plan through, I might have opted for a different design so the end walls were strictly within the long walls, allowing assembly on the subfloor and then I could raise them in place. But, alas, I did not think of this. There might have been structural reasons why I elected to have the end walls cap the long walls, but honestly, I don’t remember why I made that choice. It seems structurally they’d probably be slightly better inside, actually. Ah, well. What’s done is done.
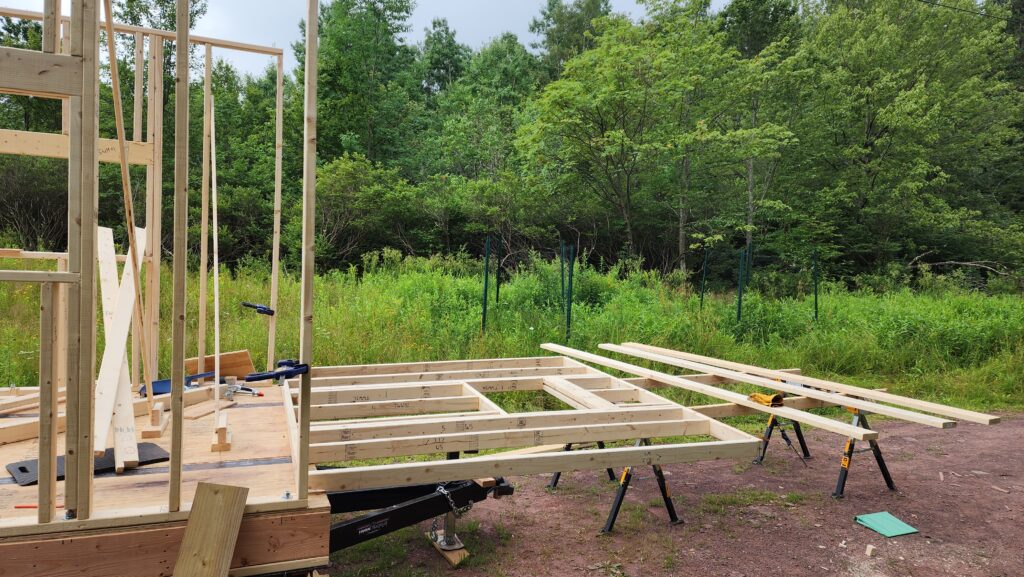
The challenge, then, is to find a level place big enough to build the end walls. I did not have such a place. Until I did, by using some spare lumber to create a build platform out of some sawhorses.
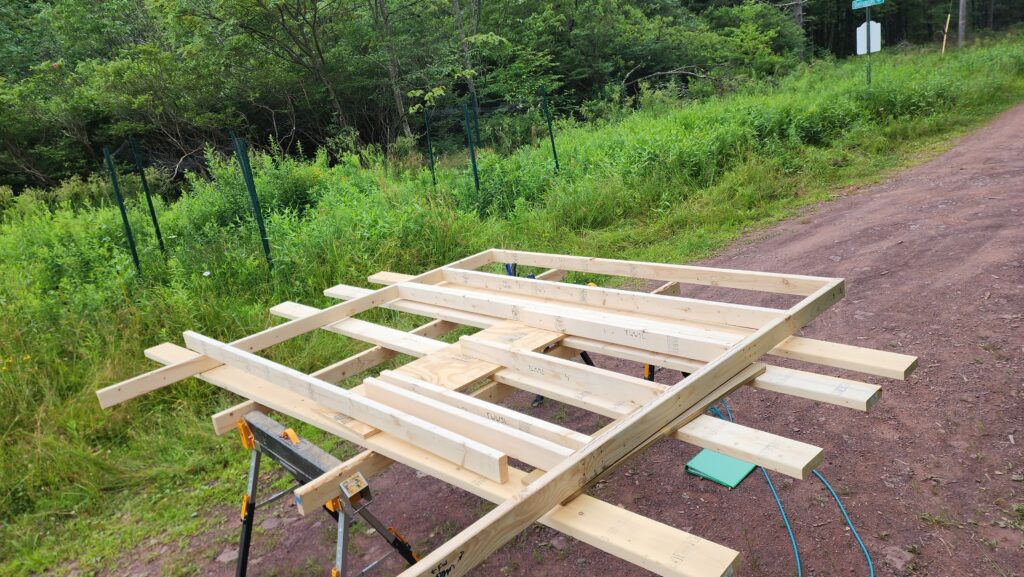
Not ideal, but it worked. Sometimes I would need to move some lumber of plywood around to support specific parts like window headers. One way or another, I got it done.
The next trick is how to raise an 8×8 wall onto a subfloor that is actually 3ft above ground level, solo.
The answer is to work smart and do it in stages.
First, slide the foot of the wall onto the edge of the subfloor, otherwise supported by the sawhorses.
Next, I added some “kickstands” — 2×3 strapping attached with a single nail, intended to pivot as the structure was tilted up into place.
Now, I could get under it, lift it some, then let it rest on the kickstands, which would drag along the ground and dig in to bear the weight when I stopped lifting. This allowed me to lift in stages, re-positioning myself for good leverage between each.
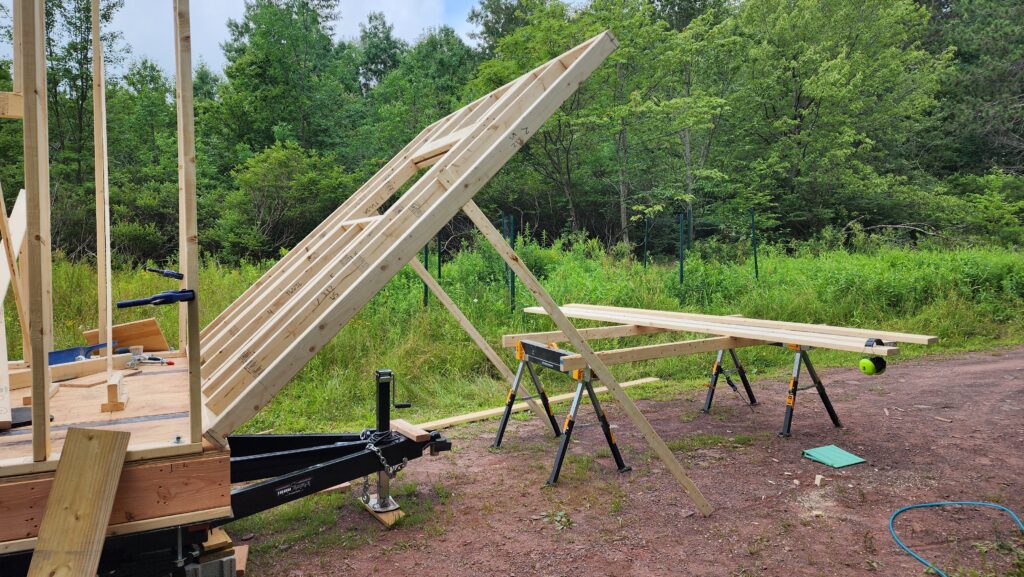
A few hoists like this until it was close enough to vertical that I could hop up on the subfloor deck and pull it up the rest of the way.
The kickstands were still helpful here, propping up the wall until I could get some clamps in place to secure it a little better.
After that, it was time to add some floor braces to hold the wall in place more securely until it was time to square everything up and get it all nailed together.
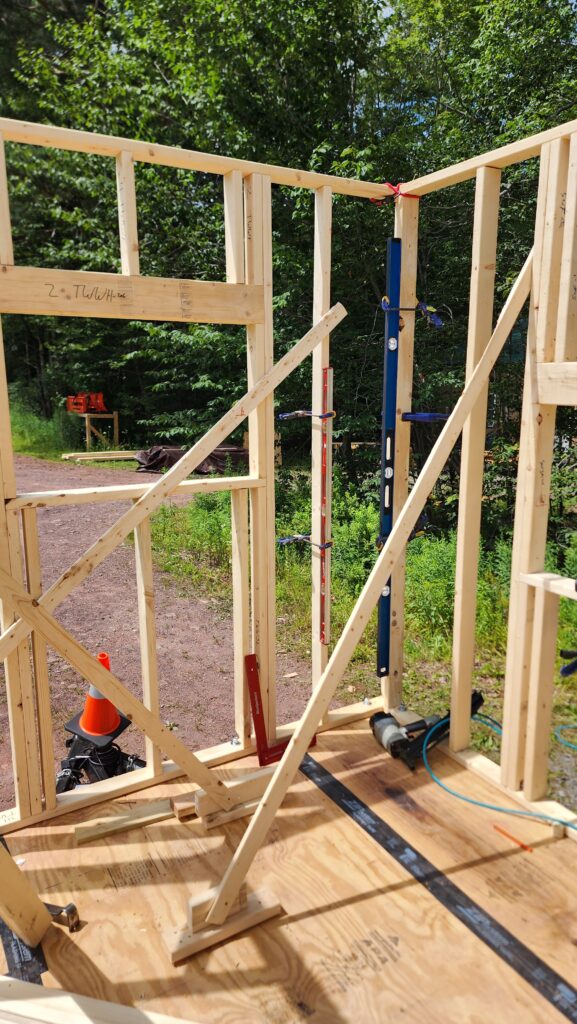
Later, I would release the floor braces and manhandle the walls until they were decently square and plumb, then nail strapping diagonally across to keep them square and re-anchor them. For starters, though, I just wanted the walls built and approximately in place.
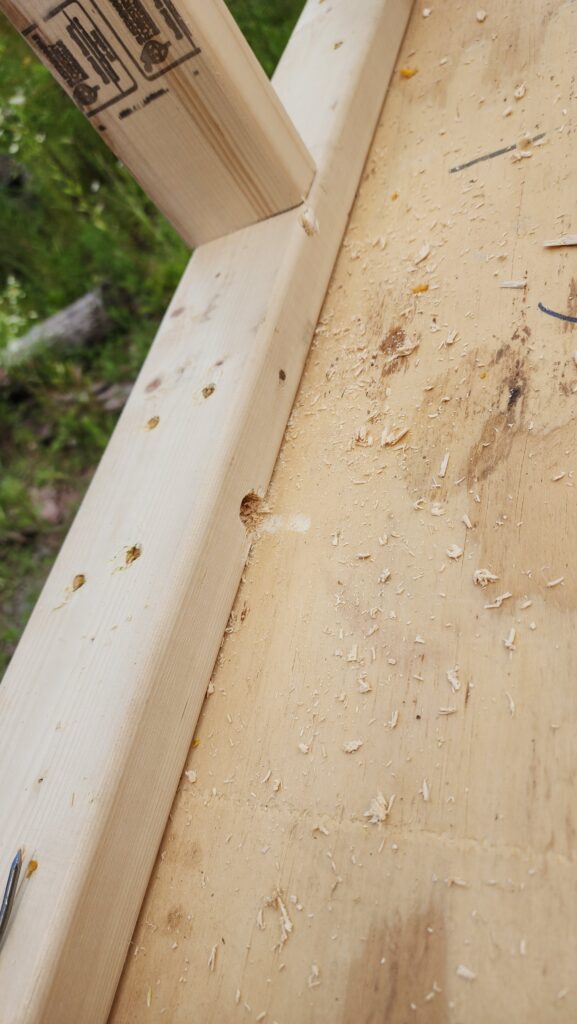
The flashing tape on the floor isn’t necessary for the floor, but it is necessary to keep rainwater out of the insulation below decks. So, too, these drainage holes I made in a couple of places on the wall feet.
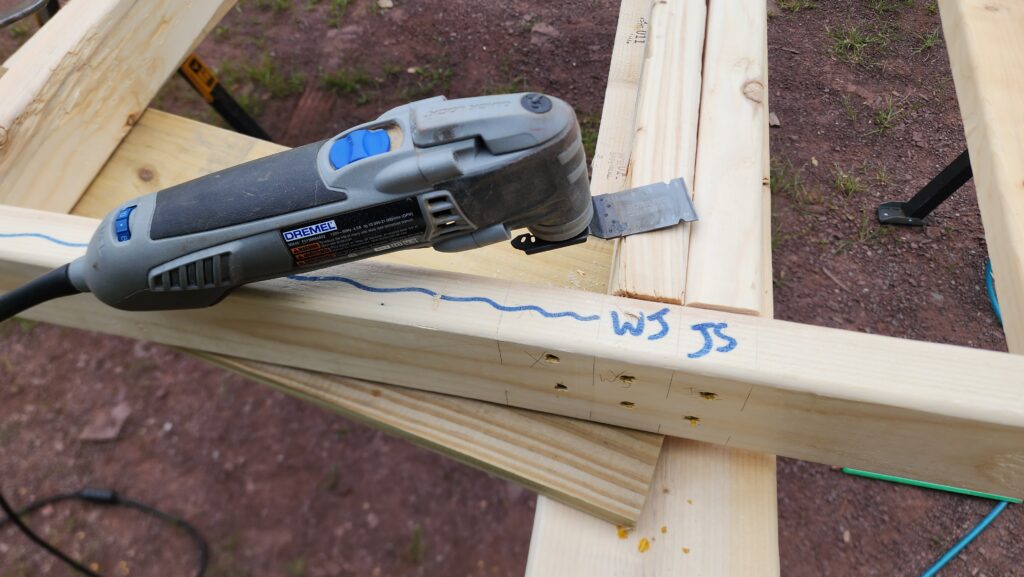
Assembly of the walls went pretty well for the most part, but were not without the occasional error. For those things that a flat bar and hammer can’t fix, there’s my trusty friend Dremel MutliMax. This guy can do plunge cuts and go right through nails with the right attachment. This made short work of removing the stud to the left of WJ that should not have been there (you can see the nail holes).
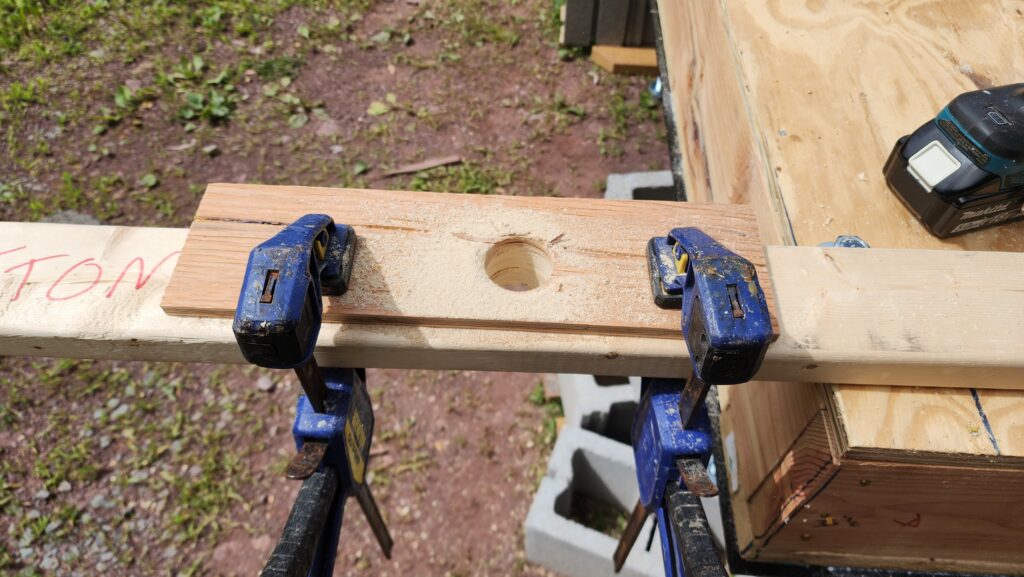
There was another case where a hole drilled to accommodate a nut and washer for the end of a threaded rod was made too small. It’s pretty much impossible to follow a cut hole with a larger hole saw, because there’s nothing to guide the larger hole saw. Unless you add something, such as this piece of plywood, pre-drilled with the larger hole saw. Clamped in place, it provides a guide for the larger saw until it can get purchase on the workpiece below, enlarging the hole just as I wanted, with some precision.
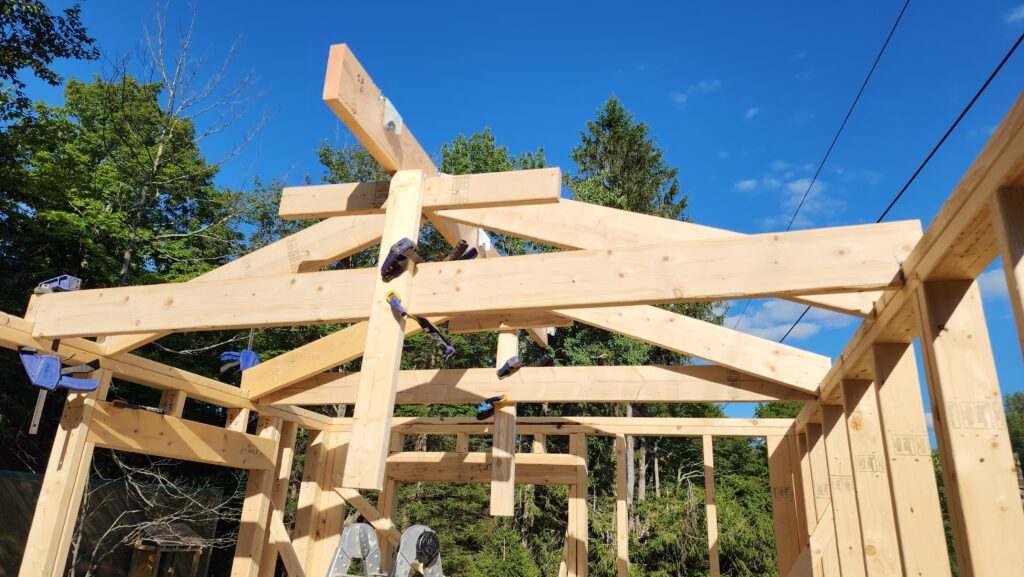
Next up, rafters! Unlike the main house, which has a rake roof (single slope), the club car will have a peaked roof. The reason for this is a little odd, perhaps. Originally, it was to have the same roof line as the main house, for consistency. When I tried to order metal roofing at that slope, however, all the vendors told me no. No? But I bought roofing just like this for the house. I asked why not. They said that the snow loads here dictate steeper rooves. The house was built somewhere else, you see… with less snowfall. That must have been the difference. Now, the house roof’s low pitch doesn’t seem to be a problem, though I do get ice dams sometimes, so maybe that’s it. But in any case, I couldn’t get roofing for the low pitch here and I’m here, so I needed to change something. I thought about making a single slope roof at a steeper pitch, but that made the rise across the structure too much for other reasons. So ultimately, I settled on a a mid-pitch (4:12) peaked roof. I think 3:12 was the shallowest roof I could buy parts for around here.
So, for a peaked roof, one either needs trusses or a ridge board. I went with ridge. But the tricky bit is how to place the ridge board before anything is up there to hold it in place? I put some temporary cross pieces in and made a couple of T braces for this. It was precarious, but held long enough to get a couple of rafters in place to carry it more securely. Shown here with four rafters (2 per side) in place. I didn’t dare take any extra time for photos while the ridge was held up just by those T braces.
This was relatively easy to do from the interior of the structure, on an A-frame ladder.
To shape the rafters, I spent some time to carefully lay out all the angles and cuts on a piece of hardboard and then cut that out as a template which I could use to trace the shape onto the 24 rafters without any further thinking required.
The collar ties (horizontal beams) serve double duty on this structure. First, they are nailed to the rafters to complete the triangle and prevent them from splaying under snow load. Second, they become the ceiling joists to which the ceiling material will be attached. To have them sit at the right height to match the slope of the roof at the eaves but still be wide enough to have the necessary strength, they needed a notch. A whole template seemed excessive for that, but a little block just the size of the notch was perfect.

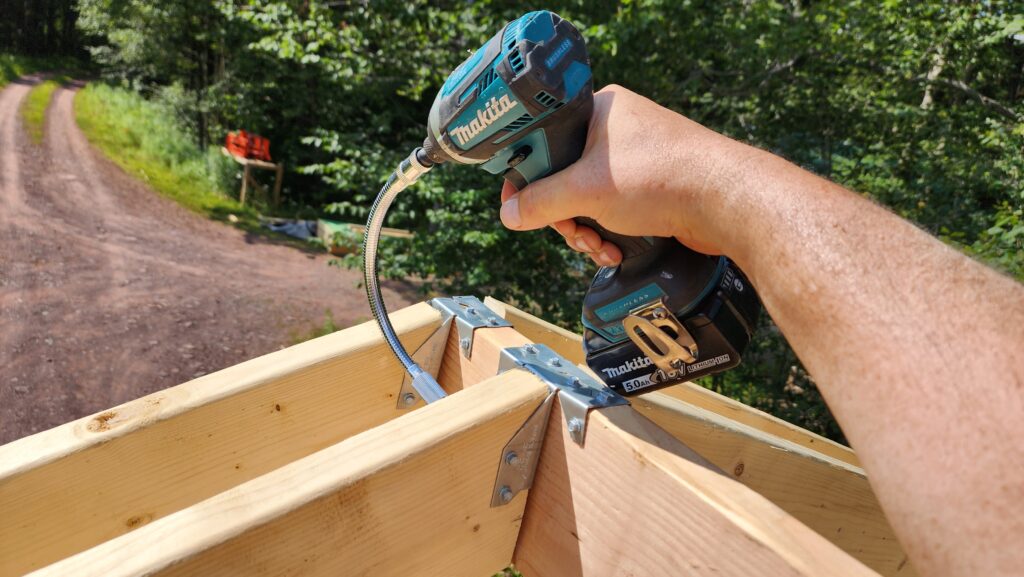
Sometimes, driving the screws for the rafter hangers required some creative transmission of torque. Fortunately, I have a tool for that! Hello, flexi driver shaft!
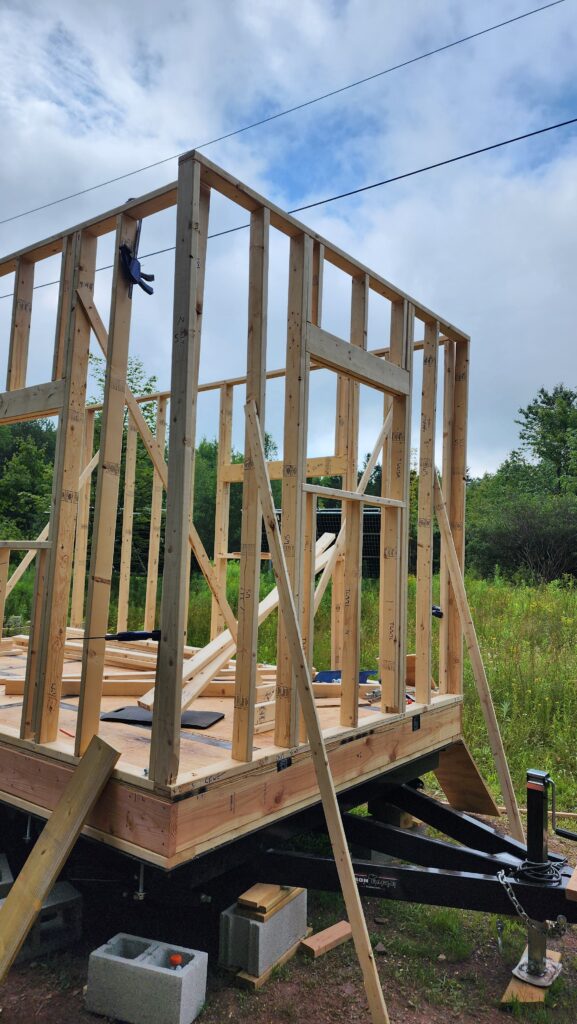
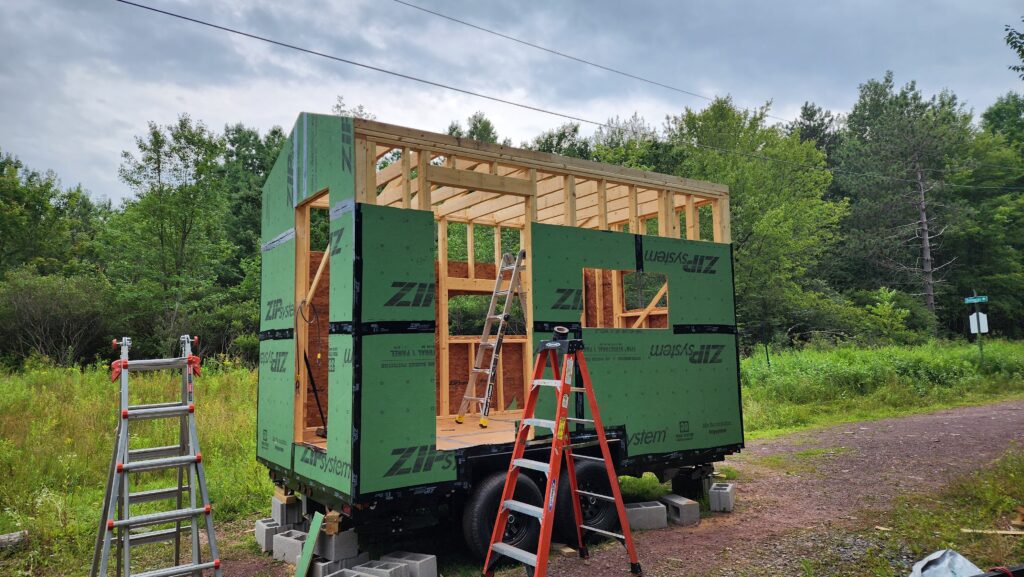
And then it started to look like something!
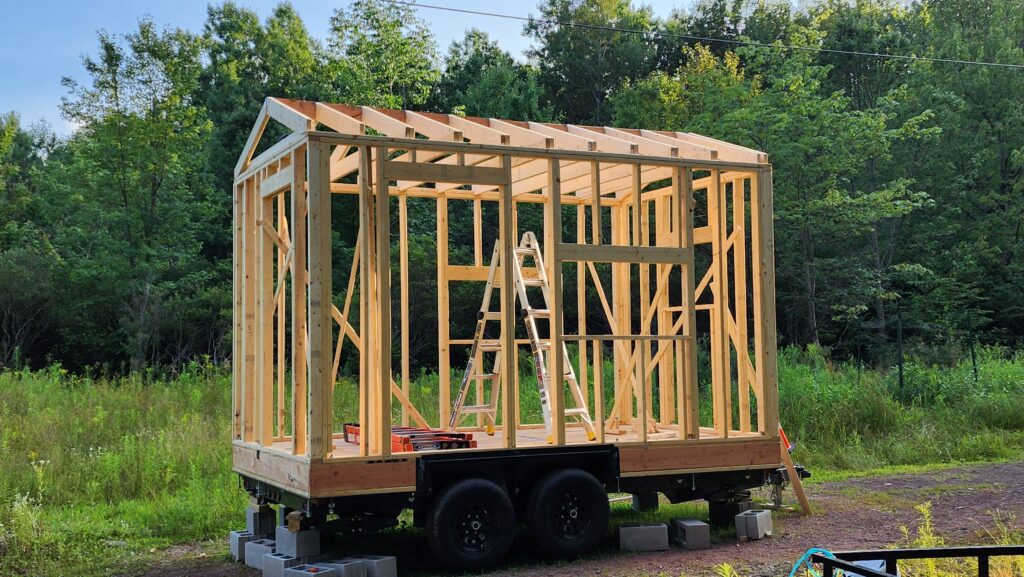
You can also see the doorway (foreground wall, roughly straddling the left wheel) and how it had to be raised above the wheels in order not to interfere with them. Moving the door all the way to the left was not an option, structurally, and I didn’t want it there aesthetically. Furthermore, even in the extreme corner position, the doorway couldn’t be wide enough for a full size (36″) door. And I’ll be damned if I spend all this money and effort to build this club car and the doorway is too small to admit a Big Comfy Couch!
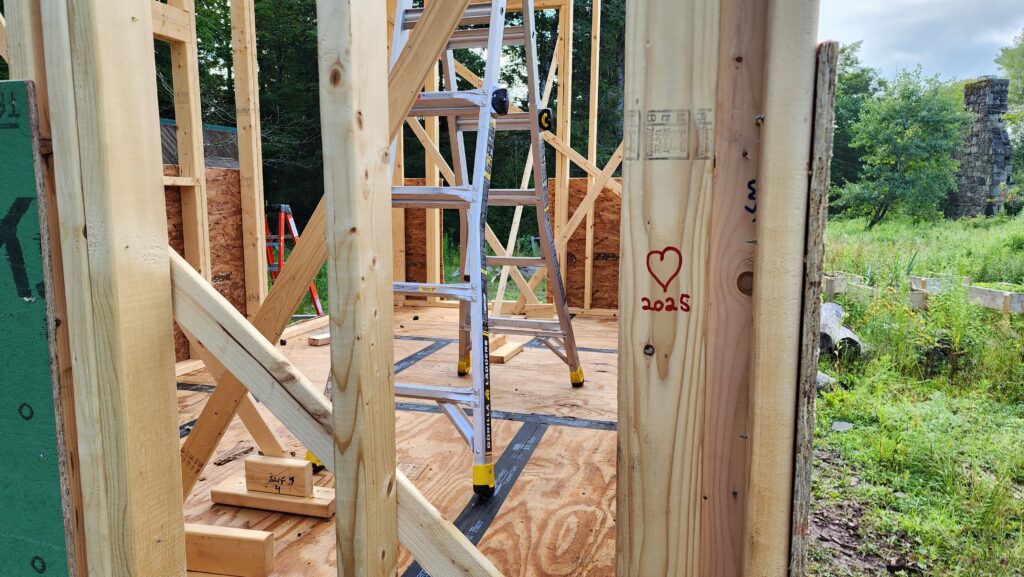
I did continue my tradition of putting little blessings on the structural parts as I went… such as
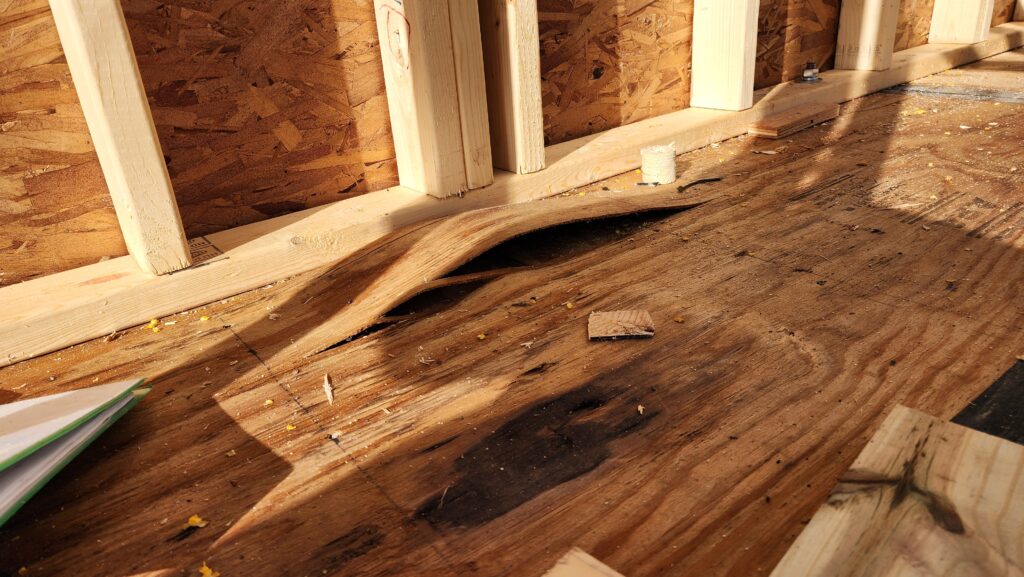
I’m quite eager to get this closed up and with some kind of roof on – even just the decking – because even though there are drainage holes, water still stands on the plywood some and that’s no good for the plywood. For the most part, it takes it ok, but here, for example, it didn’t.
It’s far safer to work on the roof when the walls are in place (something solid to lean a ladder against…), so I started with the wall sheathing.
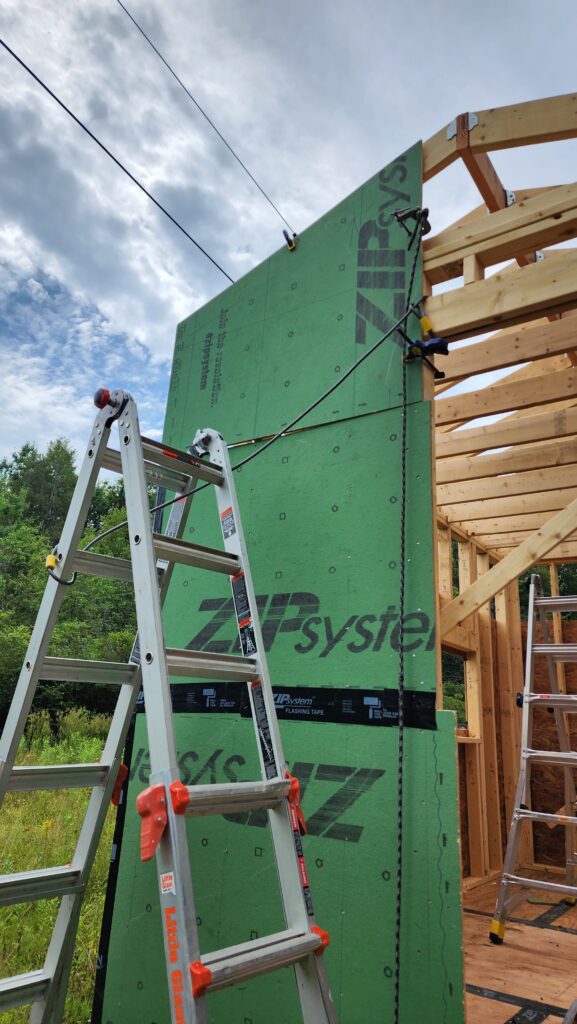
For safety, I tied the top of the ladder to the structure whenever possible. Handling these heavy boards at ladder-top is not for the faint of heart! I did chop the boards down to manageable sizes, but even so, they weighed 20-30# each, which is definitely enough to cause me to lose balance if I’m not careful. So I was careful.
To even get the boards into position beyond the lowest course, I used this simple technique:
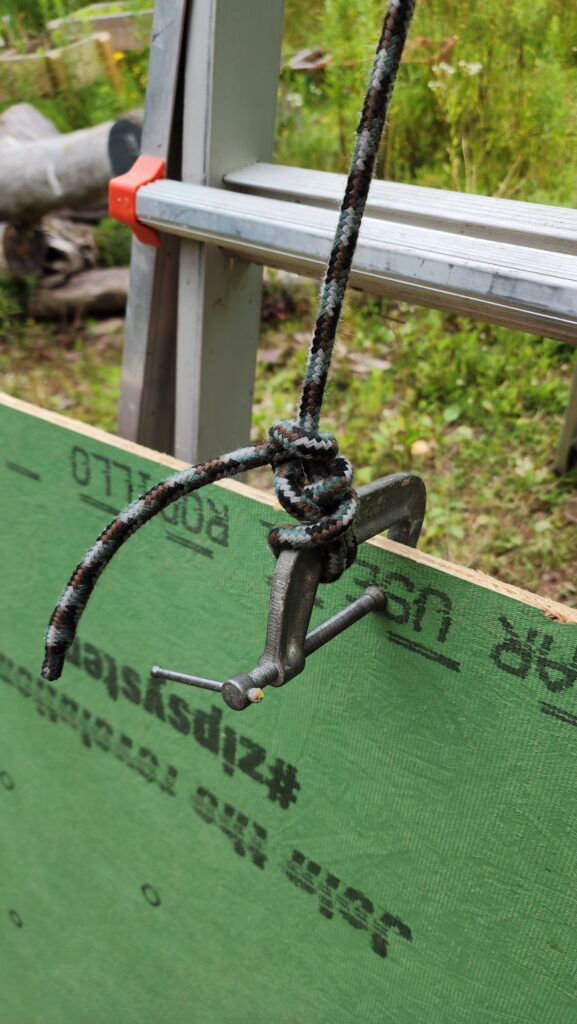
Tie a clamp to a rope and then hoist it up gently, once I’m in position. It was still pretty treacherous. The low edge of the roof is about 12ft above the ground, for reference.
I got about this far before I decided that this was just too treacherous… and there was no way I was going to be able to do the roof safely from just a ladder.
I tried building a small scaffold using ladder jacks, but that just didn’t work out. What I really needed was the right tool for this job, so I invested in one.
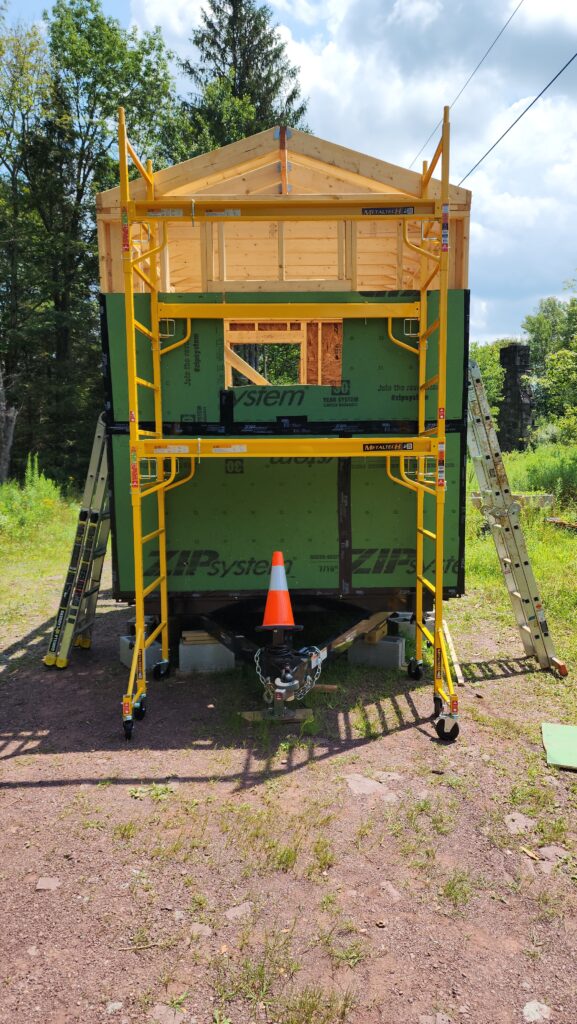
This was much safer and faster working than the ladder. The wall sheathing was completed without much fuss at all thanks to the proper scaffolding.
And you know, the ZIP system is decently zippy, but the flashing tape… well…
… it was rock-solid steady. Not a single flash. Not even once.
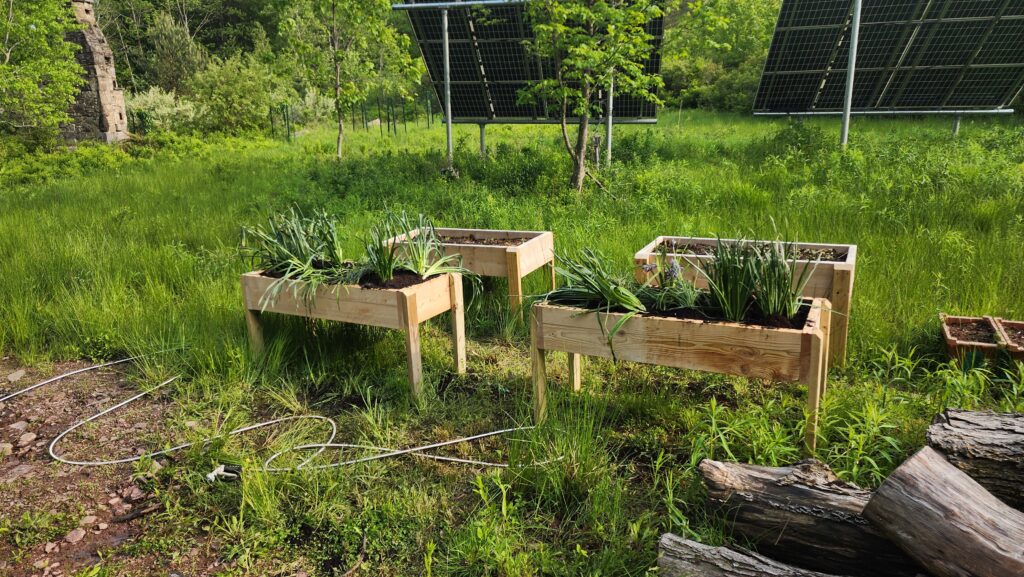
A side project — because the club car will need to be placed over about 1/2 of the spring garden, I also needed to move the spring garden. I moved it from the ground to these planters, which you can see are at hip level. This makes weeding and general maintenance much more friendly, too. No more hands-and-knees nonsense.