In case you missed it – this year, 2021, is the one where I finish the HomeBox, have it driven (no way this is going to be the first thing I ever tow!) to the homestead site, and actually live in it!
Needless to say, there’s some work ahead! It’s not as much as you might think, but there’s still plenty. With most of the utility infrastructure done, some of it totally done, and the overall structure having proven itself weather-worthy for a couple of years now, what remains are the details of the interior and they’re going to go comparatively quickly. Why? For starters, there’s less “empty canvas” wondering and pondering to do. Spaces are defined. Things are what and where they are, which constrains design and thus actually makes it easier to figure out what to do simply because there’s fewer things possible. Secondly, my workshop as well as my skills have been improving along the way. Things don’t take as long as they once did. When will it be done? The goal is end-of-summer.
HomeBox Hiatus is over and I’m back at it, starting right now. There’s no particular order to what I work on next other than the influence of the weather: it’s still way too cold to be building things outdoors so I’m spending time on design. There may be some warm days before spring — this is ever more common as climate change settles in — during which I may do a little building on the house, but major physical work will wait until spring. There’s still plenty of designing to be done, however, and that’s where things start today.
Originally, the thought for the BeDeLiA was that there would be a couple of cleverly-built benches with removable backs such that one back could be hung on the wall and become a table/countertop and two backs could be strung up between two bases to become the bed. There were solid reasons that motivated this concept but ultimately we decided that having to assemble and dress the bed every night was undesirable. Okay, then, what other options are there? Well, plan B was to have a Murphy bed. Now Murphy beds reserve a significant amount of wall volume when stowed which is why it was plan B instead of plan A, but it turns out it can be made to work without seriously compromising the space.
Let’s start with a model of the BeDeLiA as-built. Unlike the CAD model of the whole house I’ve shown you before, this single-room model is based of real-world measurements as the room was built so it’s much more accurate. The whole-house model does not take into account construction errors and slight on-the-fly revisions. This model is much closer to exact. The rafters shown are the floor joists for the Cozy Loft. The solid vertical panel is the end of the tansu stairway. I gotta tell ya, I’m really happy with having put in real stairs to the loft. It’s so nice to be able to just walk up there without having to do anything. Just go.
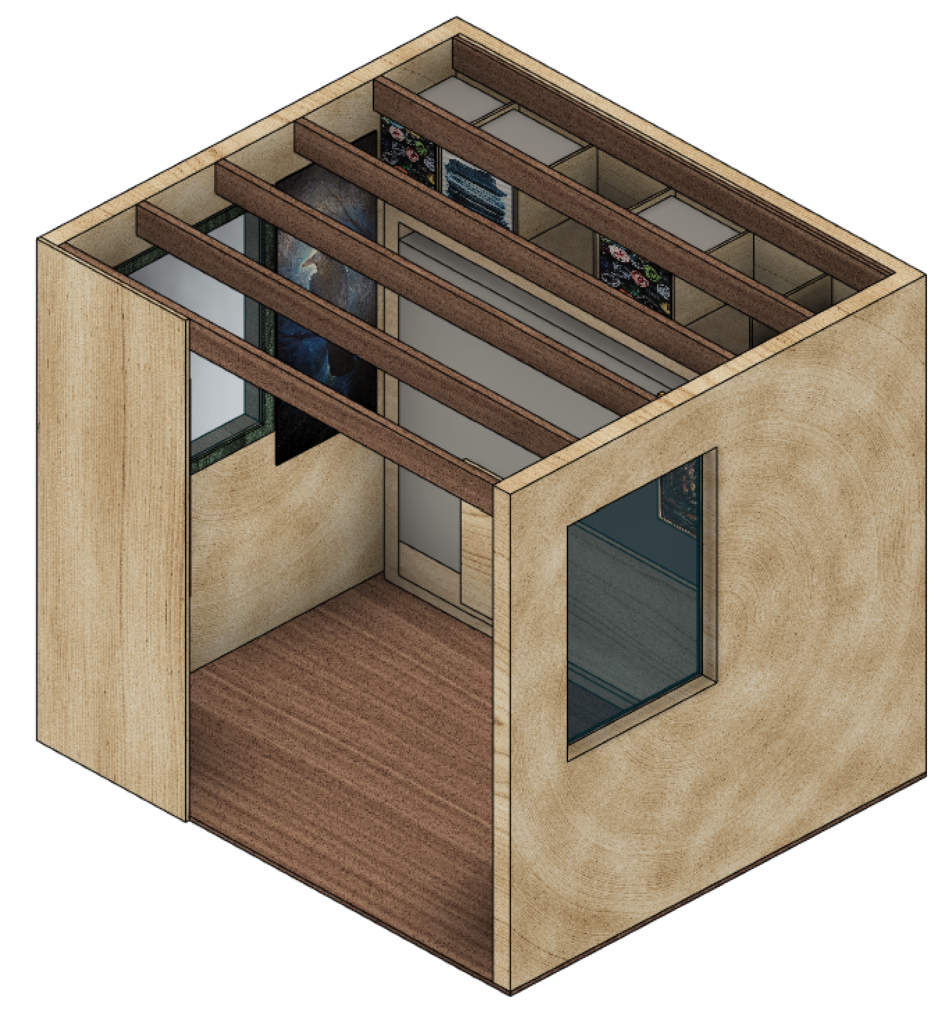
No need to inspect that model too closely. I have details to share with you next. I’m showing you that image so you can see how everything fits together, not so you can see everything clearly.
Here’s the view with the back of the stairs cut away and the bed down. In reality, there will be some fold-down legs that support the front of the bed and it won’t be a solid gray block but rather a frame and a mattress, but for today, a solid gray block will serve as a useful approximation.
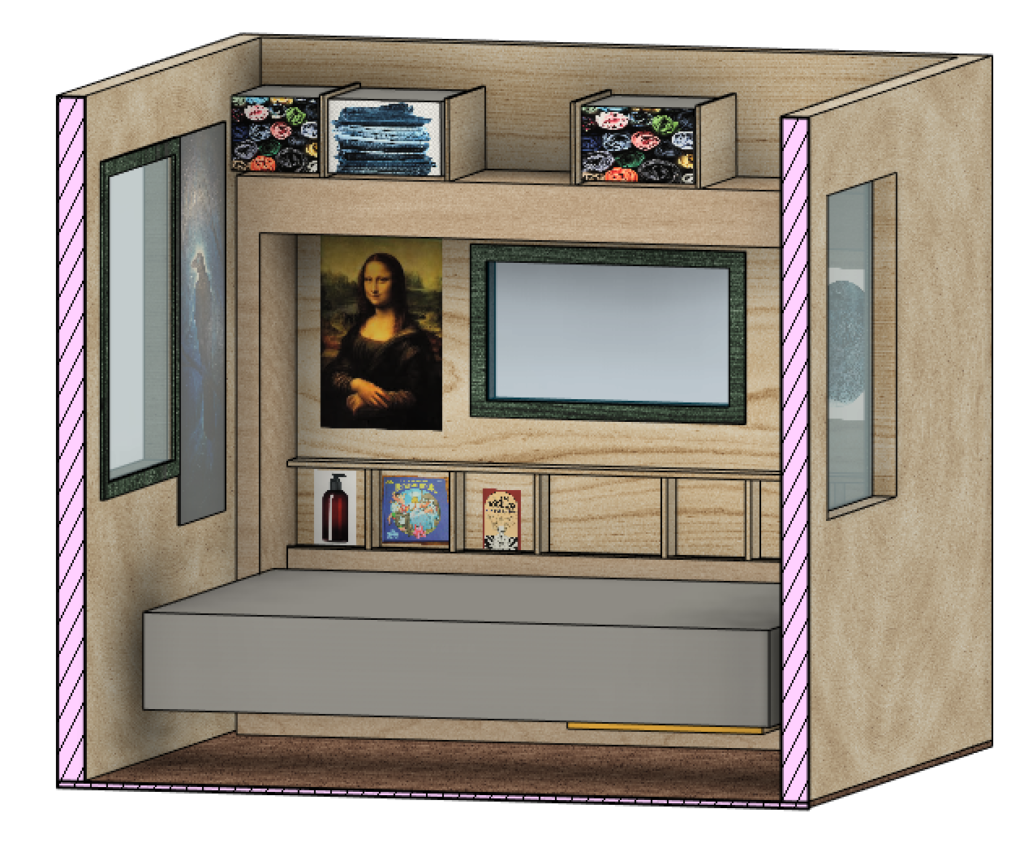
First thing to notice: there’s space above the bed-cabinet. That space is perfect for efficient clothes storage. Marie Kondo would be proud 🙂 There’s actually a fair but of volume up there, especially when you count the between-rafter space, which you should, because it’s available (even though I did not show it used). The exact profile of the bed-cabinet is not yet known – that will emerge after I read the instructions that come with the hardware kit and figure out exactly how this is all going to happen.
Second thing to notice: the bed in the stowed position does not actually touch the wall! I’m not sure based on looking at the promotional images for the hardware kit whether it’s intrinsic to the hardware that there’s some space between the bed and the wall. If there is, I’m using it. If there’s not, I can definitely stand off the whole project a few inches to create that space. Just a few inches of depth lets me install a shallow knick-knack shelf that doubles as a night-stand for the against-the-wall occupant of the bed. That’s enough room for a cup of water, a small bottle of massage oil, a book, or whatever. That depth also provides a secondary place for hanging some artwork. Yes, the artwork is only visible when the bed is down, but that’s fine – it’s a neat way to transform the space from day decor to night decor.
Third thing to notice: the window! The window in the tail of the house was designed in when I still thought there were going to be convertible benches here instead of a Murphy bed. The bed does obstruct the window when stowed, which is not delightful. The other two windows in the BeDeLiA are large, though, and in conjunction with the sky lights and the openness of the rest of the plan, there’s still lots of nice natural light in there. And when it’s bed time, the third window helps to open the visual field and can provide an easy way to get a zephyr of fresh air in the winter.
When the bed is stowed, the dining table / counter top / desk can fold out for use. The kitchen won’t really have counter space – the sink and the stove will consume nearly all the horizontal space (kitchen design is next) – so there needed to be somewhere to support food prep that was close by. The table will do just fine. Any meal that need more prep space than this is also too big for the tiny kitchen to cook!
The back of the bed is also a nice place to hang some art.
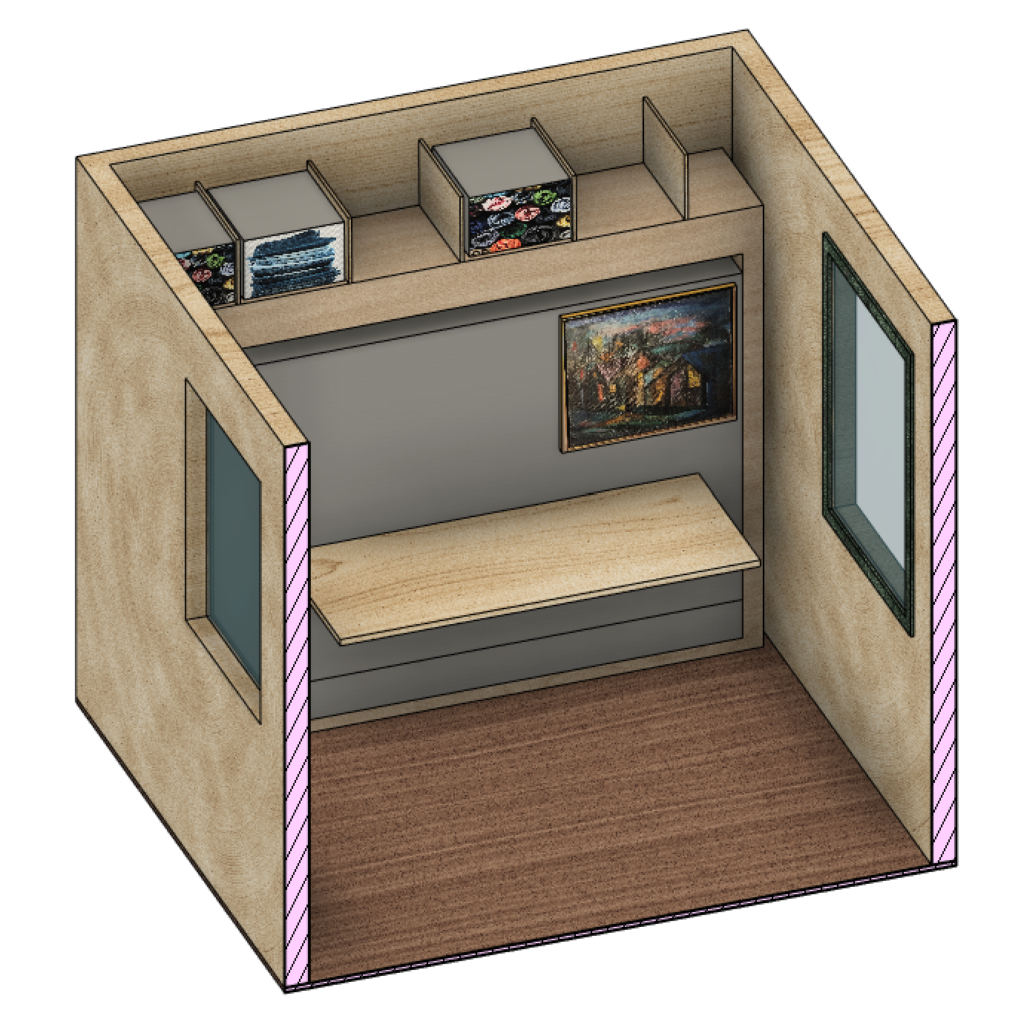
While I’m not an avid TV-watcher, there is certainly a place for video entertainment in modern life and somehow that needs to fit into the tiny house somewhere, too. I thought about putting the TV on the back of the bed, in a sub-cabinet so it was only exposed when in use, but that compromised the size and placement of the counter-desk-table. It also meant that a TV viewer would be in the way of food prep. It also meant that a TV viewer necessarily dominated the entire first floor with what they were watching. No bueno.
My solution to this was to move the TV to the Cozy Loft. My existing TV is only of moderate size (46×27) by modern standards, but it’s pretty big for a tiny house. To have it not absolutely dominate the space all the time, I figured mounting it to the ceiling and having it flip down for use like this:
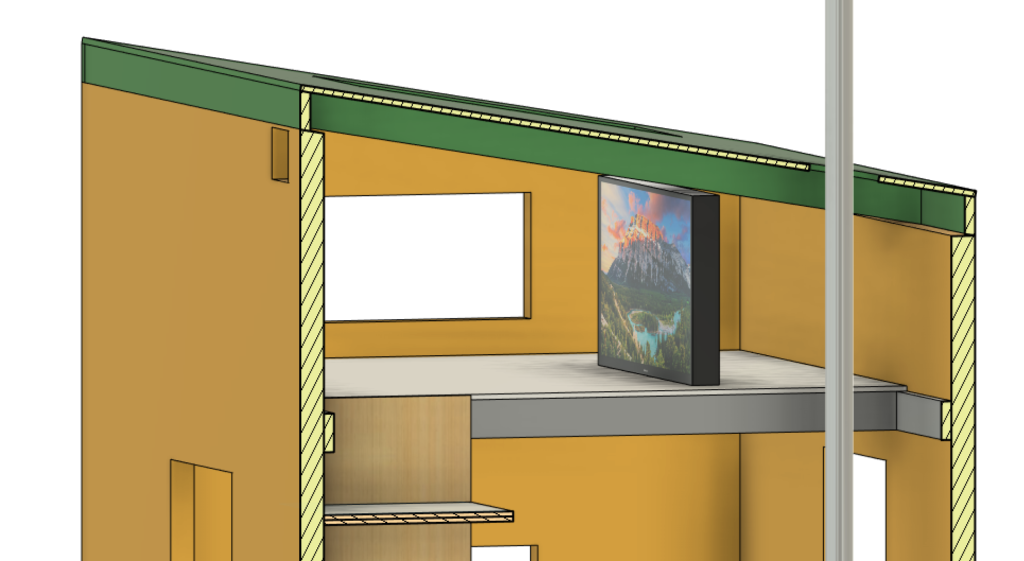
This still dominates the space when it’s down and although when I first placed it in the model it looked like it fit, in point of fact it encroaches on the Cozy Loft’s skylight by a good 8″ or so. Shifting it away from the sky light means it would hang out beyond the deck of the loft. While technically nothing bad would happen if it did, it would also look terrible that way and be a little awkward to watch given the skew angle from the seating area.
The solution may well be to replace my TV with one more modestly sized. The one I have was perfect for the room I had for it when it was bought and it does just fine in the house after that, but it’s not a tiny-house TV and that’s just how it is.
Since we stream everything now anyway, there’s always the option of just using a laptop for consuming video, but there’s something nice about a larger, more immersive experience, even if it’s not quite that large. I like the fold-down concept so what I think will happen is I’ll just trade down to a unit that fits nicely against the ceiling without obscuring the skylight.
I put together a 4-1/2 minute narrated virtual tour of the BeDeLiA and the Cozy Loft for your viewing pleasure.
I’ll let this marinate for a bit and bring my attention next to the kitchen, now that its space is defined, as well. Things get interesting in there – gotta figure out where to put a lot of things in a little bit of space.