What do these things have in common? Not a lot, really, but they all factor in to today’s update! Pretty random, I know, but that’s how it goes sometimes.
One very interesting thing I noticed while investigating the water heater rainwater ingress problem was that I felt a certain affection for the system I was investigating. Really! I don’t have kids of my own nor do I have any parenting experience, but what I felt I would imagine is similar to how a parent feels as they attend an injured child. It wasn’t “my machine needs repair” or “my structure needs maintenance” — it was “my baby isn’t well and I want to help make it better”. I mentioned this to a (parent) friend of mine who pointed out that in a very real way, the HomeBox is indeed my baby. True enough. With very few exceptions, every board, every wire, every pipe is there because I put them there. It’s my design, my doing. The sweat stains and occasional blood droplets are all mine. It’s been the center of my life since the project started. So yeah, my baby. No surprise I’m feeling like a parent as I care for my sick baby. Still, it was interesting to notice this as I was taking the cover off the water heater to see about the rain. It was analogous to parting the hair on your child’s head after they bumped it to see if they were bleeding, or to roll up a sleeve to get a closer look at that bruise. No judgement, no panic, just triage to be followed by whatever attentive care was necessary.
So about that water heater. After adjusting its angle and re-sealing the vent/intake, I went up on my ladder with my squeeze bottle of water and pretended to rain at it. Some on the roof, dripping down, some directly on the side of the house.
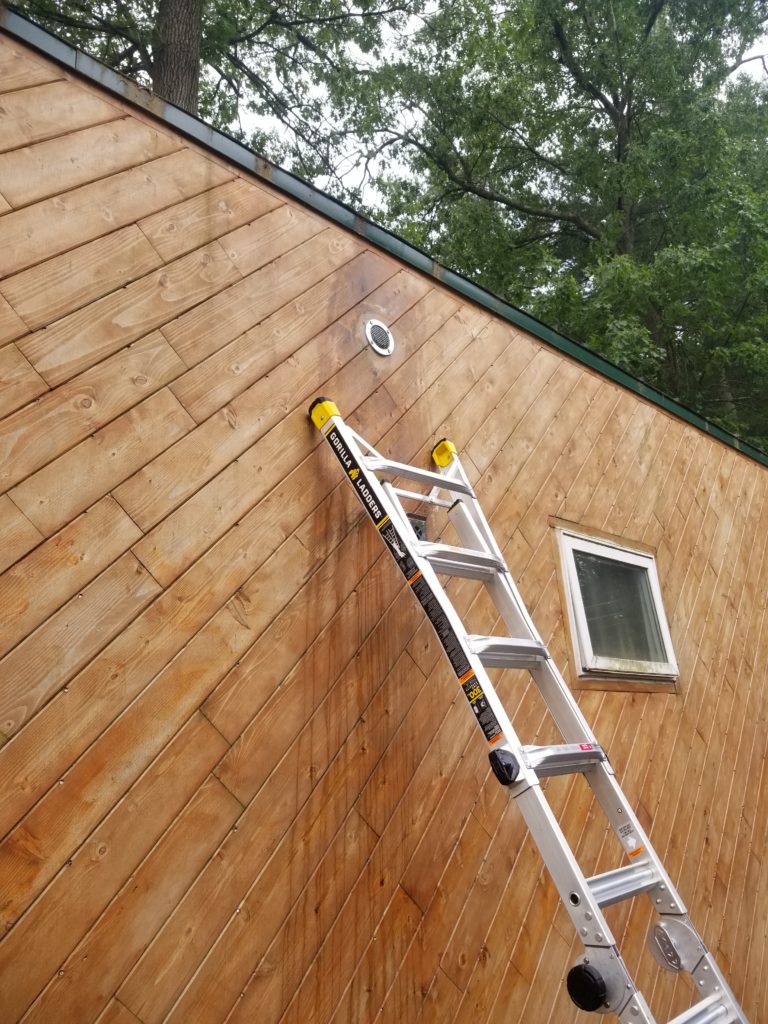
The water… did not come back. It went into the house and therefore into the water heater chassis.
No amount of adjusting the position of the water heater itself changed that. But WHY? I removed the vent and put my level in the hole.
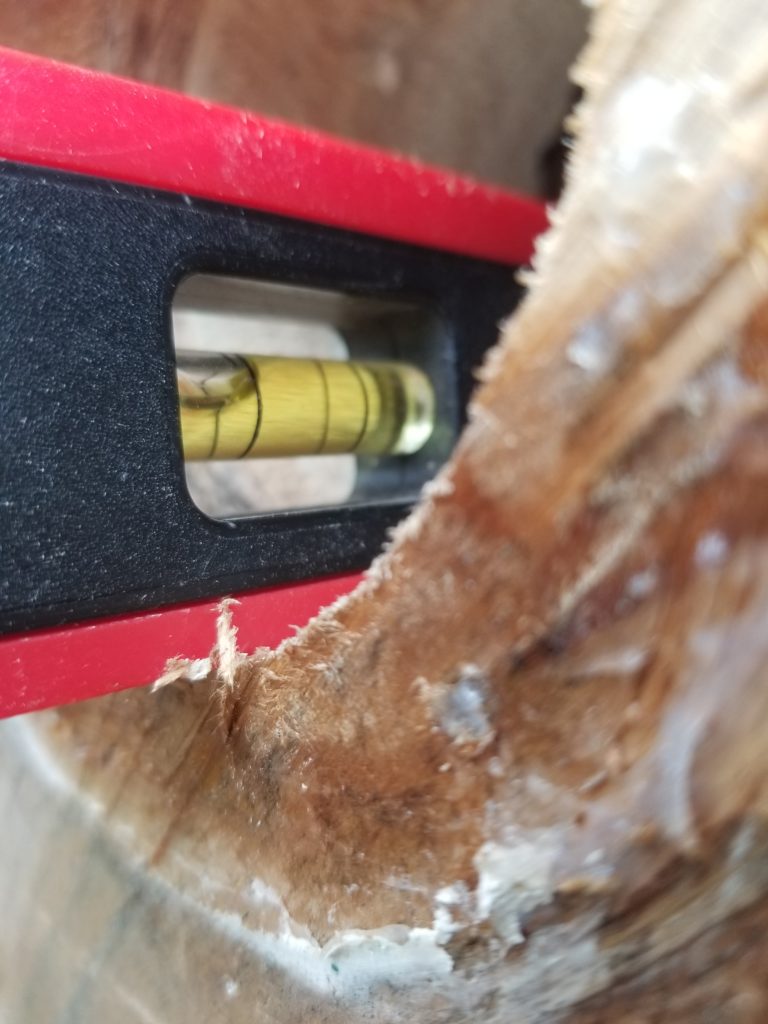
Shit! The hole itself is pitched into the house! Sorry for the extreme close-up, but I was at the top of a ladder and only so much photographic composition can be safely done up there. What you see is the bubble toward the outside of the house, showing the slope of the hole proceeding downward as it goes into the wall. Crap. I need to excavate the hole to make it level, or better yet, slightly pitched the other way to affirmatively drain any water that might get in there.
This is going to be a problem because the vent trim is just slightly larger than the hole. If I dig out the hole to change its angle, the trim might not cover it. But that’s another problem. First, I need to fix the angle, then worry about aesthetics. But before that can be done, something else must first be done: remove the water heater from the other side of the wall so I can get to the hole from the safety of the loft rather than try to work it from the top of a ladder (a very unsafe place to be using power tools).
It turns out that the rainwater problem was considerably more severe than I thought. There was more than just a water stain on the edge of the plywood panel where the heater sat. Removing the heater revealed…
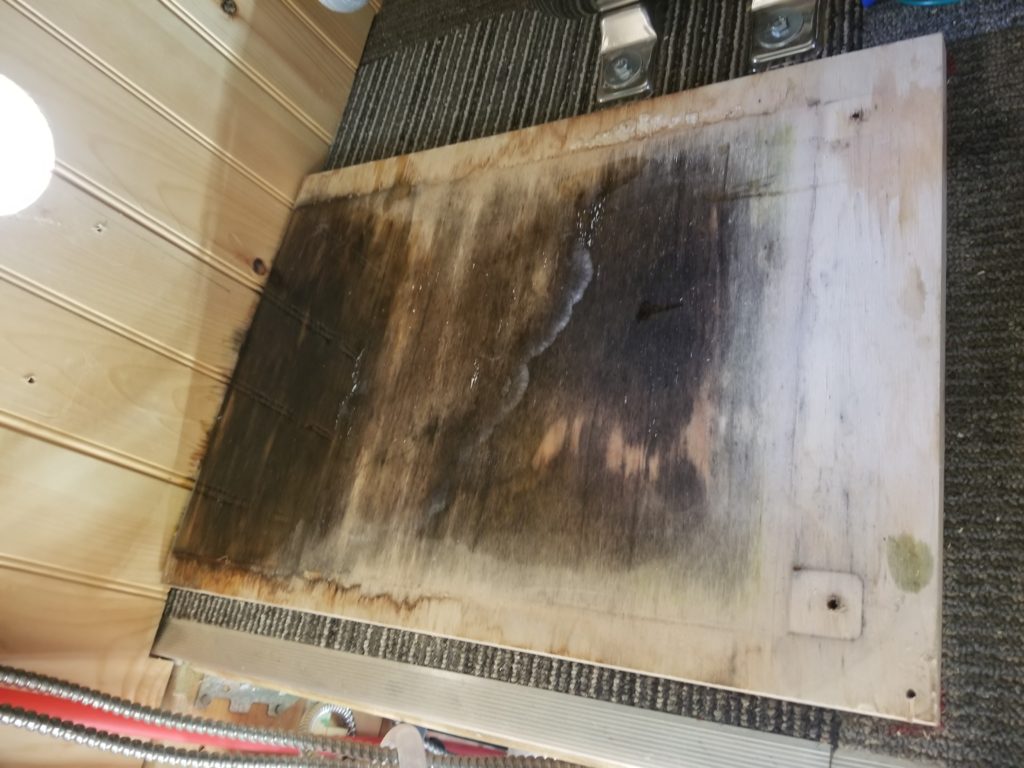
MOLD! Time to leave the loft to get some PPE before I breathe in too much of this stuff, come back and mitigate.
Masked up and begloved, I return, remove the panel, and inspect below.
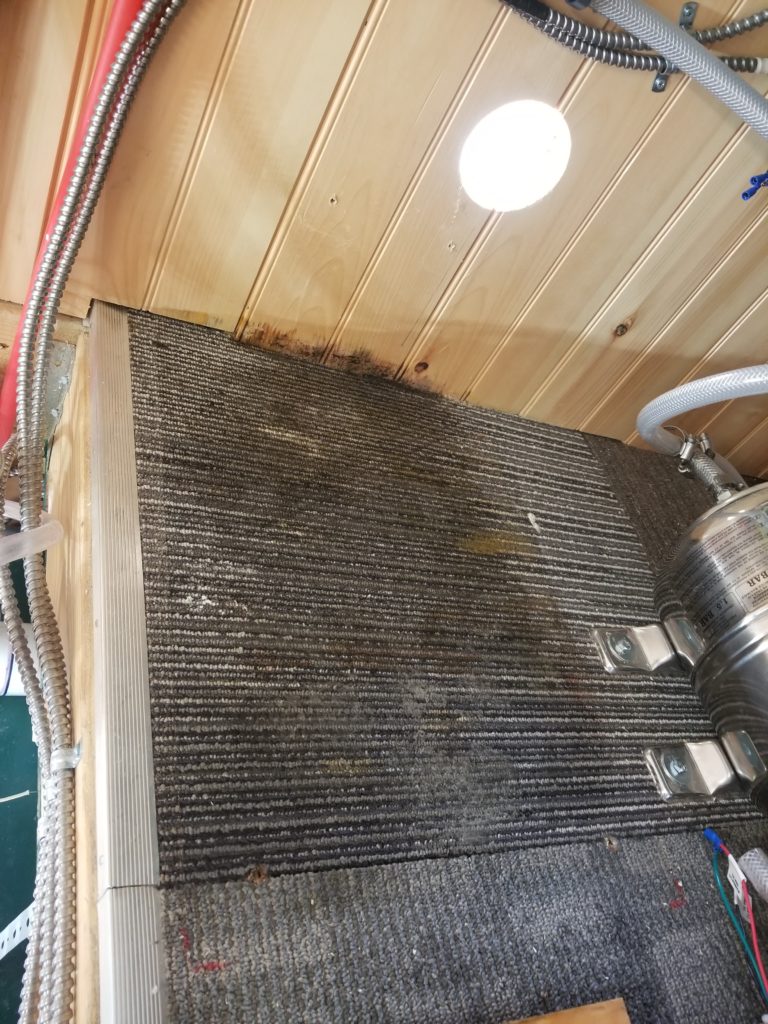
Good news/bad news. The bad news is that the carpet tiles are also a little moldy. The good news is that they’re only a little moldy and it seems to be highly localized. The other good news is that the carpet tiles are carpet tiles and I can just peel them up (and I have spares). I take up two and have a look.
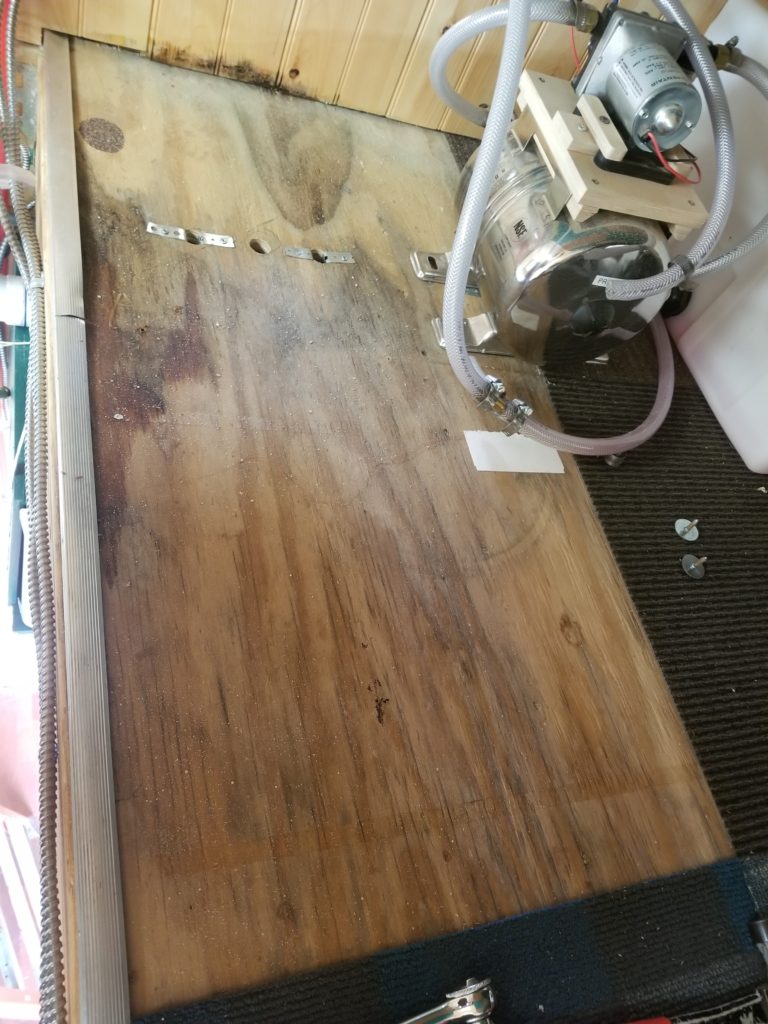
Okay! Not so bad! A little growth on the wainscoting, just a starter colony of mold on the subfloor. A little bit under the metal edge. Definitely within the realm of mitigation – no rebuilding required. The carpet tiles have a rubber backing, so most of the water stayed in the carpet fibers. Only where it saturated the carpet and got to the edges did it flow under a little bit, and only a little bit. Thank you, carpet tile rubber backing! I return with a bleach solution and scrub away the mold. Then I leave it to dry for a day and do it again for good measure. I’m going to leave it dry for a few more days before covering it up with fresh tiles and re-installing the water heater.
Meanwhile, I can get to work excavating the vent/intake hole to correct the pitch. It’s tricky business, since there’s nothing to really guide the hole saw (usually, it follows a central drill bit but here, there’s nothing for that drill bit to engage – the hole is already a hole) other than the walls of the existing hole, which are wrong. I fit the hole saw to an extension rod, aim it into the hole, force a slight downward angle and just go for it. There’s really nothing more I could do that would have better control given all the things. I wind up doing a decent job of re-grading the hole through the wall, as evidenced by this more-or-less straight-on shot, showing the floor of the hole sloping forward (toward the exterior).
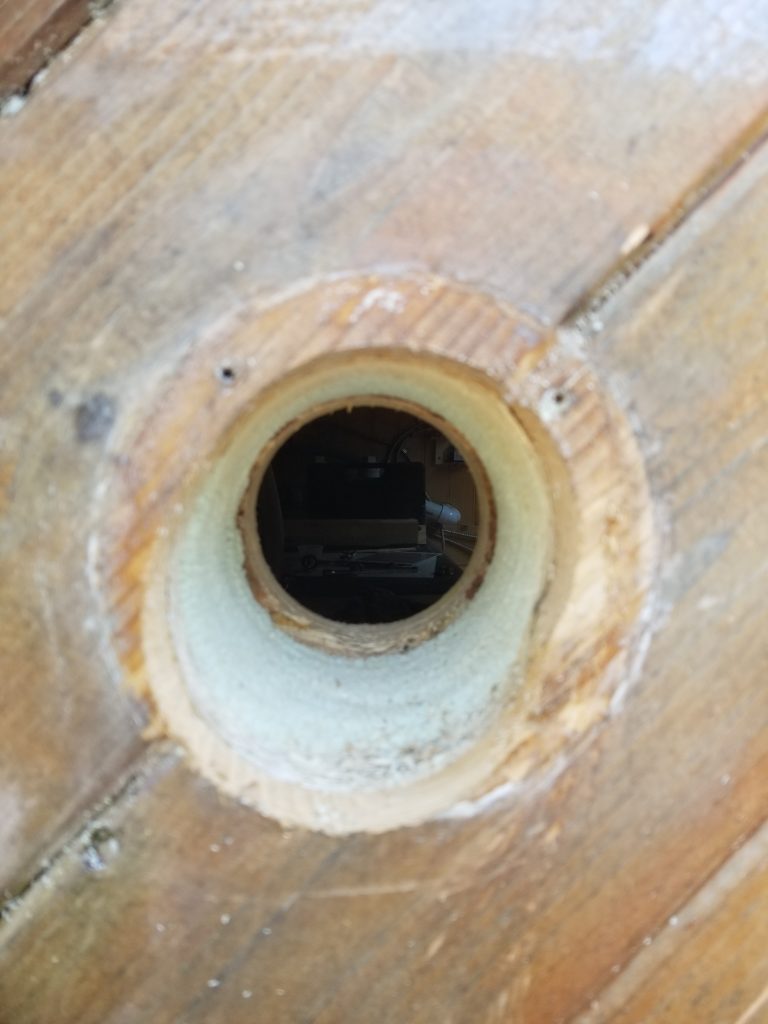
Okay, progress. How does the vent assembly fit?
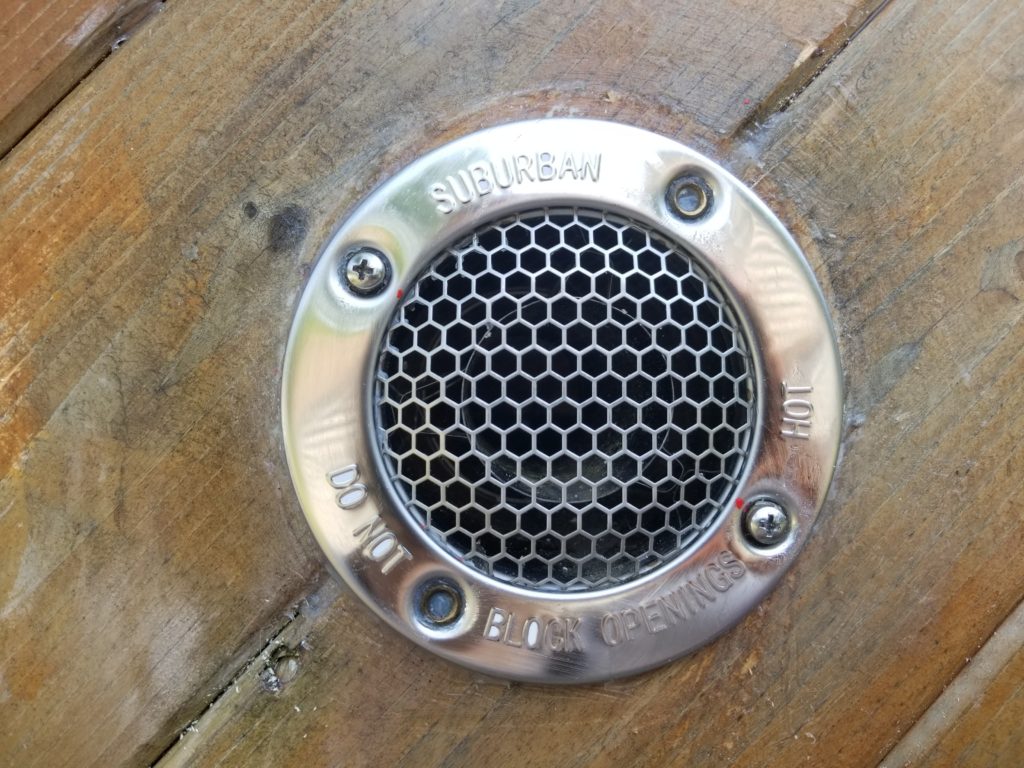
Well, good news/bad news. The good news is the hole isn’t bigger than the vent trim. However, it is bigger than the perimeter of the screws. I manage to get two of the four screws to engage with some wood, but the other two are now over thin air. The silicone sealant is also a decent adhesive, so I load it up, screw it down, and hope for the best. I go inside and check the angle.
The angle isn’t great! Why? The face of the wall is now driving the position of the vent and the wall face is (mostly) vertical. I really want this pitched outward a little. So back up the ladder I go, loosen the screws a little, then back into the loft to do this:
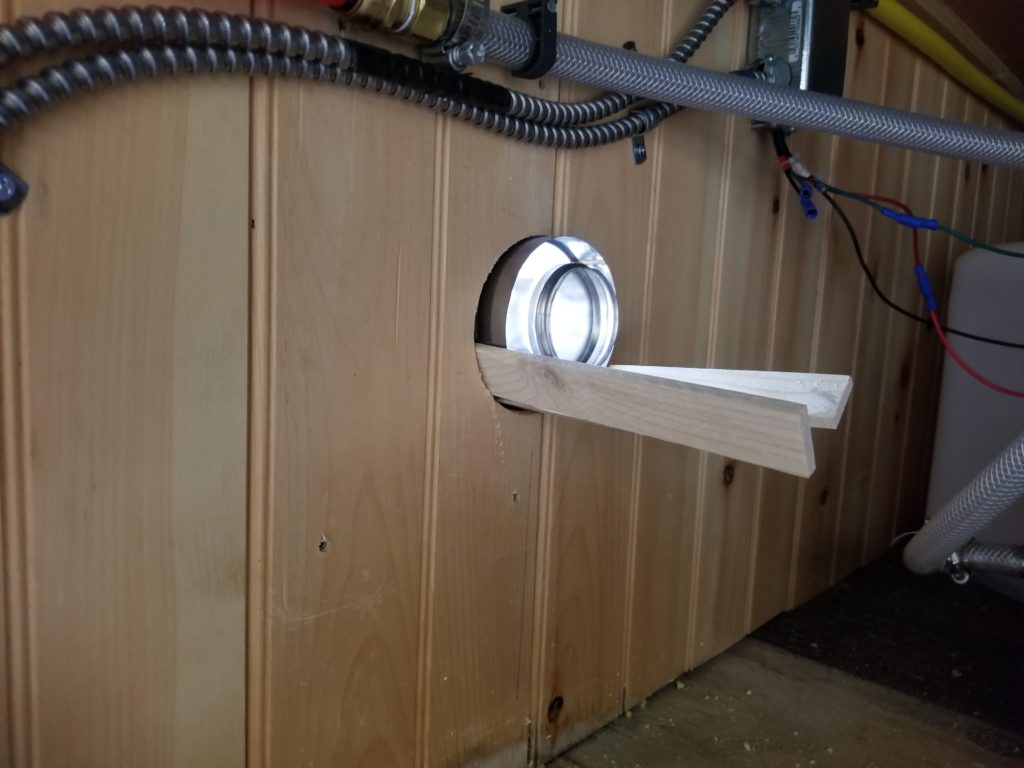
Then back up the ladder to gently snug the screws back, but not to disturb the angle, and gob on some more silicone where new gaps have been created.
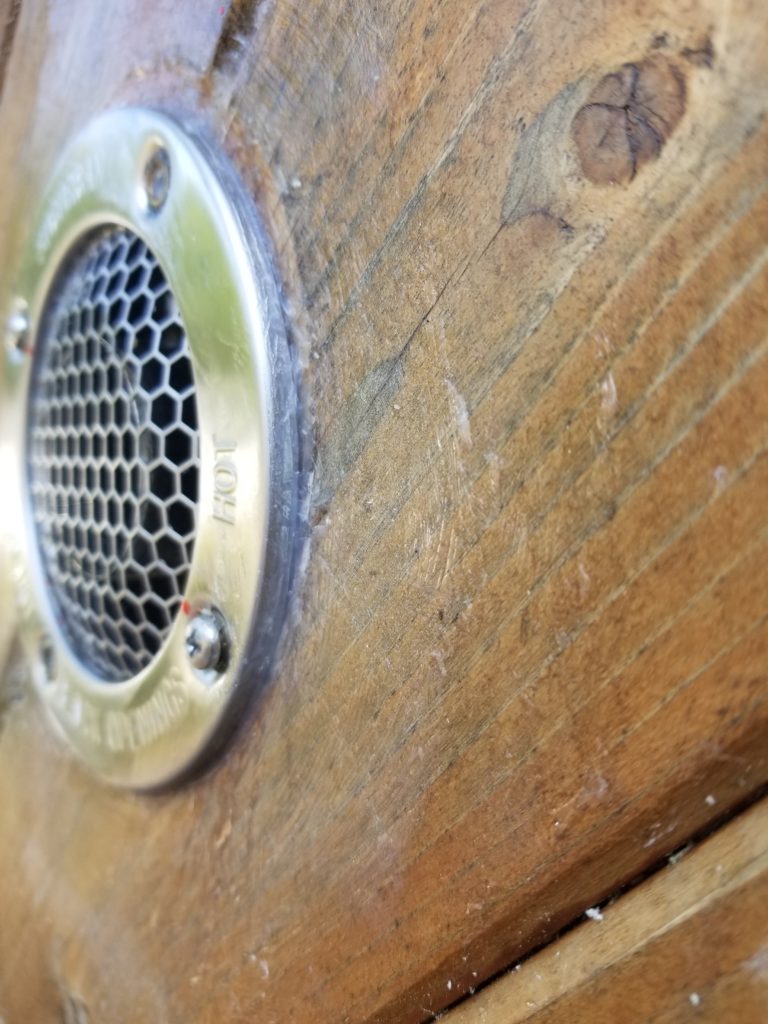
There we go. The top is now proud of the wall and the bottom is flush. Pitched downward/outward, as desired. Again, sorry for the photo – a lateral pic flush against the wall from the top of a ladder is… challenging. You should be able to see the thickness of silicone (cloudy white) increase at the top and disappear at the bottom, though, showing how the vent is seated on the wall. The shiny finish of the trim makes it hard to discern what’s silicone and what’s chrome with some silicone smeared on it, but trust me: the angle is good 🙂
I will figure out how to mate the water heater to the slightly pitched vent when this the floor is all dry and the silicone is all cured. There is some flexibility to the inside pipe and the vent fit has some tolerance, so I’m thinking it won’t be too hard to do this.
I almost forgot! One fun bit about dismounting the water heater was that it was still full of water! Well, full of antifreeze. How to drain it without making more of a mess in the loft? I came up with this idea – some shop-vac hose placed under the port and routed to a bucket carefully balanced atop the step ladder and the edge of the loft. Not a great answer, but it worked and I didn’t have enough of the thick hose that normally would mate with these fittings to serve as an impromptu drain line.
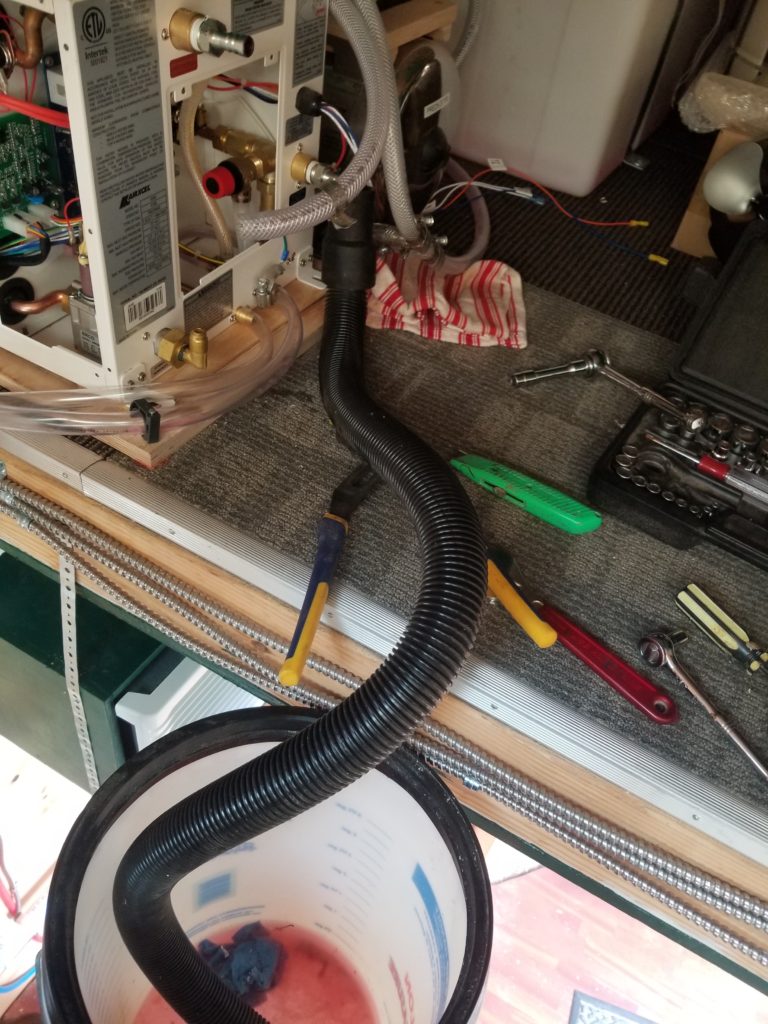
The unit does have a drain feature and I had already used it as part of winterizing (a little bit of pink antifreeze can be seen in the clear tube under the black clip at the corner of the plywood panel), but evidently it did not drain everything (hence the antifreeze being used in the first place, for good measure).
In other news, I decided it was high time to add some installed lighting. First order of business: a light by the entry door so I can see when I enter the house at night, which happens more now as I’m planning interior stuff in the evenings and need to go measure something. Here’s a nice fixture box, mounted by the door and waiting for my fixture.
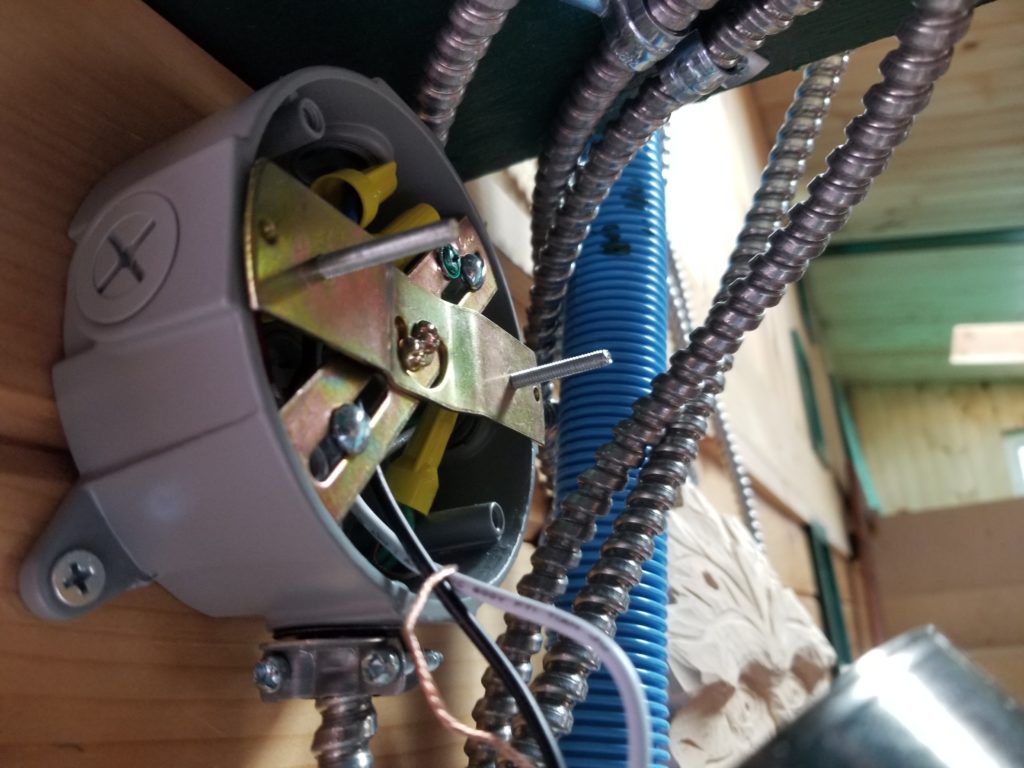
The thing is… this is an outdoor use fixture box (because all my utilities are surface-mounted) and my lamp is meant for indoor use. This is not a problem except that the fixture is expecting there to be some wall around the box to help stabilize it. I try to fit the fixture to the box anyway and find it to be pretty floppy. Too floppy. I realize that maybe I need to add some spacers to take up the space between the bracket and the inside face of the fixture base, so the screws would have something to compress and therefore stabilize it.
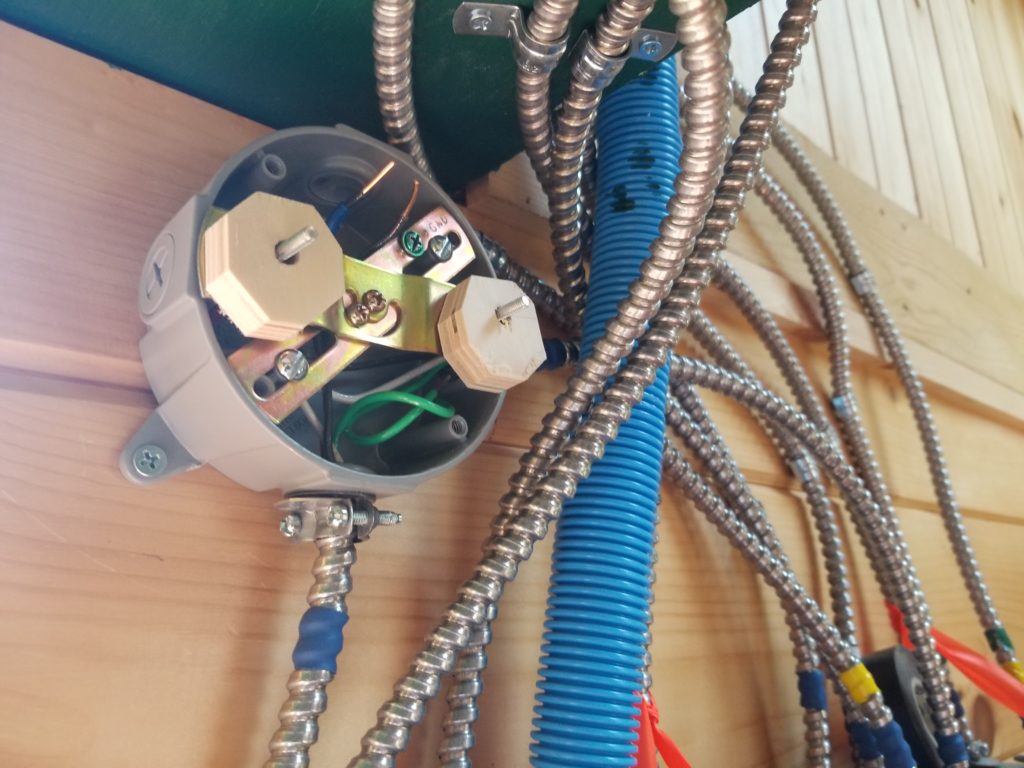
I try that. It isn’t appreciably better. Okay, then, I’ll need to add some “wall” for the fixture. I fabricate this backing plate from a piece of 1/2″ plywood – roughly the thickness of a finished wall.
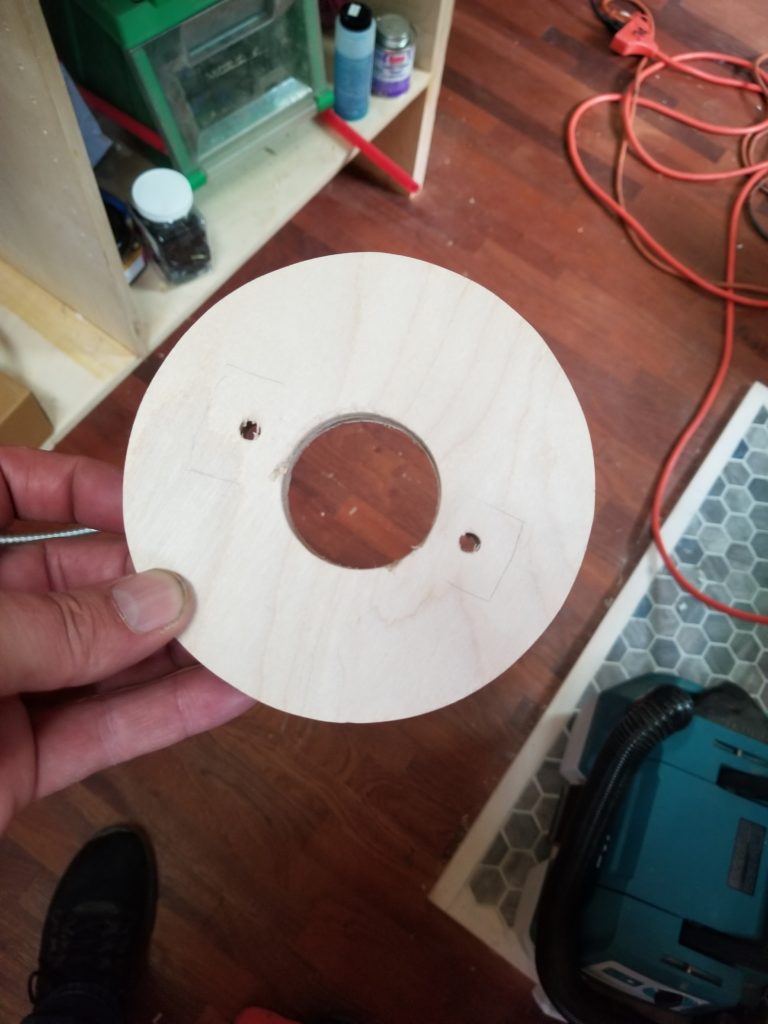
But then the screws that came with the fixture box aren’t long enough to reach through to the face of the fixture!
Not wanting to fuss with this, I grab one of those screws and bring it to my local HD to verify its size (#8-32) and buy some matching threaded rod stock so I can make however long a screw I need, no matter what winds up being the solution to the problem.
Hey, did you know that most electrician’s wire strippers also have #6 and #8 screw cutters built in? They do! You have to bear down pretty hard on them to make the cut, but they’ll do it. If you just have a couple to do, it’s not so bad. If you’re making a bunch, you’d probably want a purpose-built tool. But electrical fixture screws are usually #6 or #8, so if you’re working with them and have a nice set of strippers, chances are you already have a tool that can trim the screws if needs be. Obviously, a 3ft long section of threaded rod is gonna need to be shorter.
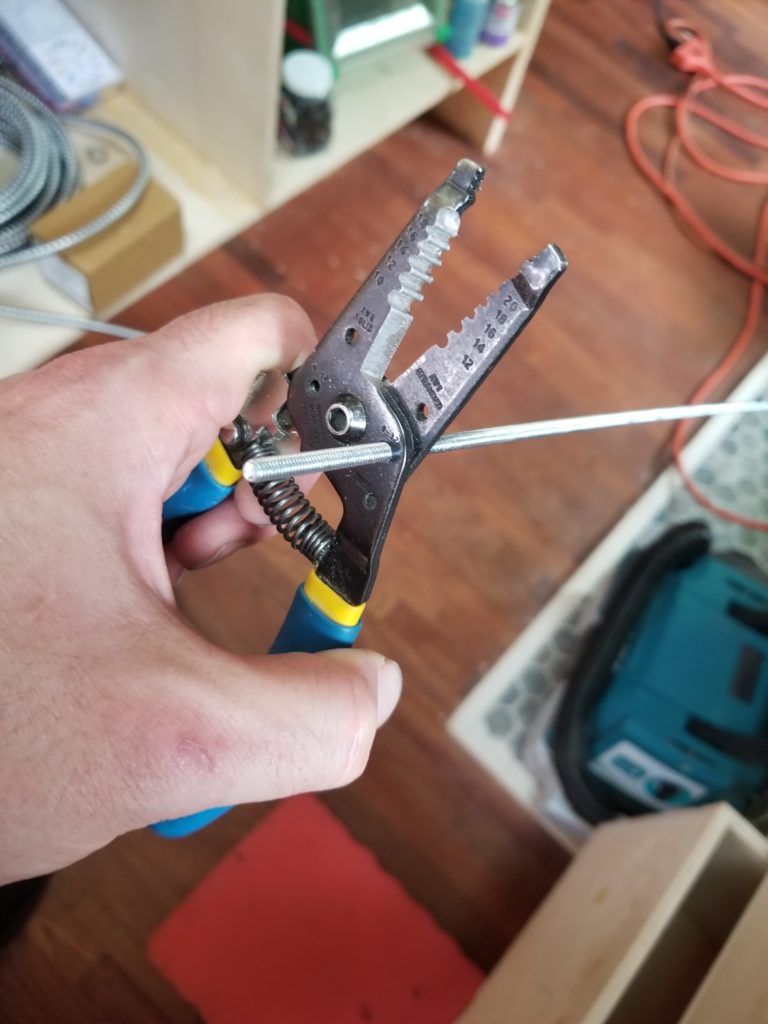
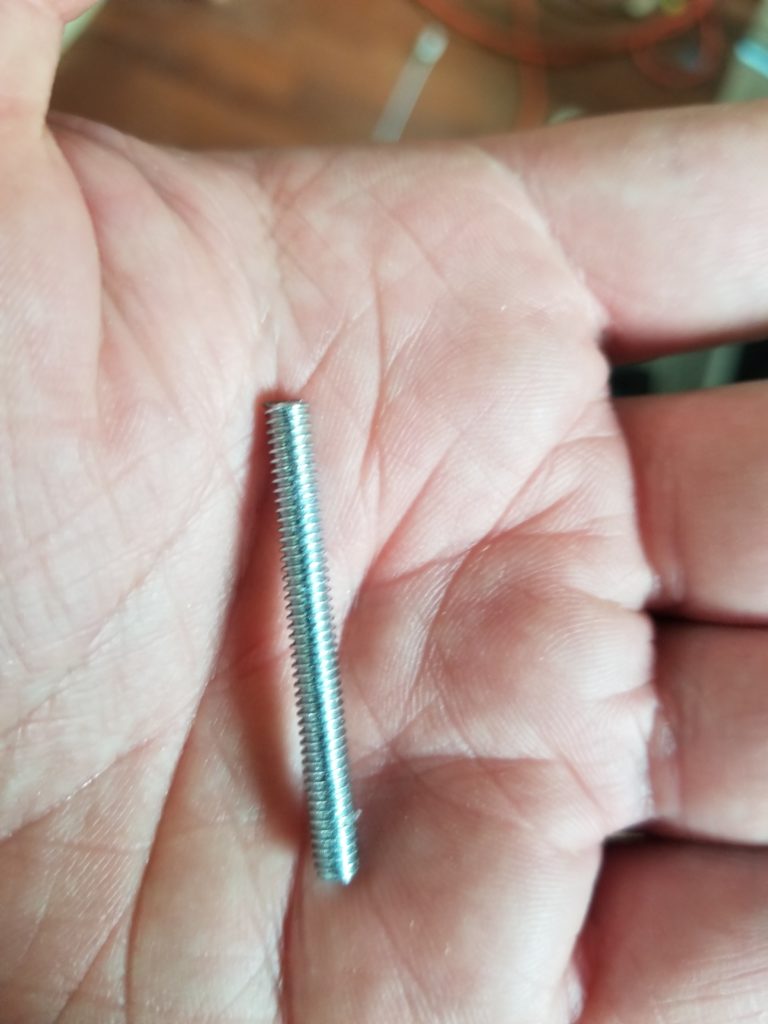
Snip!
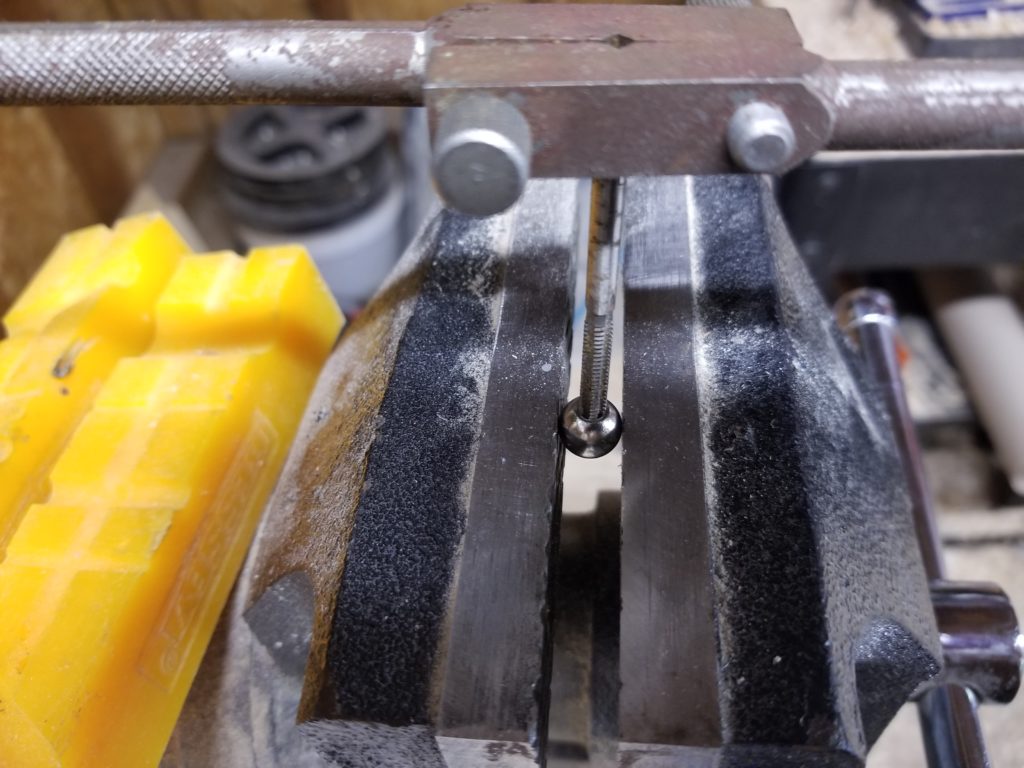
But no, it can’t be that easy! While the test-a-screw gauge at my hardware store said the screw from the fixture was a #8-32, it was a scant #8 – a fraction smaller than a standard one. When I tried to thread the rod into the fixture, it went, but with a lot of friction. Okay, though, it went. The decorative ball-ends which thread on to the screw-ends and capture the fixture, though, were simply too tight to use. I couldn’t get good engagement and with their being spherical, there’s not much hope of getting a solid grip to apply overwhelming torque. And you wonder why everything takes so long? THIS is why everything takes so long! What’s a builder to do? Answer: remember the thread tap kit in the tool box and ream out the little ball-ends to be proper #8-32 nuts, that’s what. It doesn’t take much – they are only slightly undersize – and NOW they fit easily.
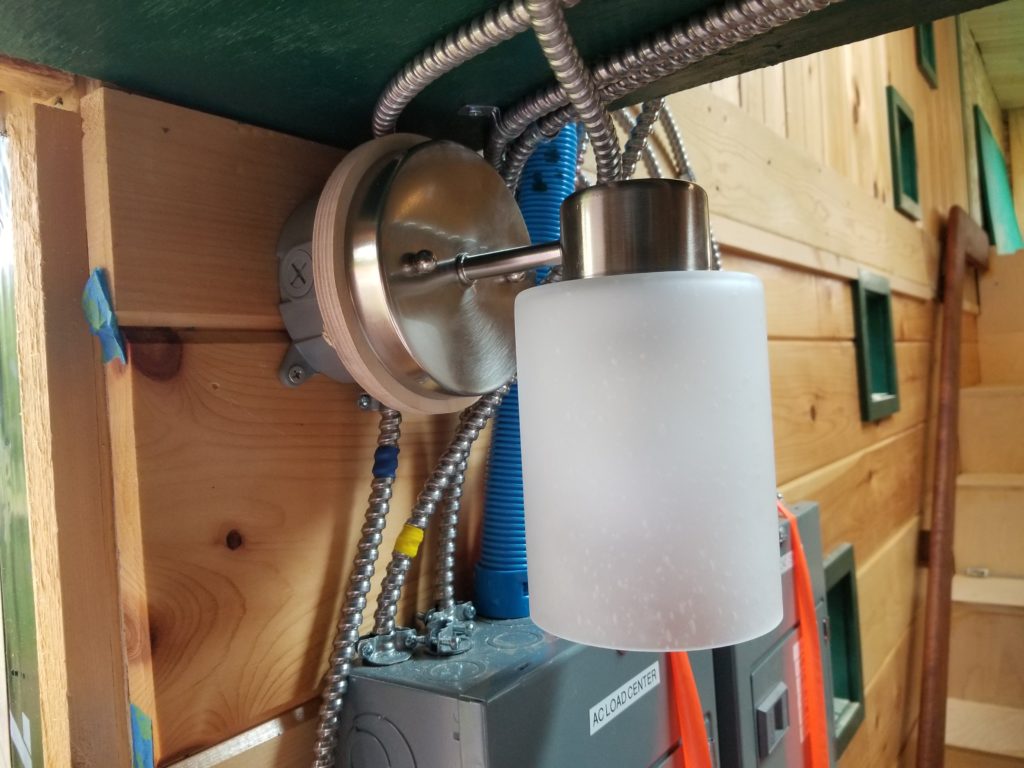
And then there was light (fixture). There was also actual light, but it doesn’t photograph as well 🙂
What else? The sealant on the sink drain had cured, so it was time to finish that up, too. It was hard to measure the distance from the drain tailpipe to the drain line proper (at the back of the cabinet, where it was impossible to see where the tape measure met it), so it turned out I under-sized that pipe a little bit, making the placement of the trap just out of reach of its range. No problem – that’s what flexible lines are for!
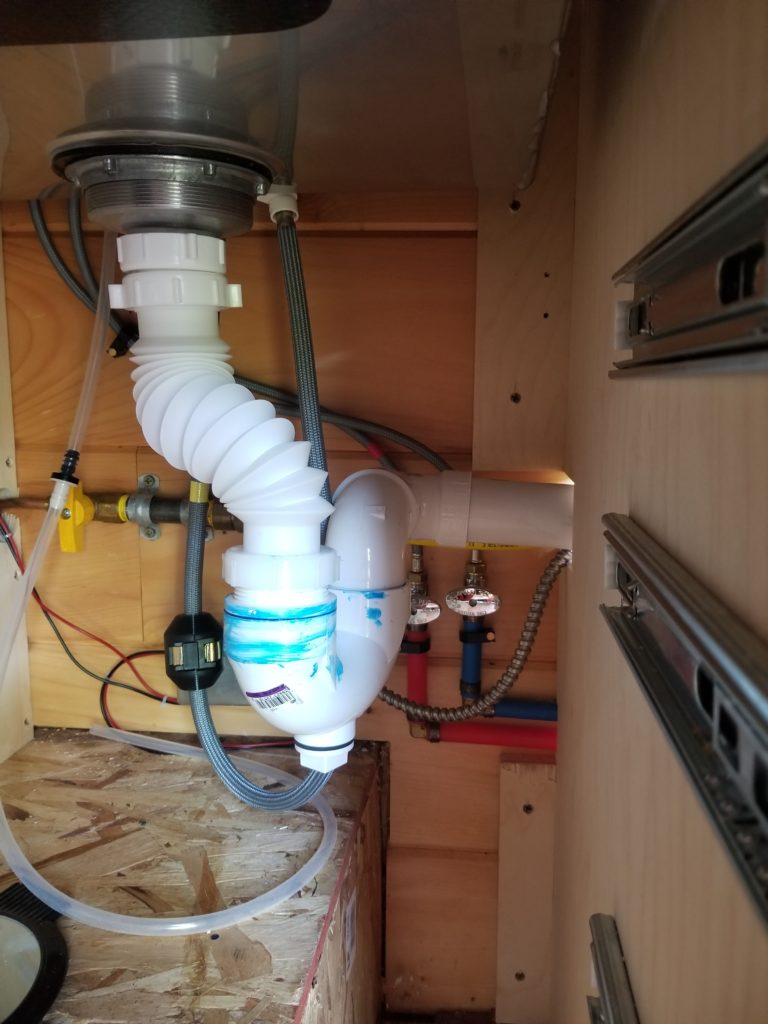
As it happens, the PVC cement I bought is blue… and while that hardly matters, it does mean that any which spills out o the joint makes my pluming blue, rather than being clear and therefore unseen. The stuff sets FAST so there’s no time to wipe it up while ensuring the joints are in the proper orientation. The result? Smurf blood everywhere. I don’t mind, really, but if I could choose, I’d choose it to be more tidy. Not enough to go back and buy the clear cement when I have an otherwise perfectly fine can of the blue stuff.
That bit of translucent hose goes to my soap pump. A relatively recent innovation in soap pumps: a long drinking straw so you can just draw the soap directly from the bulk bottle stashed in the base cabinet rather than having to refill a much smaller reservoir bottle hanging off the bottom of the pump. I like it.
I also added these seatbelt brackets to support my propane tanks. Ignore the smaller tank – it’s there for testing because the big tank(s) are empty. The seatbelts are mostly for transport (rare) but they also prevent accidental strain on the gas lines (a very good thing to prevent) in case of bumping the tank while working in there.
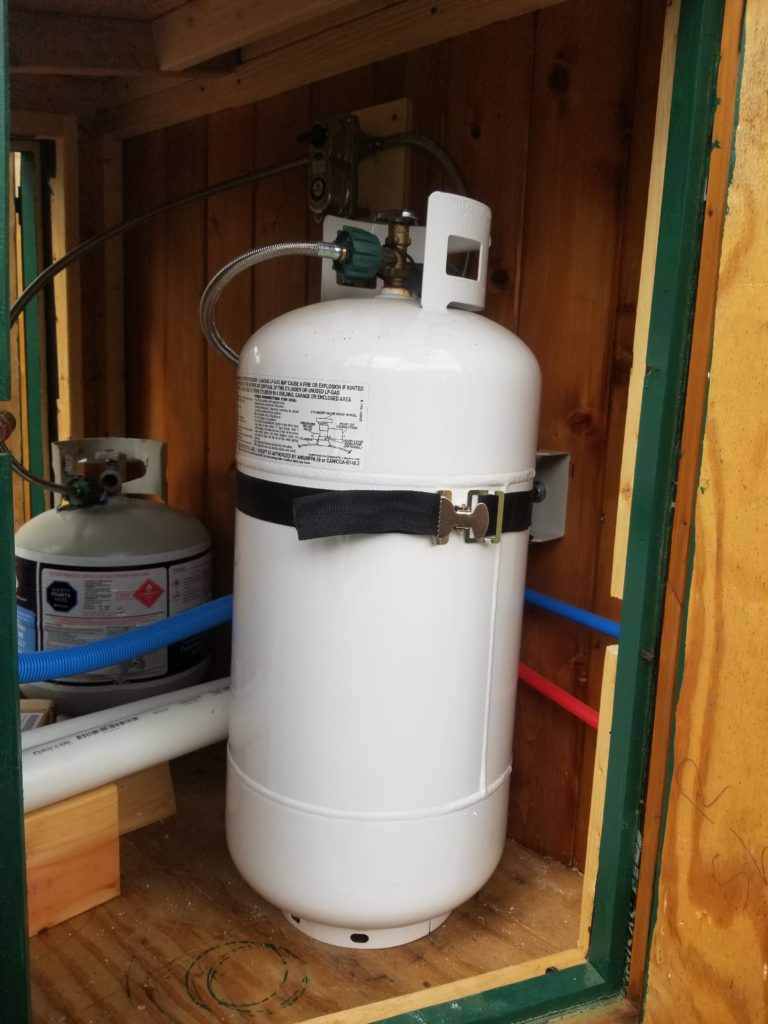
I raided my stash of random hardware for suitable lag bolts and found these, which happened to already have companion washers… and some black paint on them.
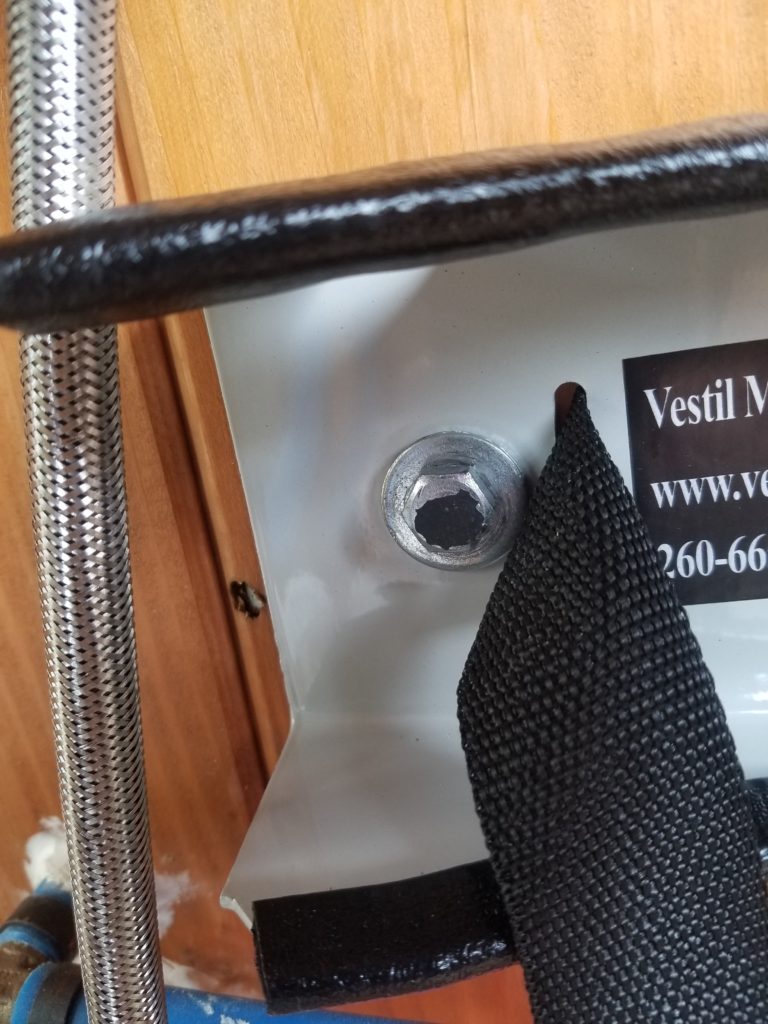
Black paint? Yep. I remember these lag bolts! They were once part of some Halloween decor! Hence the black paint.
The drawer slides for the kitchen drawers were from a desk I built for my last house that was simply too big for the current one (and definitely too big for the HomeBox). The upper deck of the T.H.R.O.N.E. is actually made from wood reclaimed from that same desk, actually. Modern construction generates a lot of waste, so it’s extra nice to be able to re-use stuff from prior projects when possible.